Making of The Blacksmith: Concept and Art Production


For our second blog post in this series, the team reveals some sources of inspiration behind The Blacksmith, share key concept work, and offer fascinating insights into the art production process.
The Blacksmith character
As described in our previous blog post, at the Unity Demo Team we align our content production to certain development goals.
With our technical goals in mind, we approached the character creation of the Blacksmith with a list of objective requirements, which we believed this character should adhere to.
For example, in this project we did not intend to work on skin shading, but instead wanted to focus on using the built-in PBS in Unity which was under development. Therefore we did not want the character to have realistic human skin. We also preferred to avoid dealing with hair, because writing a hair shader wasn’t a goal for this project.
We also had to consider what kind of environment we would need to create for our character. We already had the environment from our earlier Viking Village demo, so, for the sake of saving production time, we wanted to re-use some resources. We therefore decided to keep the character within the same theme. This brought us to the idea to explore Nordic mythology for interesting characters and stories.

Concept art: Early sketches
By now you may have figured out which literary source gave the initial spark for the idea of a blacksmith: the poem Völundarkviða in the collection of Old Norse poetry called The Poetic Edda. There are also interesting treatments of a blacksmith in the Finnish epic poetry of Kalevala, which includes some overlapping themes. Thinking more about the importance and mystical power of the blacksmith in Indo-European myth and folklore, we really liked how different elements mix to create a controversial figure with both appeal and a distinct dark side. We thought this was truly interesting, much like many of the existing villains in film and literature who inspire us.

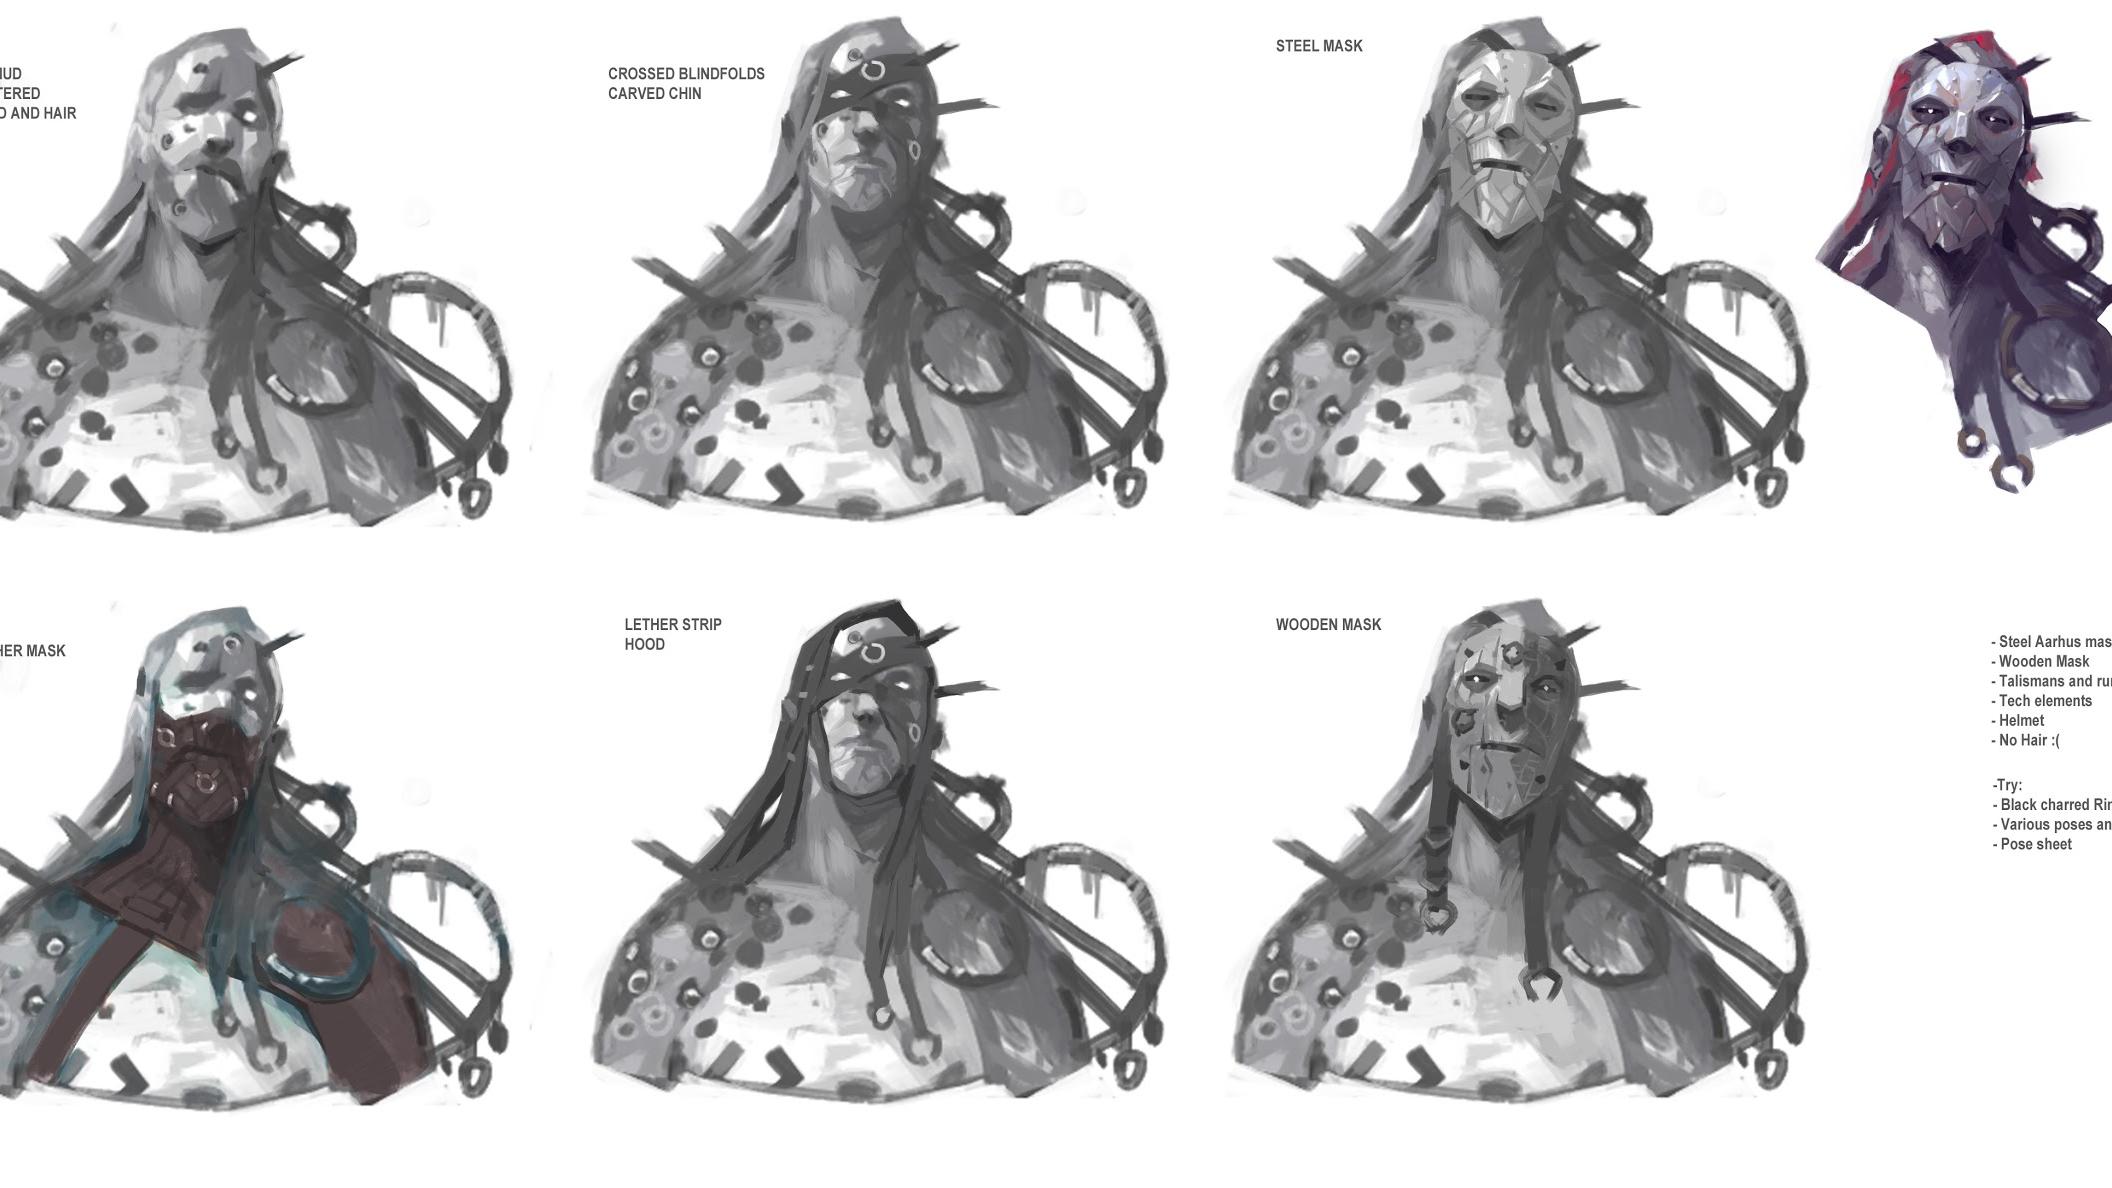
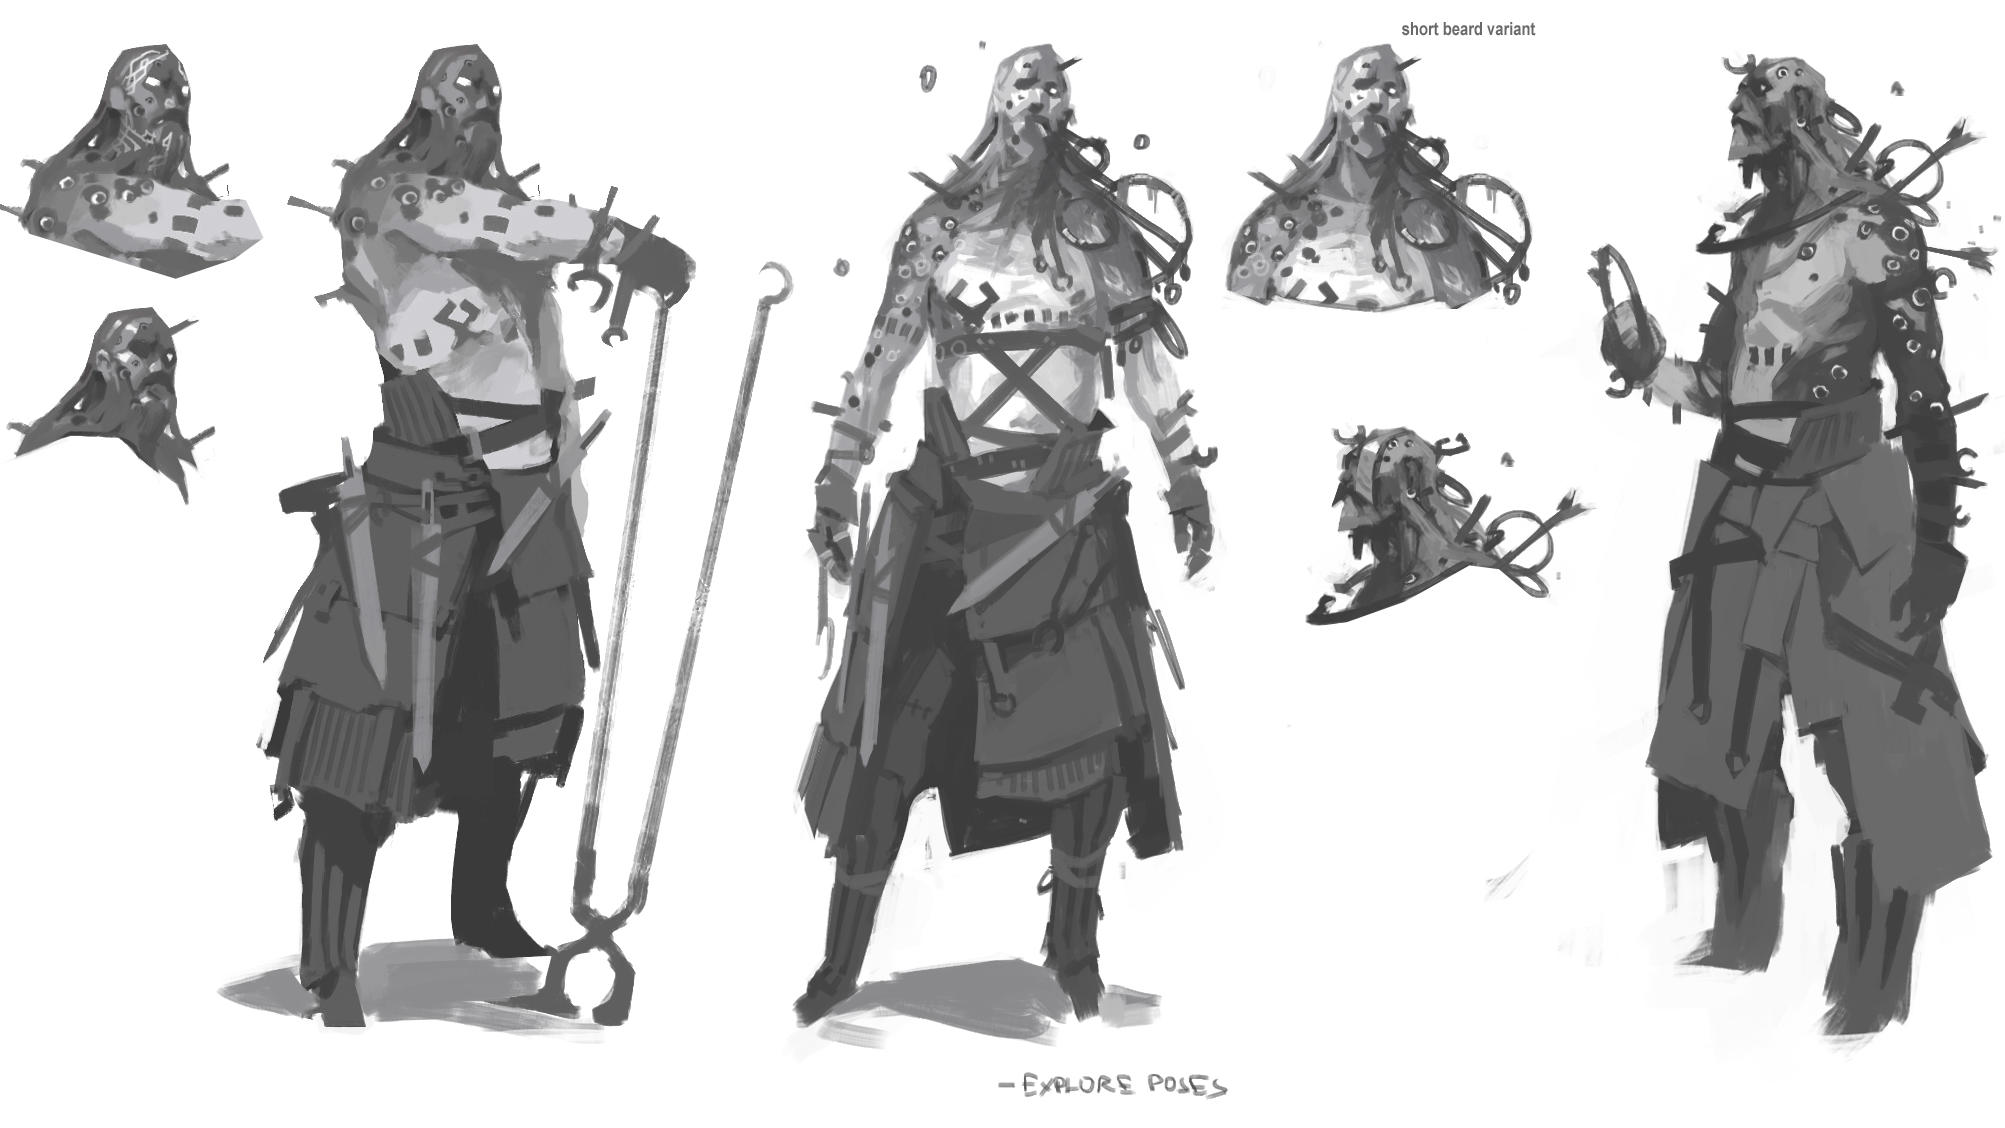
Concept art: Explorations
We worked very closely with the concept artist, Georgi Simeonov, on the visual development of the character. He supplied many interesting ideas and explored different ways to suggest hair as part of the silhouette of a human figure, by using details like leather straps and a hood.

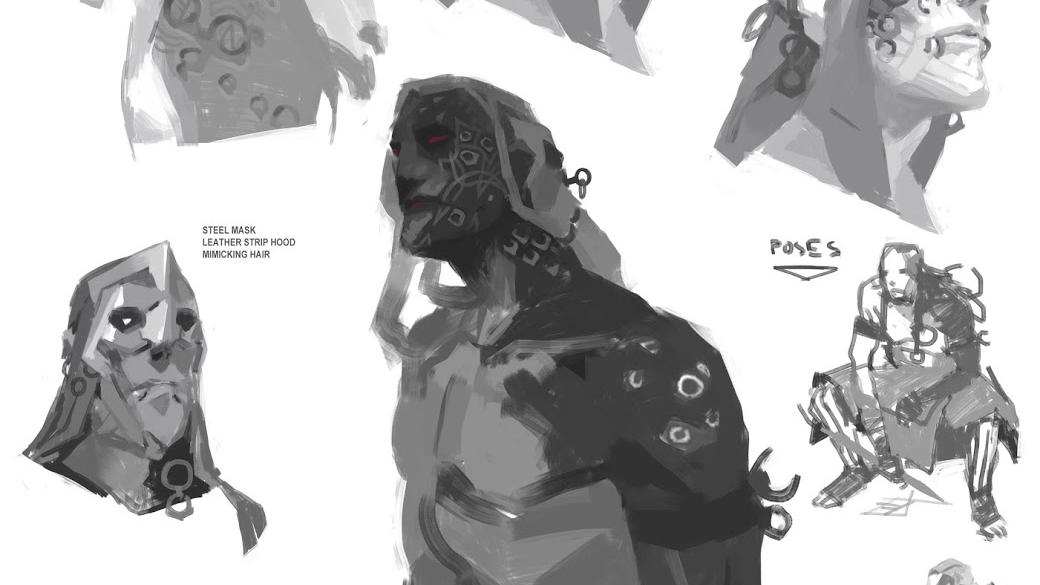
Concept art: Explorations
Developing the character, we explored and re-interpreted the rich treasure trove of themes that the mythological material presented. It informed many decisions about character design, art direction, and story. An additional source of inspiration were other deep and intriguing literary characters, such as Morpheus from The Sandman series by Neil Gaiman and Judge Holden from Blood Meridian by Cormac McCarthy.
Here is the final approved concept sheet for The Blacksmith’s lead character:

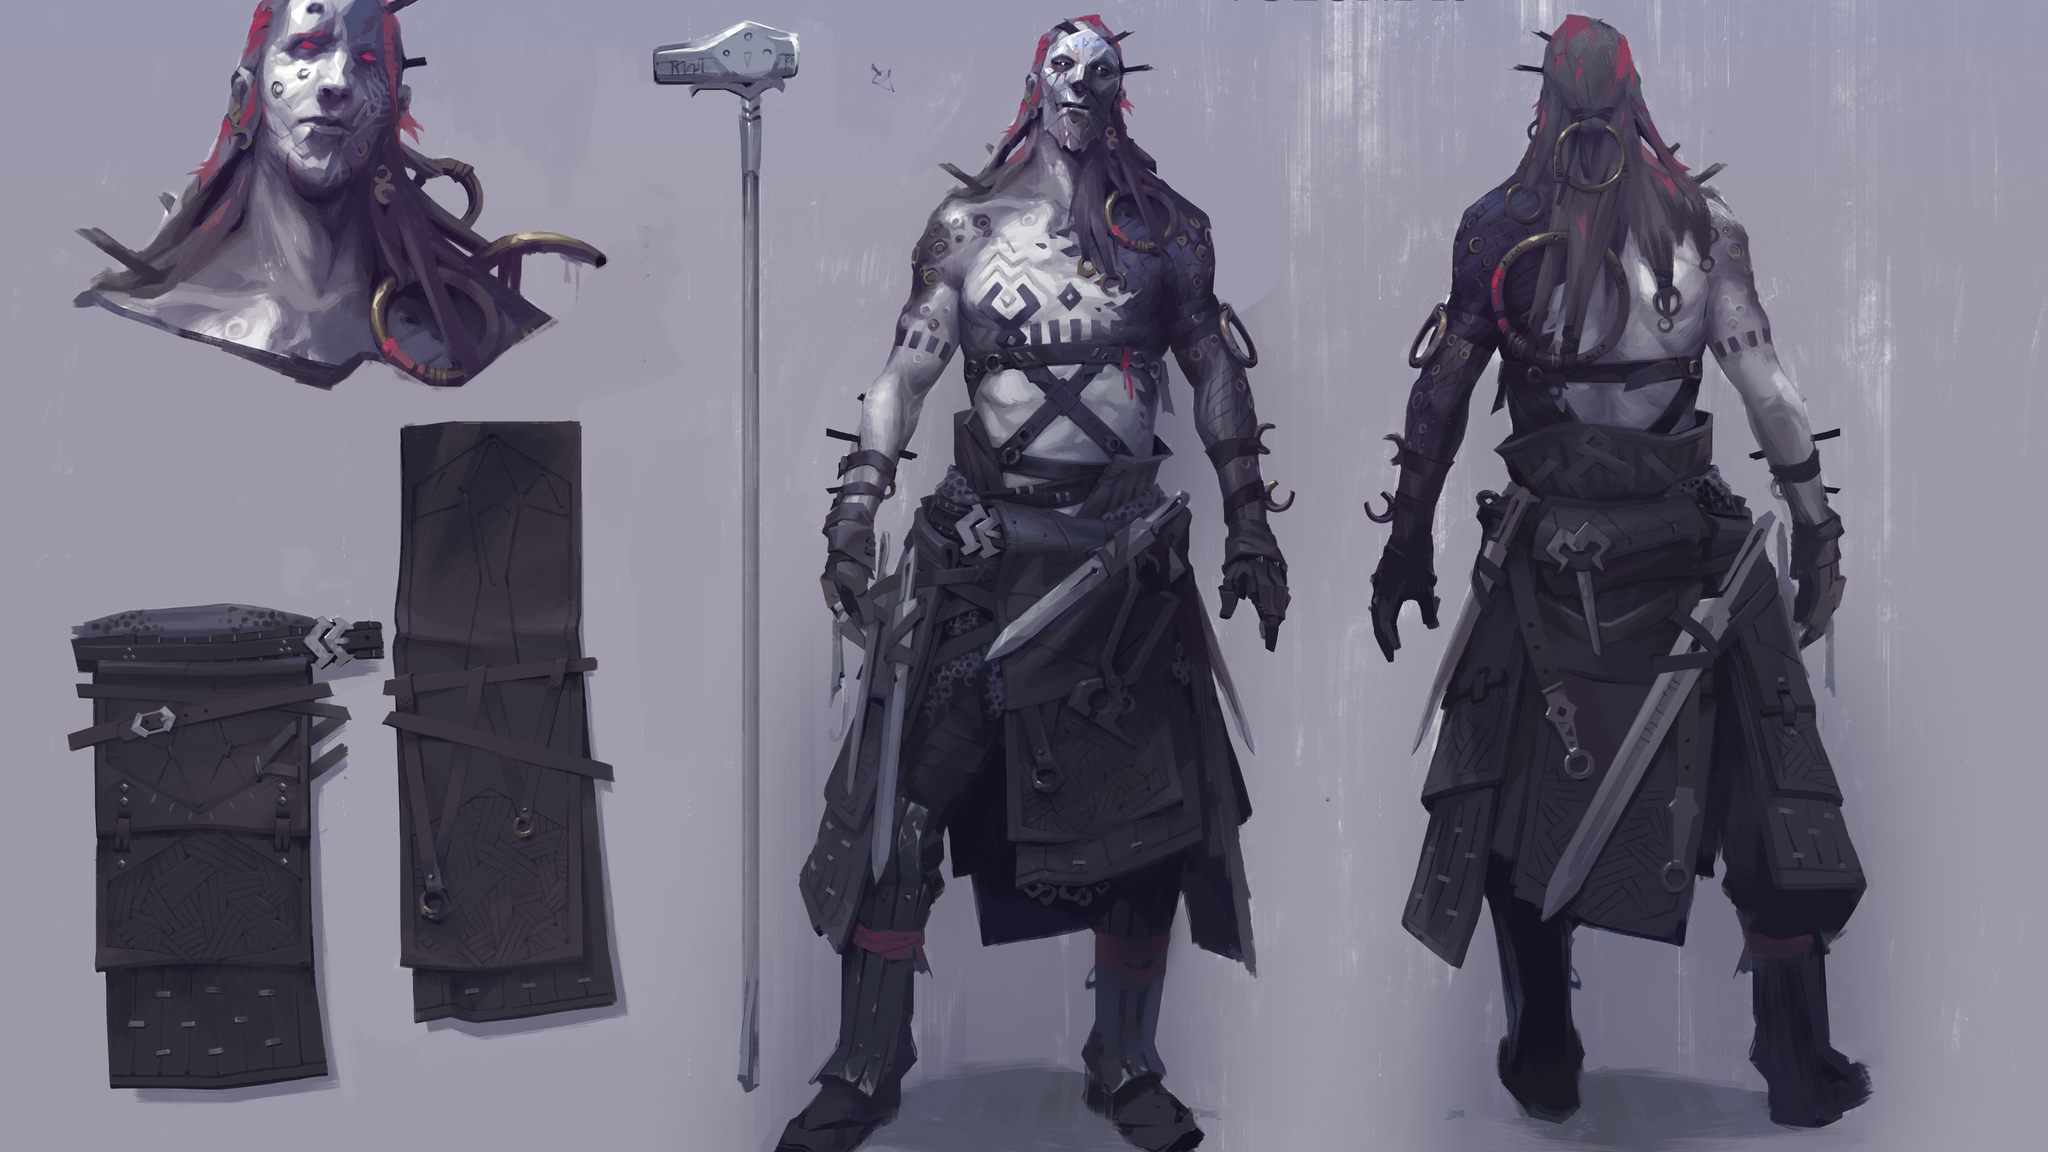
Concept art: Final concept sheet
We contracted Jonas Thornquist for the modelling and texturing of the Blacksmith character. He did an amazing job of interpreting the character in 3D and supplied us with this reference render from VRay:

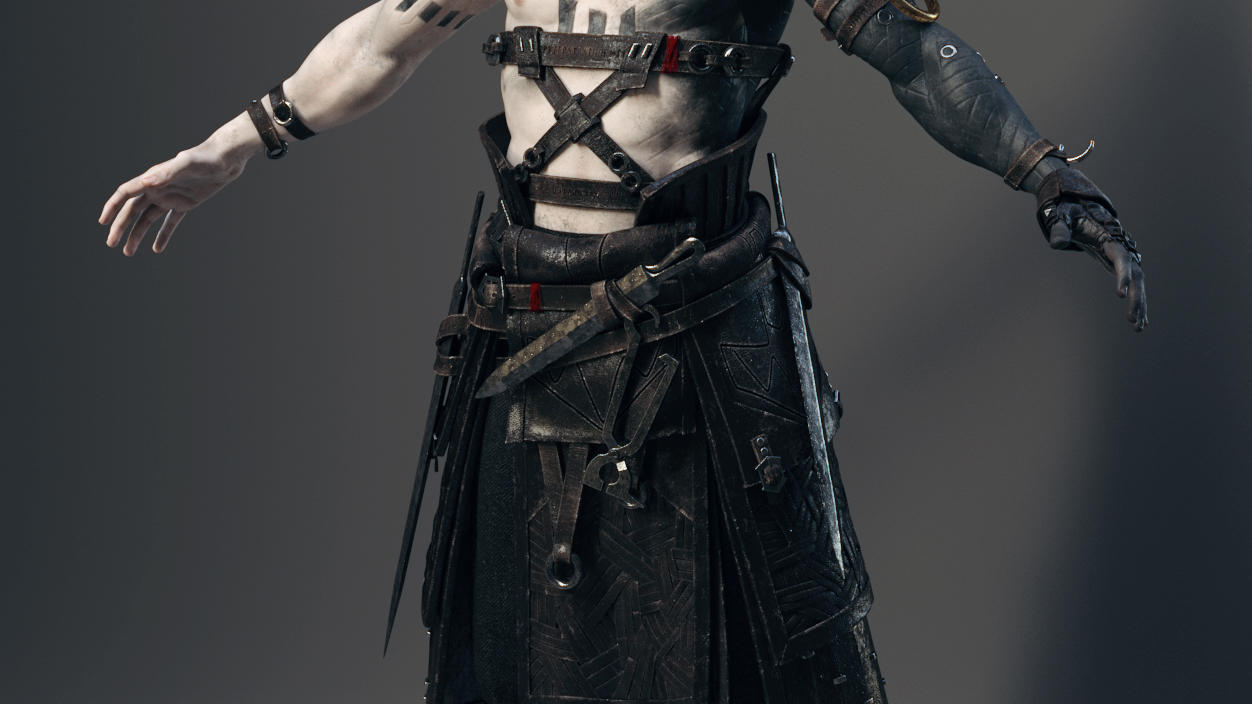
The Blacksmith - Reference render from VRay of the high poly model
The Challenger
We saw the potential of making a nice short film, and therefore decided to scope up the project a little. So we dropped some of the initial technical limitations which affected the main character, and decided to add a second one.
The antagonist in our story is a seasoned, veteran warrior. His design combines some Viking themes with decidedly anachronistic elements. We worked with Sergey Samuilov on the concept and character art.

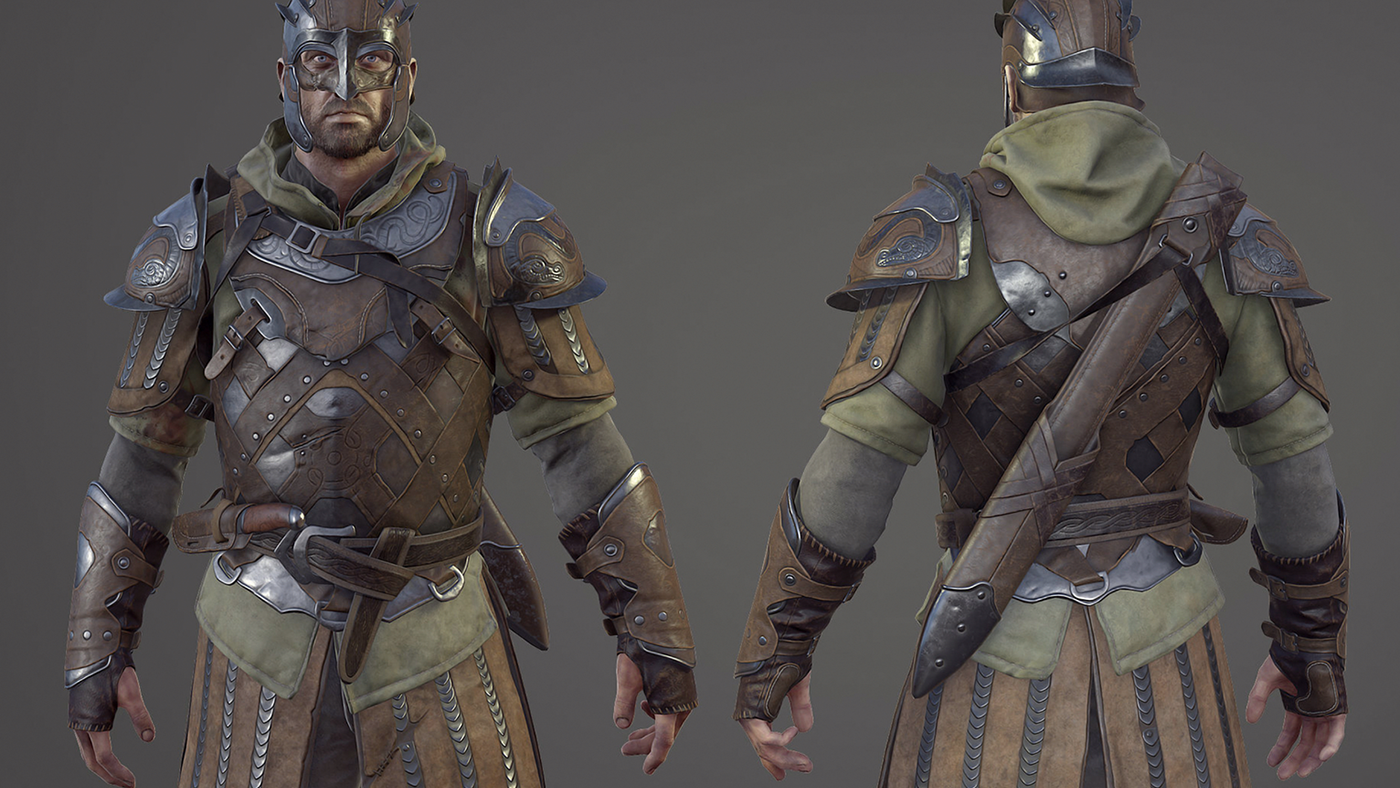
The Challenger - Reference render from Marmoset Toolbag 2
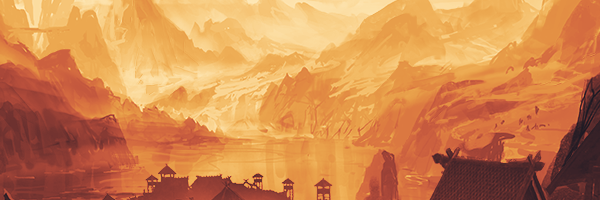
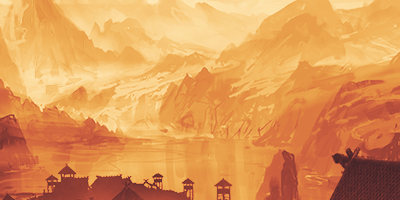
Environments
We had the Viking Village environment still in production and, of course, wanted to use assets from it, but it was clear from the onset that they will be re-arranged in a different way. In The Blacksmith, we were going for a more dramatic feeling. The environment had to sustain the story of our movie and tie well with our characters’ personalities and backstories.
We made some illustrations that helped us to communicate the idea, both inside the team and to other teams within the company.

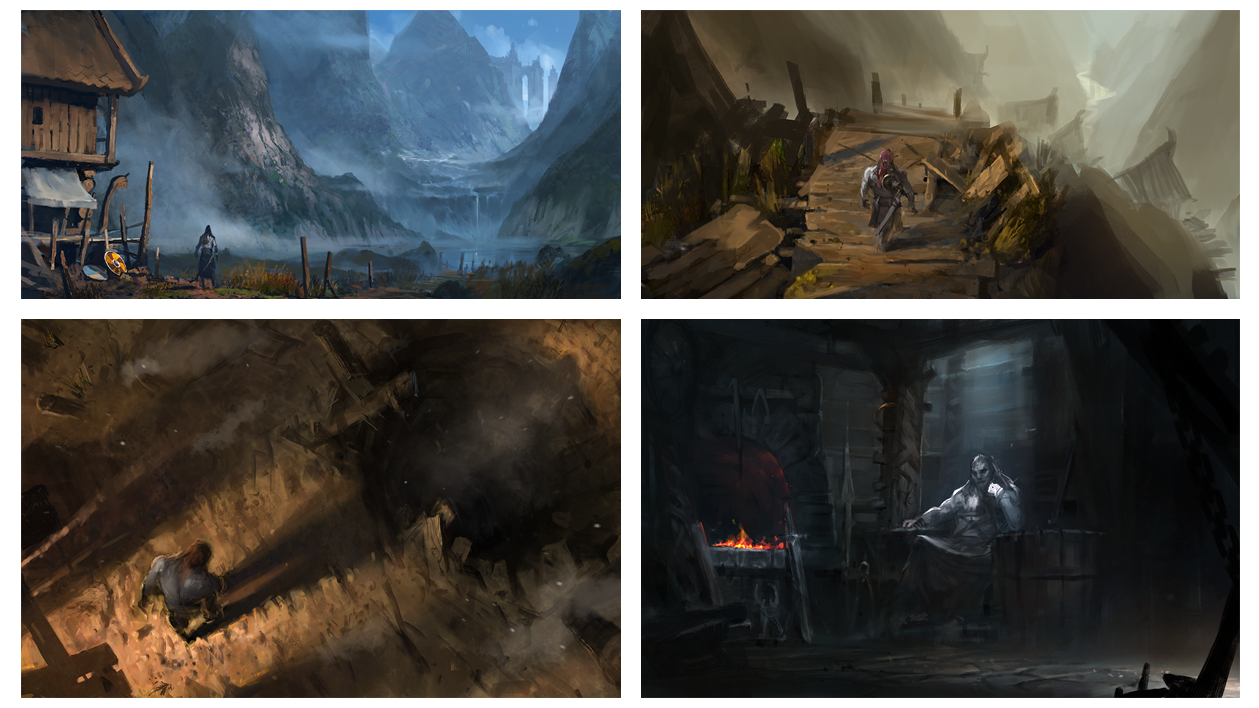
Mood boards
We did very little work on concepting the environment. We got some quick thumbs and sketches to explore some ideas, and then quickly moved into Unity where we iterated until we reached a version that was OK.


When it came to the creation of the natural assets in the environment, we worked with Terragen master Martin Huisman to generate procedurally the highly detailed relief on the rocks surfaces.

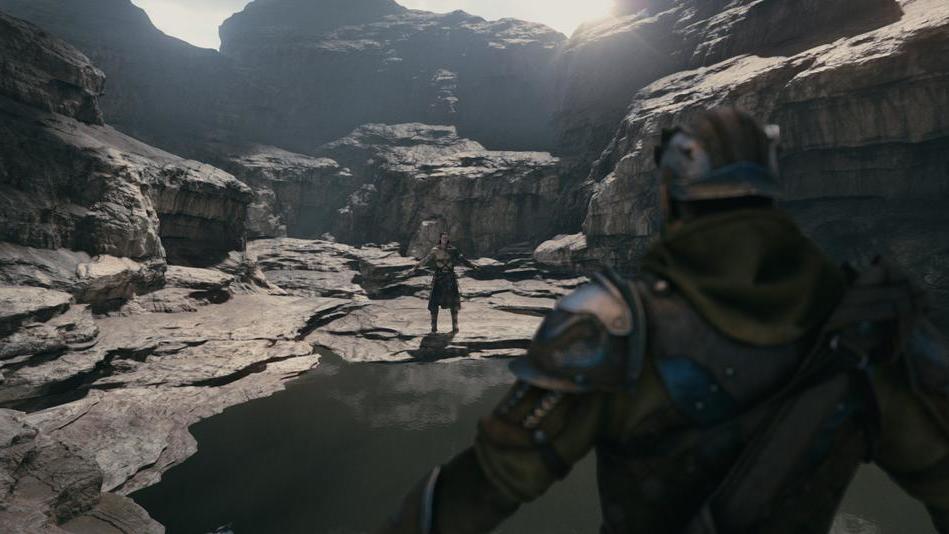
All the rocks in this image are instances of one asset, rotated and scaled.
Production process
The initial creative process was completed with a storyboard. For us, it was both a way to develop ideas and to communicate them to the production team. One of the benefits of working in Unity is that we did not need to lock the storyboard early in the process, because a realtime engine allows changes of cameras and editing until very late in the project. With very little effort, we were able to try out multiple modifications and adaptations of our initial ideas, make editing re-arrangements and even slight storyline adjustments almost until the final delivery date.

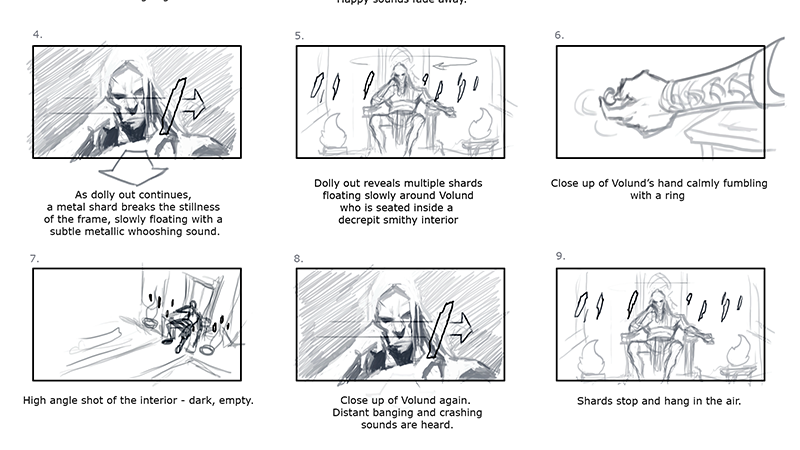
Storyboard: early version
The stages of production following on from the storyboarding looked roughly like this:
First, we did a shot prototype of some crucial moments. We had an animated (2D) storyboard to help us get a first feeling of length and rhythm, as well as identify what additional tools and shaders we’d need to develop so work on them could start.
From there, we moved into Unity, prototyping the environment with placeholder assets, including early versions of the character models. We used this both for look development and for a 3D previs, which guided the actors during the motion capture session.
After the shooting the animation was post processed, implemented into Unity, and aligned on a timeline, along with some iteration on the cameras. In parallel, the artist started replacing the placeholder assets in the engine with the ones which were being created in the meantime. He did this while simultaneously working on the lighting setup and the post effects.


Anatomy of 1 shot: storyboard; 2D animatic; motion capture with realtime preview; 3D previs; final in Unity (Scene view); final in Unity (Game view)
This was a period of intensive stress, put both on Unity’s graphics systems and our own additional shaders. While Unity 5.0 advanced through its beta cycle, we fed back to Unity’s development teams about the integration issues, bugs, inconsistencies, and stability issues we hit, and requested some workflow- and performance-related improvements.
The final stage was dedicated to iterations and gradually polishing the animation and art, as well as fixing the remaining bugs on the custom tools and shaders, to get the project into its shipping state.
In the next blog post in this series, we’ll move on to looking at creating The Blacksmith from a more technical perspective, starting with scene set-up, shading and lighting. So be sure to check back at our short film’s special page soon.
Is this article helpful for you?
Thank you for your feedback!
- Unity Labs
- Copyright © 2024 Unity Technologies