Low-Level Plugins in Unity WebGL


Last year we launched a series of technical blog posts on WebGL, starting with a couple of posts on memory. Now it's time to continue with a new topic.
Have you ever needed/wanted to re-use existing C/C++ code in a web page? Perhaps a graphics effect written in OpenGL ES? With Unity WebGL there is a way!
Unity supports two types of plugins: managed and native. On WebGL, managed plugins are supported like on other platforms. The only difference is that the managed assembly of the plug-in is converted, along with the engine and user’s managed code, to JavaScript (asm.js/wasm to be specific).
What about native plugins? Does it even make sense to talk about something “native” on the web? When referring to native as something specific to the underlying architecture (mac, win32/64, etc.), it certainly does not. However, Unity WebGL does support several other types of plugins: JavaScript, C/C++ and pre-compiled LLVM byte code.
In the Unity User Manual, there are a couple of examples of both JavaScript and C plugins that demonstrate how to interact with them via scripts. So, since we can use C/C++ sources, what’s stopping us from accessing the Low-Level plugin interface for rendering purposes? Well… nothing in Unity 5.5 ;-)
In fact, Unity 5.5 adds the missing hooks to allow you to register a low-level plugin:


As you can see, the amount of code we had to add is massive. Now let's see what you need to do to implement your plug-in!
Implementation
First of all, you need to copy the Plugin API headers from the Unity install path Editor/Data/PluginAPI to the location that will contain your plug-in source file(s).
The headers you are interested in are IUnityInterface.h and IUnityGraphics.h, which declare the interfaces needed for the plugin. Remember that these headers are specific to a version of Unity, so it's important to keep them in sync with the Editor.
The function you need to call to register your plugin is UnityRegisterRenderingPlugin:
extern "C" void UnityRegisterRenderingPlugin(PluginLoadFunc loadPlugin, PluginUnloadFunc unloadPlugin);
However, first you need to implement both Load and Unload callbacks to get the IUnityGraphics interface and register/unregister the graphics device event callback for your low-level rendering. Here is an example:
IUnityInterfaces* s_UnityInterfaces = 0;
IUnityGraphics* s_Graphics = 0;

extern "C" void UNITY_INTERFACE_EXPORT UNITY_INTERFACE_API UnityPluginLoad(IUnityInterfaces* unityInterfaces)
{
    s_UnityInterfaces = unityInterfaces;

    s_Graphics = s_UnityInterfaces->Get<IUnityGraphics>();
    s_Graphics->RegisterDeviceEventCallback(OnGraphicsDeviceEvent);

    // Run OnGraphicsDeviceEvent(initialize) manually on plugin load
    OnGraphicsDeviceEvent(kUnityGfxDeviceEventInitialize);
}

extern "C" void UNITY_INTERFACE_EXPORT UNITY_INTERFACE_API UnityPluginUnload()
{
    s_Graphics->UnregisterDeviceEventCallback(OnGraphicsDeviceEvent);
}
Once those are implemented, you can register them:
extern "C" void UNITY_INTERFACE_EXPORT UNITY_INTERFACE_API RegisterPlugin()
{
    UnityRegisterRenderingPlugin(UnityPluginLoad, UnityPluginUnload);
}
And finally, you need to add the the C# binding and register the plug-in on startup (so that UnityRegisterRenderingPlugin is actually executed):
class MyRenderPlugin
{
    #if UNITY_WEBGL && !UNITY_EDITOR
    [DllImport ("__Internal")]
    private static extern void RegisterPlugin();
    #endif

    void Start()
    {
        RegisterPlugin();
    }
}
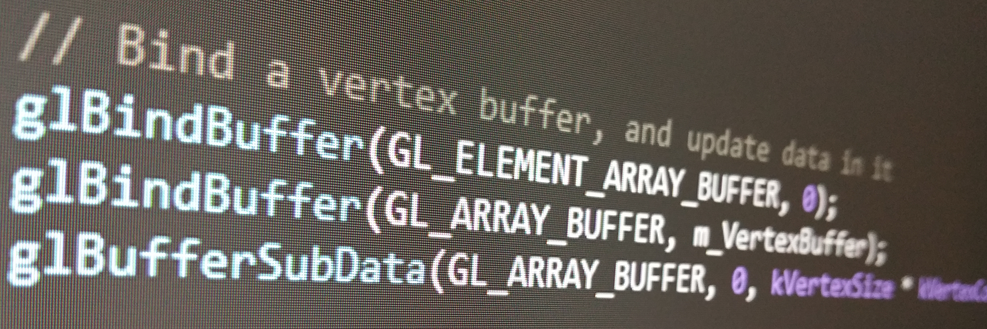
Then all you need to do is to implement OnGraphicsDeviceEvent and add your rendering code.
#include <GLES2/gl2.h>

static void UNITY_INTERFACE_API OnGraphicsDeviceEvent(UnityGfxDeviceEventType eventType)
{
    // OpenGL ES calls here...
}
Note that if the same plug-in source files are used on different platforms, you can check __EMSCRIPTEN__ or UNITY_WEBGL (5.6+ only) to conditionally compile your code:
#if defined(UNITY_WEBGL)

// Unity WebGL-specific code

#endif
Finally, if you need to browse system headers (e.g.: gl2.h), you can find those in your Unity install path under: Editor/Data/PlaybackEngines/WebGLSupport/BuildTools/Emscripten/system/include
Sample plug-in
Our NativeRenderingPlugin on Bitbucket is a great starting point if you are interested in trying to make your own rendering plug-in. It's already setup to register the required callbacks, compile own Shaders, and it demostrates how to render a triangle on top of a simple Unity Scene.
Note that on Unity WebGL, there is no need to build the C/C++ plug-in separately. The Unity project of this sample contains a simple file (Plugins/WebGL/RenderingPlugin.cpp), which includes the actual implementation of the plug-in and looks like the following:
#include "../../../../PluginSource/source/RenderingPlugin.cpp"
#include "../../../../PluginSource/source/RenderAPI.cpp"
#include "../../../../PluginSource/source/RenderAPI_OpenGLCoreES.cpp"
Demo
If you are viewing this page on a browser/device supported by Unity WebGL, see the demo below, which demonstrates a Mandelbrot effect written in OpenGL ES via Native Rendering Plugin:
The original OpenGL 2.0 demo was written in C++ and GLSL, so we only had to make a few modifications to make it work with our Native Rendering Plugin sample mentioned earlier.
If you want to take a peek at this demo Unity project and plug-in source code, click here to download them.
Conclusion
There might be several different reasons for writing low-level plug-ins; at least now you know that it is possible. One final suggestion: considering the lack of debugging tools on Unity WebGL, you might want to prototype on a different GLES2/3 API platform, so that you only build for WebGL once everything works properly on iOS/Android or Standalone.
Have fun!
Is this article helpful for you?
Thank you for your feedback!
- Unity Labs
- Copyright © 2024 Unity Technologies