


Exit Games is a well-known provider of high-performance network multiplayer server and hosting solutions both inside and outside the Unity development circles. In this tutorial, Exit Games developer Tobias Schweers explains how to use the new Photon Cloud multiplayer network service to create a fun game inspired by the classic children’s game, Marco Polo.
If you like the workflow, you can get the free intro package , including one month of hosting, or you can get a running start with the comprehensive Photon Networking Guide, a starter kit with in-depth tutorials by expert Unity educator and author of the Ultimate Networking Tutorial, Mike Hergaarden. Best of all, it comes with a 6 month, 100 CCU cloud service subscription!
Preparation
Get the Photon Unity Networking package from the Asset Store. During import, un-check the “DemoWorker” folder (and the complete sample). A PUN “Setup Wizard” will pop up. You can use the free 30 day subscription without obligation. For now, we just enter our mail address and the Wizard does its magic: If the mail address is unknown to the Cloud, we will get an “app ID” right away. If the address is known, we registered it before fetch our “app ID” from the account page. Click “Setup” in the Wizard and copy & paste the app ID”. Save and close the Wizard. We’re ready to use “The Cloud”!
So, what exactly does this “Photon Cloud” do?!
Basically, it’s a bunch of PCs with the Photon Server running on them. This “cloud” of servers is maintained by Exit Games and offered as hassle-free service for your multiplayer games. Servers are added on demand, so any number of players can be dealt with. Even though Photon Cloud is not completely free, the costs are low, especially compared to regular hosting, and you can find subscriptions available on the Unity Asset Store . The Photon Cloud is built with “room-based games” in mind, meaning there is a limited number of players (let’s say: less than 10) per match.
Reception: Getting a Room
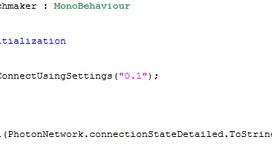
Before we do anything else, we need to get our players into a room where we can move around and let others know about it. Create a folder “Marco Polo” and a new C# script: “RandomMatchmaker”. The most important class in the PUN package is called PhotonNetwork. It’s similar to Unity’s Network class and contains almost all methods we’re going to use. We did the setup with the Wizard, so we can use PhotonNetwork.ConnectUsingSettings() and pass “0.1” as gameVersion. This will read our settings and use them. The gameVersion should be any short string as identification for this client. If started this would get us connected and into the lobby. With a minimum of GUI, the code looks like this:

The script is not yet in the scene. We create a new, empty GameObject and name it “Scripts”. This makes it easier to find the scripts later on and we don’t rely on the camera being active all the time.
PUN is calling
Like Unity, PUN will call certain methods in our code when something interesting is happening. Currently, we are interested in something like “arrived in the lobby” or “found a room” and “didn’t find a room”. The list of methods PUN will call can be found in the documentation. There is also an enum with all those method names in code. So autocompletion in MonoDevelop can give us a quick hint which methods our script might have. Type PhotonNetworkingMessage, followed by a period character (a dot), and a dropdown will list the names and a description.
OnJoinedLobby
One of the callback methods in PUN is OnJoinedLobby. It’s called when PUN gets you into the lobby. Let’s get into a room quickly: The PhotonNetwork class has a JoinRandomRoom() method. This should get us into any room. Let’s try...


Running this, we notice that JoinRandomRoom() doesn’t work – the current code stays in the Lobby?!
Handling errors
In case of errors, PUN makes use of the Log and the Console. Now is a good time to open it in the Editor (Ctrl+Shift+C). There is a message: “joinrandom failed, client stays on masterserver: OperationResponse 225: ReturnCode: 32760 (No match found).” Ok, so there is no match. This can happen. And we can fix this. A check in the PhotonNetworkingMessage enum shows there is a callback for exactly this situation: OnPhotonRandomJoinFailed. Don’t mix it up with the similar OnPhotonJoinRoomFailed.
Creating a room
JoinRandomRoom fails if no one else is playing or if all rooms are maxed out with players. Obviously, we need to create a room. We implement OnPhotonRandomJoinFailed() and lookout for a “create room” method in PhotonNetwork. There is a perfect match: CreateRoom(). The tooltip explains that there are two overloads and if we pass null as room name a GUID will be assigned. As we don’t show room names yet, we don’t care and pass null.

Try out this code by running it. The detailed state is changing more often than before and ends on “Joined”. We’re in some room!
Marco Polo: Syncing Positions
Let’s give each player a monster to run around with. First, get a “Monster” character (by Dries Maesen) from the Asset Store. After import, we will do some preparation for later use: Rename the folder “character1” to “Resources”. We will instantiate this prefab by name and this means it must be in a Resources folder . Add a PhotonView component to the “monsterprefab”. They are found in the Components menu under “Miscellaneous”.
PhotonView
A PhotonView is PUN’s equivalent of a NetworkView (if you are familiar with Unity Networking). PUN needs a PhotonView per instantiated prefab to keep the networking reference (known as PhotonViewId), the owner of the object and a reference to an “observed” component. PUN keeps track of the PhotonViews it instantiates locally. At runtime regular checks of observed components will send updates to the other clients. More observed objects mean more work and network traffic. To setup the new PhotonView to observe the translation of its “monsterprefab”, drag & drop the translation to the “observed” field. We don’t need to change the other settings of the PhotonView.
Adding Monsters
To instantiate a monster use PhotonNetwork.Instantiate(). Don’t mix it up with Unity’s Instantiate() or Network.Instantiate(). This makes sure the view gets instantiated on the other clients, too. In OnJoinedRoom(), we call Instantiate() like so:

Running this will show a monster pop up and start falling. Poor monster. Let’s create some ground.
Grounded
The next steps are common Unity “work”: Create a directional light in the scene and rotate it to point down in some angle - imitating the sun. Add a plane, scale it to 10, 1, 10 and move it to 0, 0, 0. Let’s try some substances from the Asset Store. Download the Eighteen Free Substances package and import it. The “Pavement_01” looks nice, so we open its folder and apply the material to the plane. In the Inspector, change the texture tiling from 1 to 10 for x and y.
Fight for Control
Checking the progress with two clients, we notice that all monsters are moved by our key input. We cloned the monster including the enabled myThirdPersonController component! There are countless ways to do this. One simple way is to disable the script in the “monsterprefab” (!) and enable it only when we instantiate a monster for “our” client. Instantiate() returns the GameObject it created, so this is no big deal. Aside from one handicap: The myThirdPersonController is a UnityScript script. To make any script of one language available to the scripts of another language, you can move it to a “Plugins” folder in your project. Create this folder and move the script over (drag & drop in the editor).After instantiating our monster, we can grab its myThirdPersonController component and activate it.

So far, monsters of other players are moved but don’t walk. The animation is missing. Also, the position updates are not smooth. This can be fixed by a bit of code. We need another script. Create a “NetworkCharacter” C# script in the Marco Polo folder. Add it to the “monsterprefab” and make it the observed component of the PhotonView (drag & drop). While a script is observed, the PhotonView regularly calls the method OnPhotonSerializeView(). The task of this is to create the info we want to pass to others and to handle such incoming info – depending on who created the PhotonView.
A PhotonStream is passed to OnPhotonSerializeView() and the value of isWriting tells us if we need to write or read remote data from it, A simple way to smoothly “push” a monster to its correct position is to Lerp it there over time. We add OnPhotonSerializeView(), correctPlayerPos and correctPlayerRot to the NetworkCharacter. In OnPhotonSerializeView we store the new values and apply them (bit by bit) in Update(). It looks like this:

Monsters of other players won’t be using the exact same speed this way but they will reach the same point in a short time. For some games it might be more important to have the characters at the correct position than how exactly they get there.
Conclusion
By now, you should have learned to register an application with the Photon Cloud, how to create a room, and implement smoothly moving characters in a network multiplayer game– and in mere minutes! If you’d like to learn more about Photon Cloud, consider examining the tutorial pages made available at www.exitgames.com
- Unity Labs
- Copyright © 2024 Unity Technologies