The High Definition Render Pipeline: Getting started guide for artists


Editor's note: The information in this post is outdated. For newer versions of Unity, we recommend The definitive guide to lighting in the High Definition Render Pipeline (HDRP) e-book, which was last updated in 2022.
In this post we will explore authoring a scene to be rendered using Unity’s High Definition Render Pipeline, also known as HDRP. We’ll walk through starting a new HDRP Project, upgrading the Materials of any imported assets, and learn how to use the new parameters within the Material Inspector to create a realistic glass material. We’ll also highlight the differences between the built-in pipeline and HDRP.
In 2018.1, Unity introduced a new system called the Scriptable Render Pipeline (SRP), allowing you to create your own rendering pipeline, based on the needs of your project. SRP includes two ready-made pipelines, called Lightweight (LWRP) and High Definition (HDRP). HDRP aims for high visual fidelity and is suitable for PC or console platforms.
Setting Up HDRP
If you haven’t already, we recommend that you install Unity Hub. It helps you to keep track of your projects as well as your installed versions of Unity. When creating a new Project in Unity Hub, under Template, you will see an option to select High-Definition RP (Preview).

Since HDRP is still in preview, it’s not a good idea to switch to HDRP in the middle of production. However, you can try upgrading your project to HDRP by going into the new Package Manager and installing it. Be advised, once you have upgraded your project to HDRP, you won’t be able to revert. Make sure to create a backup of the project prior to upgrading.
As mentioned above, HDRP is still in preview, so it's subject to change in the future. In order to upgrade a project from the built-in render pipeline to HDRP, navigate to Window > Package Manager. In the Package Manager, you can see all of the current packages installed within your Unity project. Under All, locate “HD Render Pipeline” (Render-pipelines.high) and install the latest version. Installing the pipeline will also integrate the Render-pipeline core, Shader Graph and the post processing packages.


After installing the HDRP package, you need to navigate to Edit > Project Settings > Graphics to assign the Scriptable Render Pipeline asset for HDRP.


The Inspector displays the currently installed Render Pipeline Asset under in the “Scriptable Render Pipeline Settings” field. The HDRP Render Pipeline Asset will be assigned if you are installing the Pipeline from Unity Hub. If you're upgrading your project from the Built-In pipeline this field will be set to “None”. We can assign a Pipeline Asset by clicking the button next to the Asset Selection box or by dragging the asset in from the Settings folder.
HDRP uses the C# Scriptable Render Pipeline API. With this comes a whole host of different preferences you can set to customise the rendering of your project. The fact that your rendering settings are stored in a Render Pipeline Asset means that you can change your render settings by assigning a new Render Pipeline Asset to this field.
To create a new Render Pipeline Asset, right click within your settings folder and choose Create > Rendering > High Definition Render Pipeline Asset.


Upgrading Materials
When using a HDRP Project, any Unity built-in, Standard or Unlit Material will not be rendered, and therefore appear using the default pink unlit shader which Unity displays when a shader is broken. This may occur when attempting to upgrade an existing project or when integrating legacy content such as Asset Store assets which do not use HDRP compatible shaders. In order to be rendered by HDRP, the Material needs to be upgraded.
Unity 2018.1 is equipped with a Built-in Material Conversion Tool. It takes the Material properties from Unity’s Standard Shader and converts them to new HDRP Materials. It’s worth noting that this does not work for custom shaders, which need to be re-written for HDRP.
To access the Material Conversion Tool, navigate to Edit > Render Pipeline.


Unity offers several upgrade options in this menu. We’ll focus on the first two here. “Upgrade Project Materials to High Definition Materials”, will upgrade all upgradable Materials in the Project. “Upgrade Selected Materials to High Definition Materials”, lets you select which Materials you want to upgrade from the Project window.
It is at this point that we recommend you create a separate backup of your project.
Once the Materials have been converted, the Material’s shader will now be called “HDRenderPipeline/Lit”. Now you have complete access to the brand new features of the HDRP lit shader within the Material Inspector.
Furthermore, within the Materials Shader options, under “HDRenderPipeline”, you can select and apply a variety of shader types such as LitTesseleation or Unlit, to name a few.

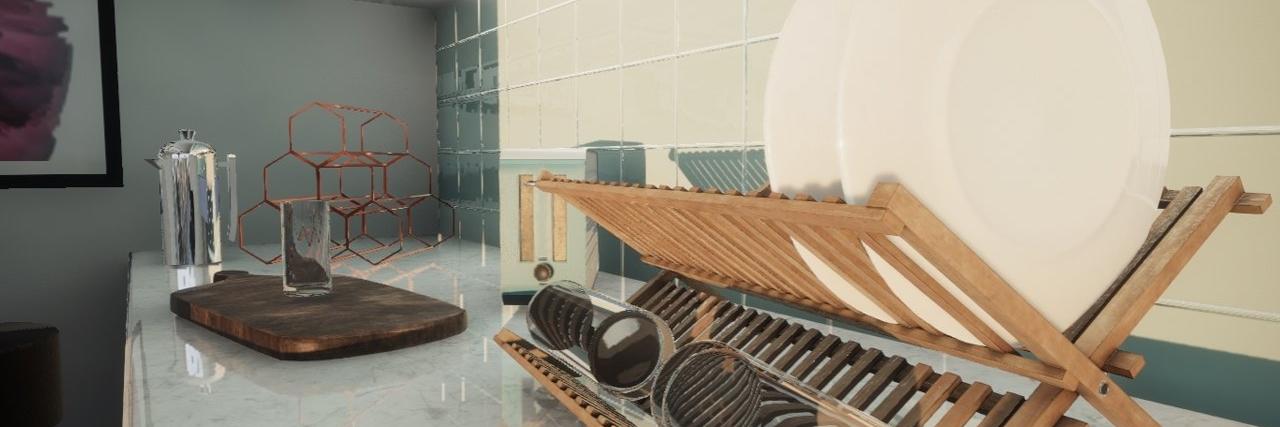
The subsequent sections provide an introduction to some of the new features added as part of HDRP. We’ve used some of these new features to enhance the look of our kitchen scene.
HDRP Lighting
Lighting in HDRP uses a system called Physical Light Units (PLU). PLU means that these units are based on real-life measurable values, like what you would see when browsing for light bulbs at the store or measuring light with a photographic light meter.
We use LUX for Directional Lights because in the real world, those are the values used to measure the intensity of sunlight, which can be easily done with a LUX meter. Other real-world light sources use Lumens to measure intensity, which can be used as a reference for the smaller light emitters in our scene.
Realtime Line Lights
The Realtime Line Light light maintains a seamless, constant light output emanating from a line of a user-definable length. These lights types are commonly used in animated films to achieve realistic lighting. They add a filmic quality to the lighting of your scenes. Line Lights can be created by selecting the shape type in the Inspector after a Light has been placed in a scene.
A lot of modern kitchens use a style of Line Light to illuminate the kitchen workspace, so the Line Light here not only produces realistic lighting, but is accurate to what would be found in a real kitchen.
In addition, the Light Inspector can determine the color of a light emitted through temperature. Ranging on a scale of 1000 to 20000 kelvins, the lower the value, the less heat is emitted, the light appears more red. In contrast, as you increase the temperature value, it appears more blue.
Similarly, the Rectangle shape type emits a light output based on custom X and Y axis values.
Note: Shadows are currently not supported for Line or Rectangle light shape types.

Light Explorer
As an added tip, using the Light Explorer allows you to easily manage any type of Light within your project. You can modify values, change the type of Lights and even manipulate Shadow types without the need to locate them in the scene. Reflection Probes, Light Probes and Static Emissives can additionally be managed through this window.
To access the Light Explorer, navigate to Window > General > Light Explorer:

Volume Settings
Volume Settings allow you to visually alter your environment preferences, adjusting elements such as your Visual Environment, Procedural Sky and HD shadow settings. This also enables you to create custom volume profiles and switch between them.
Volume Settings are managed by creating a GameObject and adding the Volume component. This workflow is similar to the one for creating a volume for the Post-Processing Stack v2. In HDRP, there will be one present within the hierarchy by default.
HD Shadow Settings
The HD shadow settings allow you to determine the overall quality of the Shadows in a Volume. The Max Distance field calculates the quality of the Shadows based on the distance of the Camera from the Shadow.

Visual Environment
You have two drop-down menus within Visual Environment.
Sky Type provides three options: Procedural Sky, Gradient Sky and HDRI Sky.


The Procedural sky produces an environment based on the values you choose within the procedural sky component.
HDRI Sky constructs an environment map based on an image set within the Component. By default, the HDRISky Component is not assigned to the Volume Settings, by clicking “Add component overrides...” at the bottom of the Inspector tab and selecting “HDRI Sky”, the component will become available.
Now you can assign an HDRI Sky Cubemap and alter the values to achieve accurate, real-world lighting.
Unity HDRI Pack is available on the Asset Store for free from Unity Technologies and provides 7 pre-converted (1024x2014 resolution) HDR Cubemaps ready for use within your project.
For this Scene, “TreasureIslandWhiteBalancedNoSun” from the Unity HDRI Pack worked best as it supplied enough light to brighten up the kitchen, but not wash it out. Of course, with the modifiers supplied within the Component such as Exposure and Multiplier, brightness can be altered and adjusted. It's important to pick a HDRI map that complements your Scene.
Finally, Fog Type gives you 3 options, Linear, Exponential and Volumetric. In order to determine the values, repeat the previous component step ( “Add Component Override”, apply the relevant component to the Inspector)
Material Inspector
Before the introduction of the HDRP, creating a glass Material was not an easy endeavor. There was no simple way to construct a realistic glass Material without extensive research and shader programming or resorting to the Asset Store to use a custom shader.
Now with the new features of the HDRP Lit Shader available in the Material Inspector, you can create glass which not only looks great but refracts light based on definable settings.
To start, we want to create a new HDRenderPipeline/Lit Material. This is the default Material shader applied to any new Material created in HDRP.
To create a new Material, right-click within the preferred folder, and choose Create -> Material. The Material Inspector will now show the brand new HDRP Material Inspector. In it, there are a few noticeable changes. Let’s review them.
Surface Options
Here you can start to determine the surface of the Material.
Surface Type
There are two options for the surface type, Opaque or Transparent. Opaque simulates a completely solid Material, with no light penetration.
In contrast, Transparent is an alpha blend and simulates a translucent surface, although useful, this type of surface is more costly to render.
An important feature of HDRP is unified lighting across both transparent and opaque objects.
Select Transparent for this example. This will provide access to parameters discussed later below.
Double Sided
This preference allows the Material to be rendered on both sides. By default, the Normal Mode is set to Mirror, but within the drop-down, we can select Flip or None.
If Double sided isn't active, Unity will only render the sides of the Material facing the cameras direction.
Material Type
The Material type options create new behaviors that allow for even more realistic Materials. Each of these options provide additional parameters within the Inspector once activated.
Standard
Uses the basic parameters and is the default Material type.
Subsurface Scattering (SSS)
Subsurface Scattering works by simulating how light interacts and penetrates translucent objects such as plants. It is also in used in rendering skin. If you have ever shined a light through the tip of your finger, You will have seen that the light changes color as it is scattered under the surface. This can be replicated using this Surface Type.
Once activated, a Transmission parameter will appear. Using this, you can determine the translucency of an object by using a Thickness Map.
Both of these features can be manipulated by using Diffusion Profiles. Two default profiles called Skin and Foliage are provided and can be used as a basis for these type of SSS Materials. An additional 13 profiles can be customised using the profile settings shown below.


For a brief video demonstration, check out my Unity tip on SSS:
I have always shied away from Subsurface Scattering (SSS) as it always sounded complicated!! ?
With HD RP, SSS has 2 preset profiles, as well as 13 other profiles which can be customised and add additional depth to any Material.
See below for a simple video demo ?#unitytips pic.twitter.com/NM4Z03l1U1
— Kieran Colenutt Unity (@kierancolenutt) August 28, 2018
Anisotropy
Anisotropy simulates a surface material which changes properties depending on its orientation, for example, mimicking the look of brushed aluminum. Instead of creating a metallic surface that has clean, neat reflections, using both a Tangent and Anisotropy Maps, you can alter the intensity of the reflections, as well as the orientation.
Iridescence
Provides the parameters to create an iridescent effect on the surface of the Material, similar to how light appears on an oil spill. The output is determined by an Iridescence Map and Iridescence Layer Thickness Map.
Specular Color
A Specular color is used to control the color and strength of specular reflections in the material. This makes it possible to have a specular reflections of a different color other than the diffuse reflection..
Translucent
The Translucent Option can be extremely effective at simulating light interaction for vegetation. This Material type uses profiles, similar to SSS except in this case the thickness map is used to determine how light is transmitted.
Enable Decals
This useful parameter easily enables the Material to respond to a decal Material, this works for both workflows, either through the Decal Projector or as an object component.

Inputs
Base Color + Opacity
At this point the Glass Material will still appear opaque, this is because you need to change the value of the opacity within Inputs to allow light to penetrate.
To do this, open the color swatch window next to “Base Color + Opacity”.
Red, Green and Blue channels are used as a base color and an alpha channel determines the opacity. The opacity of the current Material is determined from a value of 0 to 255, 255 is fully opaque, 0 is fully transparent. For this example, we want to set the color of the Material to a light green.
We want set the Opacity to 30 as this will alter the Material so it is mostly transparent.
Below are the color values I used:
RGB Values:
R - 201
G - 255
B - 211
Hexadecimal Value - C9FFD3
The important thing to remember is that even if you set the alpha of the Material to a low numerical value but keep the surface type set to Opaque, the Material will not be transparent and will retain its opacity.

Metallic and Smoothness
These options can be altered on a slider with values from 0 to 1. Both of the values and outputs are generated from the Mask Maps Alpha and Red Channel below in the Inspector. When a Mask Map is assigned, the sliders are subsequently used to remap the Minimum and Maximum values.
Normal Map
With a Normal Map applied, the strength can be modified when adjusting the parameter slider within a range of 0 to 2
You could add additional detail and depth to your glass Material by applying a Normal, such as indentation or scratches.
Mask Map
Within HDRP, a Mask Map is a combination of:
Red Channel - Metallic ranging from 0 to 1
Green Channel - Ambient Occlusion
Blue Channel - Detail Map Mask
Alpha Channel - Smoothness
By default, textures imported into Unity use sRGB. Within the Texture Inspector, un-checking “sRGB (Color Texture)” converts the texture to using a Linear Format. As the Mask Map uses Mathematics to generate an output, this texture must be linear.


The Coat Mask simulates a clear coat effect on the Material, increasing the smoothness along with it. By Default, the Coat Mask value is set to 0, but the slider can adjust the parameter within a range of 0 to 1. The clear coat mask can be used to mimic Materials such as car paint or plastics.
The Detail Map is a new map introduced into HDRP and an amalgamation of additional maps which add minute detail to the Material. The Detail Map uses the following channels:
Red: Grayscale using Overlay Blending
Green: Normal Map Y channel
Blue: Smoothness
Alpha: Normal Map X channel
Transparency Inputs
By modifying the Transparency Input properties of the shader, you can start to determine the overall transparent effect. The Transparency Inputs only become available once the Surface Type is set to Transparent.
For this example, the following section will enable you to create the refraction for the glass Material.
Refraction Model
The Refraction Model defines how the bending of light through the Material will be simulated. There are two options, Plane and Sphere.
Choosing the Refraction model depends on the shape and size of the object that the Material is being applied to:
Sphere: For filled objects, use a Sphere model with a Refraction thickness comparative to the size of the object the Material is placed on.
Plane: For an empty object, use a Plane mode with a small Refraction thickness.
The Index of Refraction and Refraction Thickness options allow you to control the behavior of the refraction model.
Index of Refraction
Ranging on a scale of 1 to 2.5, adjusting the parameter will provide a different refraction intensity. By default, the value is set to 1, which generates no refraction.
Between 1.1 and 1.2 is where the refraction flips and the environment seen through the Material appears upside down.

Now that the base of the glass Material has been made, custom adjustments can be added to assemble a Material that will work best for you and for the object the Material is being applied to.
Conclusion
I hope this overview has helped you to better understand how to practically apply HDRP within your projects! While it’s still in an experimental preview, we have some preliminary documentation on GitHub that you can also read to get started.
HDRP is an ever-growing, exciting new tool for creating projects and I just can’t wait to see what you’re going to make with it. Feel free to contact me on Twitter @kierancolenutt for any question or queries. I want to hear about your experiences, let me know how is it going!
To follow and discuss the development of HDRP and SRP in general, join our experimental graphics forum.
Is this article helpful for you?
Thank you for your feedback!
- Unity Labs
- Copyright © 2024 Unity Technologies