Unity 4.2.2 brings iOS Game Controller support


Like most mobile games developers, we've been closely following what important additions and changes the recently released iOS 7 update has made. One of the biggest and most exciting of Apple's initiatives is the standardization of game controllers for iOS-based platforms. So we're happy to tell you that, in addition to several important bug fixes for Xcode 5 / iOS 7 (Build&Run, WebCamTexture and status bar), Apple Controller support is included with 4.2.2! This blog post aims to answer most common questions this addition will raise and serve as a short tutorial on how to add support for iOS Game Controllers to your game.
Lets start with the questions you probably have:
- Q: Will there be a separate iOS-specific API for iOS Game Controllers in Unity?
A: iOS Game Controller support plugs directly into the standard Unity Input API. - Q: The Game Controller API is part of iOS 7, does that imply that games supporting this API will only run on iOS 7 and later?
A: No, Unity takes care of it. The Game Controller framework is loaded dynamically by Unity iOS runtime only if it is available. For older iOS versions it will just return an empty list of controllers. - Q: Can I release my game with a controller-only input scheme?
A: No, Apple documentation explicitly states that controller input must be optional and your game should be playable without them. - Q: Where can I read more about Game Controllers and the Unity Input API?
A: The Unity Input manual is available from our manual page and Apple Game Controller documentation is here.
Ok, now it's probably time to write some code ;)
The first thing you probably want to do is detect whether a controller is connected and, if so, what type of controller it is. Call Input.GetJoystickNames() to enumerate attached controller names. If the list is empty, there are no controllers attached. It's worth checking it every several seconds to detect if controllers have been attached/detached. Here's an example in C#:
    private bool connected = false;
    IEnumerator CheckForControllers()
    {
        while(true)
        {
            var controllers = Input.GetJoystickNames();
            if (!connected && controllers.Length > 0)
            {
                connected = true;
                Debug.Log("Connected");
            }
            else if (connected && controllers.Length == 0)
            {
                connected = false;
                Debug.Log("Disconnected");
            }
            yield return new WaitForSeconds(1f);
        }
    }
    void Awake()
    {
        StartCoroutine(CheckForControllers());
    }
When controllers are detected you can either hide on-screen touch controls or amend them to supplement controller input. The next task is to check for Game Controller input. Your actual input scheme is highly dependent on the type of game you are developing. Lets take a look at the upcoming Unity 2D tutorial as a simple example:

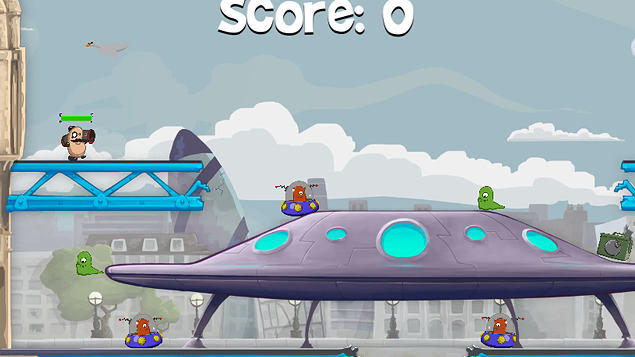
The player controls the bean character, which can move right or left, jump and fire at the bad guys. By default, the Unity Input "Horizontal" axis is mapped to basic profile game controller dpad and the left analog stick on extended profile controllers. So the code used to move the character back and forth is pretty simple:
float h = Input.GetAxis("Horizontal");
if(h * rigidbody2D.velocity.x < maxSpeed)
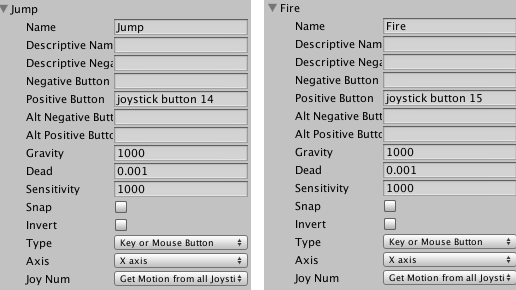
rigidbody2D.AddForce(Vector2.right * h * moveForce);You can set up jump and fire actions in Unity's Input Manager. Access it from the Unity editor menu as follows: Edit > Project Settings > Input. Lets pick joystick button "A" for the "Jump" action and "X" for "Fire". Open the following actions in the Unity Input Manager and specify "joystick button 14" for "Jump" and "joystick button 15" for "Fire".

The code handling them looks like this:
    if(Input.GetButtonDown("Jump") && grounded)
    {
        rigidbody2D.AddForce(new Vector2(0f, jumpForce));
    }
    if(Input.GetButtonDown("Fire"))
    {
        Rigidbody2D bulletInstance = Instantiate(rocket, transform.position, Quaternion.Euler(new Vector3(0,0,0))) as Rigidbody2D;
        bulletInstance.velocity = new Vector2(speed, 0);
    }
The following cheatsheet should help you map controller input in the Unity Input Manager:
| Name | KeyCode | Axis | ||
| A | joystick button 14 | N/A | ||
| B | joystick button 13 | N/A | ||
| X | joystick button 15 | N/A | ||
| Y | joystick button 12 | N/A | ||
| Left Stick | N/A | Axis 1 (X) - Horizontal, Axis 2 (Y) - Vertical | ||
| Right Stick | N/A | Axis 3 - Horizontal, Axis 4 - Vertical | ||
| Dpad | joystick button 4 .. joystick button 7 | Basic profile only: Axis 1 (X) - Horizontal, Axis 2 (Y) - Vertical | ||
| Pause | joystick button 0 | N/A | ||
| L1/R1 | joystick button 8/joystick button 9 | N/A | ||
| L2/R2 | joystick button 10/joystick button 11 | N/A |
That's all you need to start adding iOS Game Controller support to your games!
Is this article helpful for you?
Thank you for your feedback!
- Unity Labs
- Copyright © 2024 Unity Technologies