The Blacksmith Releases: Executable, Assets, Tools and Shaders


Hey. We’ve promised to release the assets and our custom project-specific tools and shaders from The Blacksmith realtime short film. Well, here they are.
First of all, you are welcome to download the executable of the demo.
The assets from the project, along with the custom tech, come in two main packages for your convenience: ‘The Blacksmith - Characters’ and ‘The Blacksmith - Environments’.
Below follows more information about what you can expect from each package, as well as some explanations about specific choices that we made. We’ve tried to not just release something of documentary value, but also make it more usable for you, in case you want to do something with it yourselves.
And let me answer straight away a very popular question you’ve been asking on previous occasions when we’ve released demo materials: yes, you can use all of this in whatever way you like, including in commercial projects. The standard Asset Store license applies. It would be our pleasure if you find the releases helpful on your own way to achieving success.
The Executable
We’ve added some simple interface for control over the playback of the demo:
- Interacting with slider will allow you to scrub back and forth
- Clicking on play-pause button, or anywhere else outside the UI, will toggle playback mode of the demo to playing or paused
- Slight look-around is possible by pausing the playback and moving the mouse pointer.
- A ‘mute’ button to toggle audio of the demo
You have the option to choose among four quality settings presets:
- Low - Recommended for machines which are not able to run the demo in higher settings
- Medium - Recommended for high-end laptops and less powerful desktop PCs. It runs at 30 FPS in 720p on a Laptop (Quad Core i7 2.5GHz with GeForce GT 750M)
- High - Recommended for most desktop PCs. It runs at 30 FPS in 1080p on a desktop PC (Core i7 4770 with a GeForce GTX 760)
- Higher - If you have a card that is better than GTX 760
It could take more than 30s to load, depending on your platform.
‘The Blacksmith - Characters’ Package
This project contains:
- The Blacksmith character
- The Challenger character
- Hair Shader
- Wrinkle maps
- Unique character shadows
- Plane reflections
Download ‘The Blacksmith - Characters’ package from here.
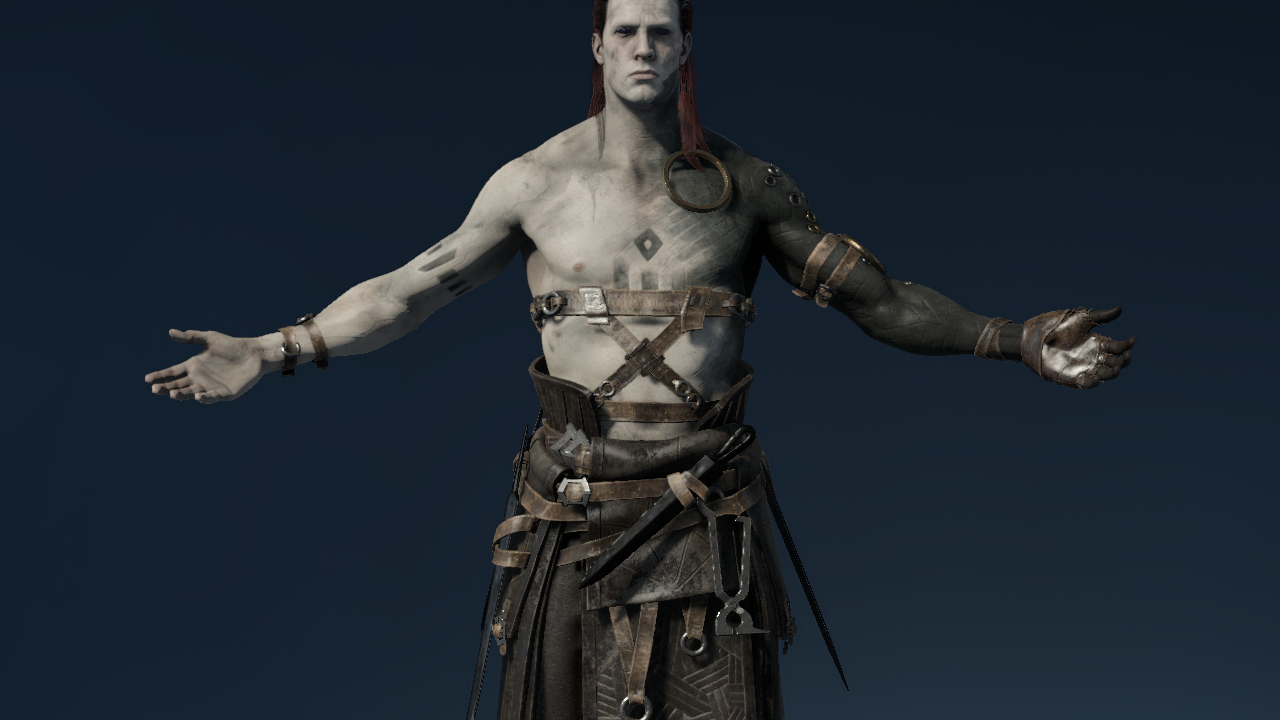
Blacksmith and Challenger
We have placed each character in a separate scene.
We have re-skinned the Challenger character so now it is a little better prepared for a more universal usage than the specific needs of our film. You are welcome to drop him in another environment and experiment. You still need to do some work if you want him to animate nicely. We have included sample animations ‘idle’ and ‘walk’.

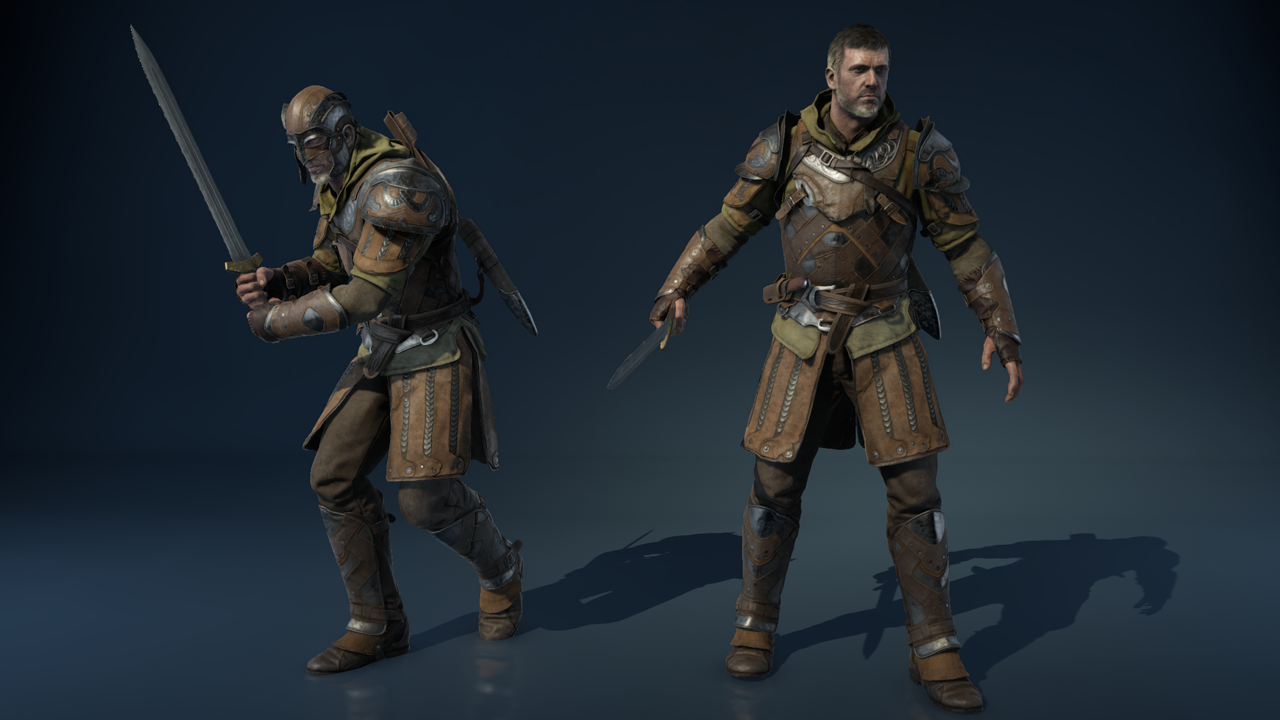
You will also find the main character, Blacksmith, in this package. We haven’t done any re-skinning on him: he is more complex than Challenger and would have taken us more time. We are including the original 3D character asset and you are free to use it in any way you like.
We are including the original, full-size 4K textures of both characters. In our project, we use a smaller version – 2K or less – of some of the textures.
The characters’ models and textures were created by Jonas Thornqvist and Sergey Samuilov.
Hair rendering
To achieve those anisotropic highlights that are so characteristic in hair, we decided to create a separate hair shader. As a complement to this, we also added a rendering component that calculated ambient occlusion for the hair, and set up a multi-pass render approach to avoid sorting errors between overlapping, translucent hair polygons.
The hair package and an accompanying example scene can be downloaded from the asset store. Don’t forget to check out the readme for more details about how it works, and how to configure it for your own projects.
Wrinkle maps
To add more life to the Challenger’s expressions in The Blacksmith, we added a rendering component for blending ‘wrinkle maps’ based on the animated influence weights of the Challenger’s facial blendshapes. The rendering component blends normal and occlusion maps in an off-screen pre-pass, and then feeds these to the standard shader as direct replacements for the normal and occlusion maps assigned in the material.
Available as a separate package here, and a dedicated blog post about it can be found here.
Unique character shadows
We wanted to make sure our characters always had soft, high-resolution shadows in close-up shots. We also needed to make sure we had enough shadow resolution to cover the rest of the world. To achieve this, we added a method of setting up a unique shadow map for a group of objects.
Unique shadows can also be grabbed as a separate package from the Asset Store, and more details are available in the dedicated blog post.
Plane reflections
Plane reflections in The Blacksmith are, in essence, the kind of planar reflections one would normally render for reflective water surfaces. The twist is that once rendered, we convolve the reflected image into each mip-level of the target reflection texture. During this convolution, we use the depth information of the reflection to force sharper contacts for pixels close to the reflection plane. The goal of this contact sharpening is to simulate the effect ray tracing would have in non-perfect reflections. The result of this convolution is a reflection texture suitable as a drop-in replacement for reflection probe cubemaps, with the material's roughness still dictating which of the different mip-levels are sampled for reflection. We use a modified Standard Shader that, based on a shader keyword toggle, samples reflections from this dynamic reflection texture instead of reflection probe cubemaps.
‘The Blacksmith - Environments’ Package
This project contains:
- The Smithy
- The Exterior
- Atmospheric Scattering
- PaintJob tool (paint vegetation on any surface)
- Vegetation system
- MaskyMix Shader
- Modified Standard Shader
- Tonemapping
You can toggle between FPS and animated camera (press C) and between several light presets (press V).
Download ‘The Blacksmith - Environments’ package from here. Be warned, it is quite large.
The Smithy
Looking like this:


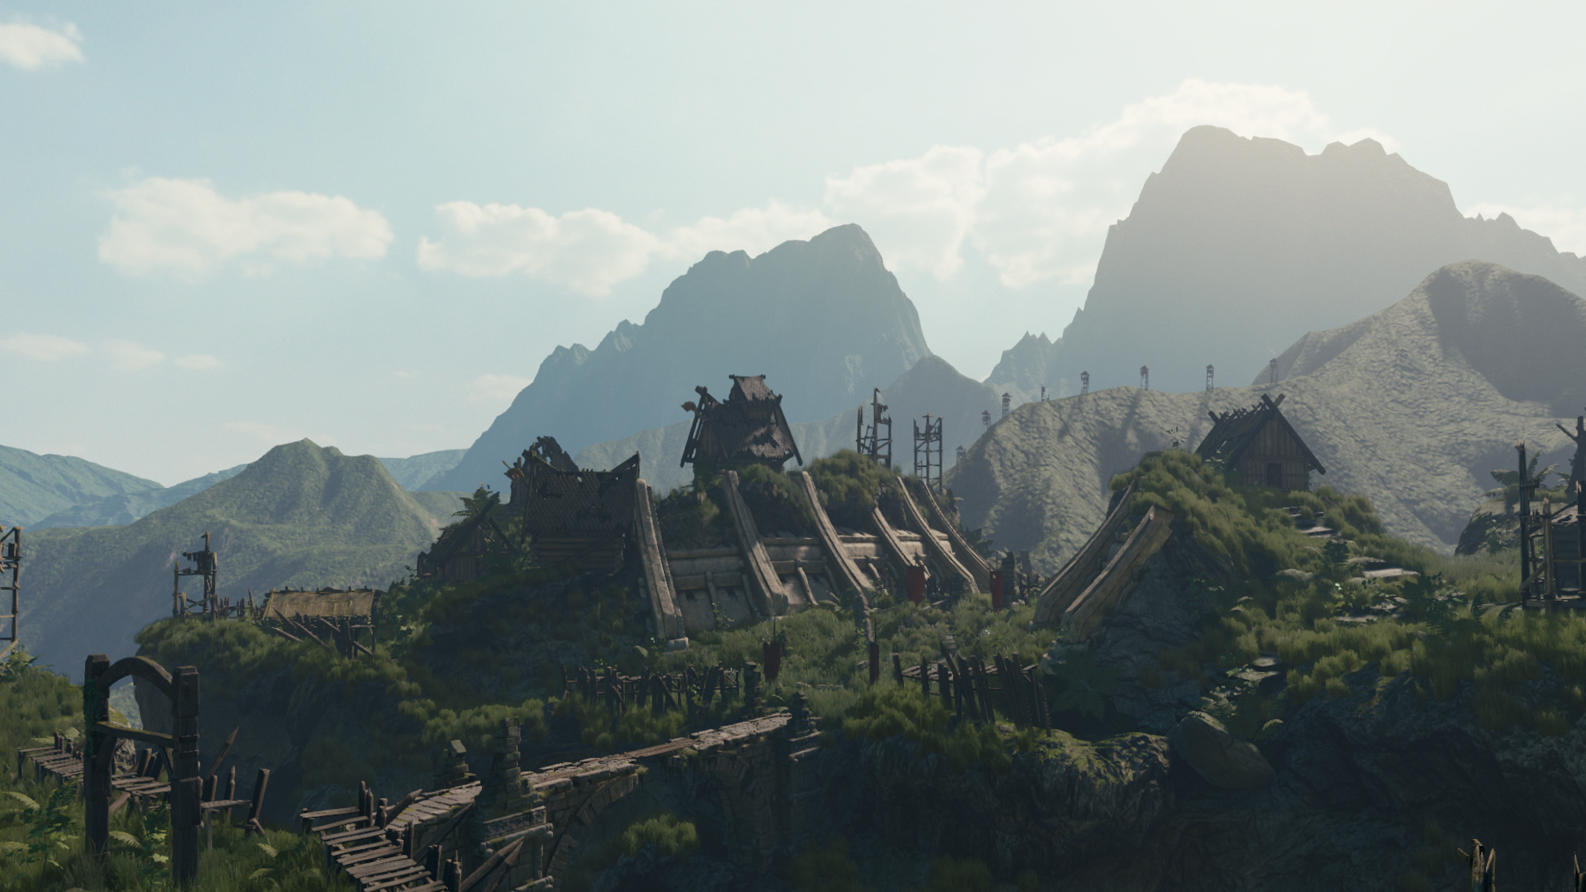
The Exterior
We decided to re-arrange the original exterior from the movie in order to make it more relevant to game production, which we hope would be of more use to you.
We haven’t gone too far with the polishing. If you spend some additional time on it, it could be a good basis for some action of your own. Here is how it looks as we’ve provided it to you:
The difference is that, for our film, we had arranged the environment according to the cameras. If you are still curious, here is a screenshot of how the environment of the original project looks in Scene view:


There were assets we didn’t use in the rearranged scene, but we still wanted you to have them. You will find them in the project.
Almost all of the gorgeous assets in this package were created by Plamen ‘Paco’ Tamnev. He also built the exterior environment scene.
Atmospheric Scattering
Our custom Atmospheric Scattering solution comes in this project. Find more details about it in this dedicated blogpost. For your convenience, we have also uploaded the Atmospheric Scattering as a separate package on the Asset Store. This way you don’t have to extract it yourself from this rather big project. Get it here.
PaintJob tool
This tool allows the artist to paint vegetation projected onto any geometry, not just Unity Terrains. It was a way for us to to explore how we could make the most out of the built-in Unity terrain tools, while also fulfilling one of the requirements we had for the project.
You are welcome to extract it from ‘The Blacksmith - Environments’ and use it in your own projects.
Vegetation system
There were a couple of things that we wanted to do with vegetation in The Blacksmith: we wanted it to be soft; we wanted custom shading on it; we wanted it to support dynamic GI; we wanted it to blend with whatever it considered to be ground; and we wanted it to work without being forced to use Unity terrains. PaintJob already took care of the latter, but to solve the rest we needed to do a little bit of a custom setup. We decided to build a component that would capture the PaintJob data - as well as any other hand-placed vegetation marked for capturing - and generate a number of baked vegetation meshes for which we could retain full control over rendering. Among other things, this allowed us to apply any kind of custom sorting we wanted, or reproject light probe data into dynamic textures.
MaskyMix Shader
Maskymix is an extended Standard Shader that mixes in an additional set of detail textures based on certain masking criteria - hence the name MaskyMix. The masking is primarily based on the angle between a material-specified world-space direction, and the per-pixel normal sampled from the base normal map. The mask is also modified by a tiled masking texture, as well as the vertex-color alpha channel of the mesh - if present. Depending on the masking thresholds specified in the material, the additional detail layer is mixed in based on this final mask. If the mesh provides a vertex alpha channel for masking, the vertex color can optionally be used for tinting the detail layer albedo.
Modified Standard Shader
The Blacksmith used quite a few tiny Standard Shader modifications to tweak things to our liking, or add small shader features that we wanted. Not all of these make sense outside of the main project, but some of them are included in the surface-shader based Standard Shader used in this package. These modifications are typically things like: optionally sampling per-pixel smoothness from the albedo alpha channel instead of a dedicated texture, or being able to control the culling mode of any material, or having additional control over the color and intensity of bounced global illumination.
Tonemapping
We’ve explained in an earlier blogpost how we used Tonemapping and applied Color Grading for The Blacksmith short film. Since the short film was shown, the Tonemapping was taken up by a Unity engineering team, and is now being developed properly into Unity.
The HDR sky textures in the package are from NoEmotionHDRs (Peter Sanitra) / CC BY-ND 4.0. Used without modification.
That’s all from us for now. Having delivered everything we promised, we’re ready to go off to new adventures.
If you do something with our assets, we are very curious to know about it. It would be nice of you if you post it as a comment here or drop us a line at demos@unity3d.com. And if it is something which others could use, please consider sharing back to the community.
Have fun!
Edit: Here are the links to the blogposts where we explain specific systems in more detail:
Wrinkle Maps in The Blacksmith
Is this article helpful for you?
Thank you for your feedback!
- Unity Labs
- Copyright © 2024 Unity Technologies