Adam: Assets creation for the real time short film


My name is Plamen (Paco) Tamnev and I was responsible for a lot of the assets used in our demo Adam. I previously worked as a character artist for Black Sea Studios, Crytek and after that I joined the Unity demo team to work on real time demos like Adam, The Blacksmith, as well as some smaller environment demos (Viking Village, Bedroom, Courtyard).

Asset creation starts with a thorough understanding of the creative goals and values of the project: the backstory of the world, the story we’re telling, and how the character design contributes to conveying the message. You can read more about it in my teammate Georgi Simeonov’s blogpost about the design process in “Adam” demo.
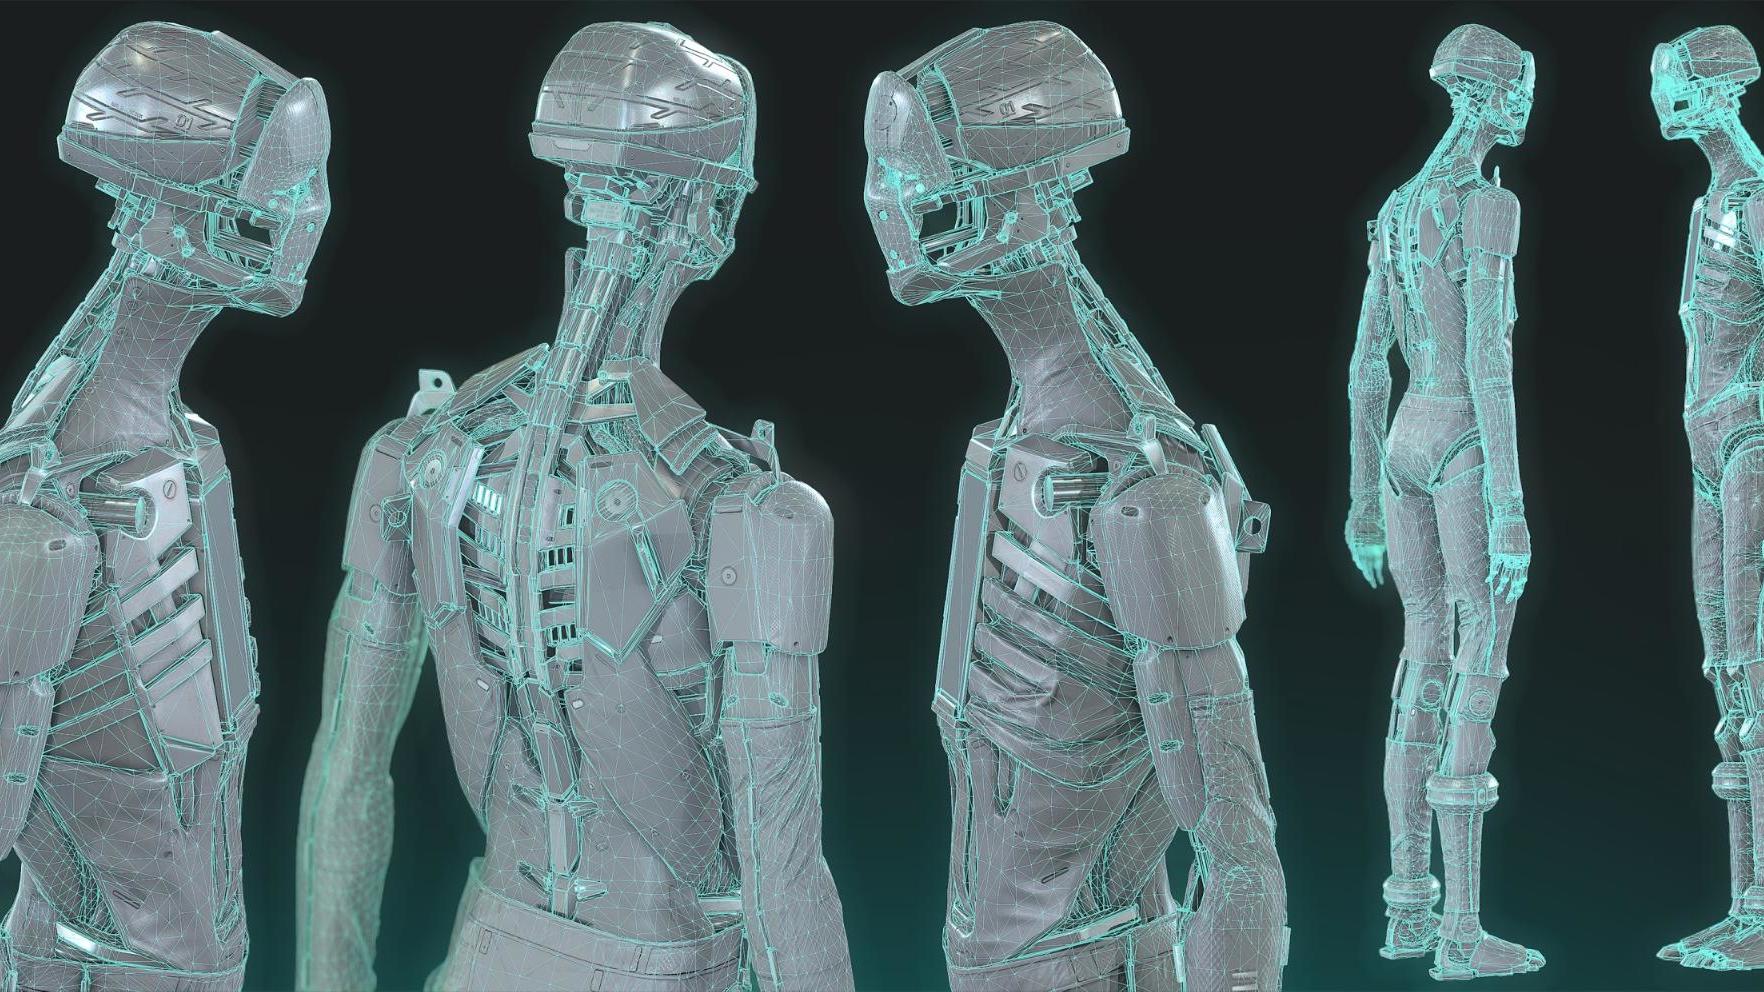
I work very closely with Georgi and with our director Veselin Efremov, in both my character and environment work. The first things we have to get right are the overall proportions, distribution of detail, and nailing the right silhouette. We rely on an iterative approach, starting with proxy models which are gradually detailed and refined.
Adam previz and functionality (Building Adam)
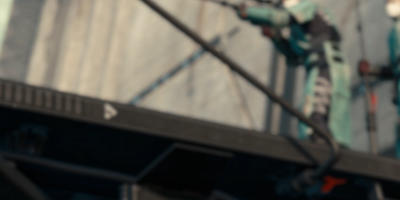
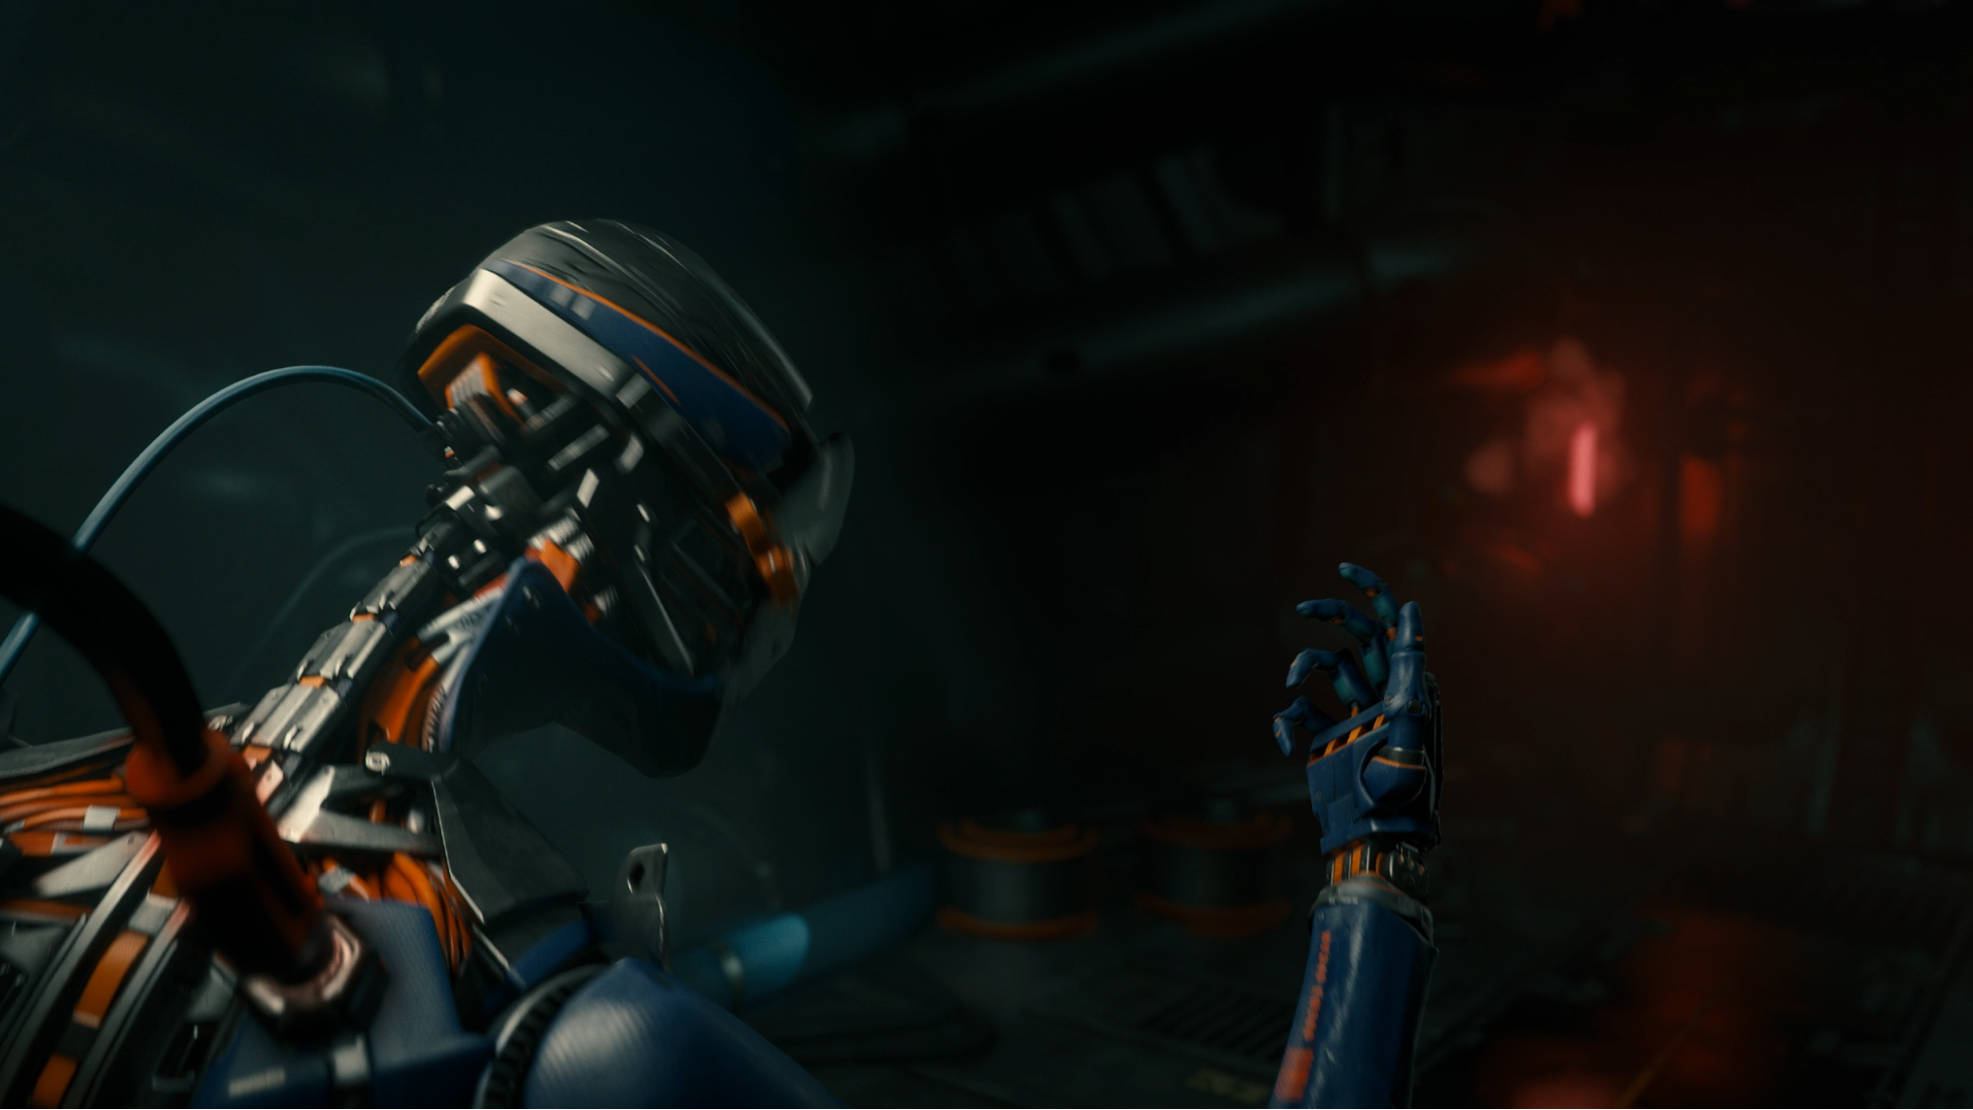
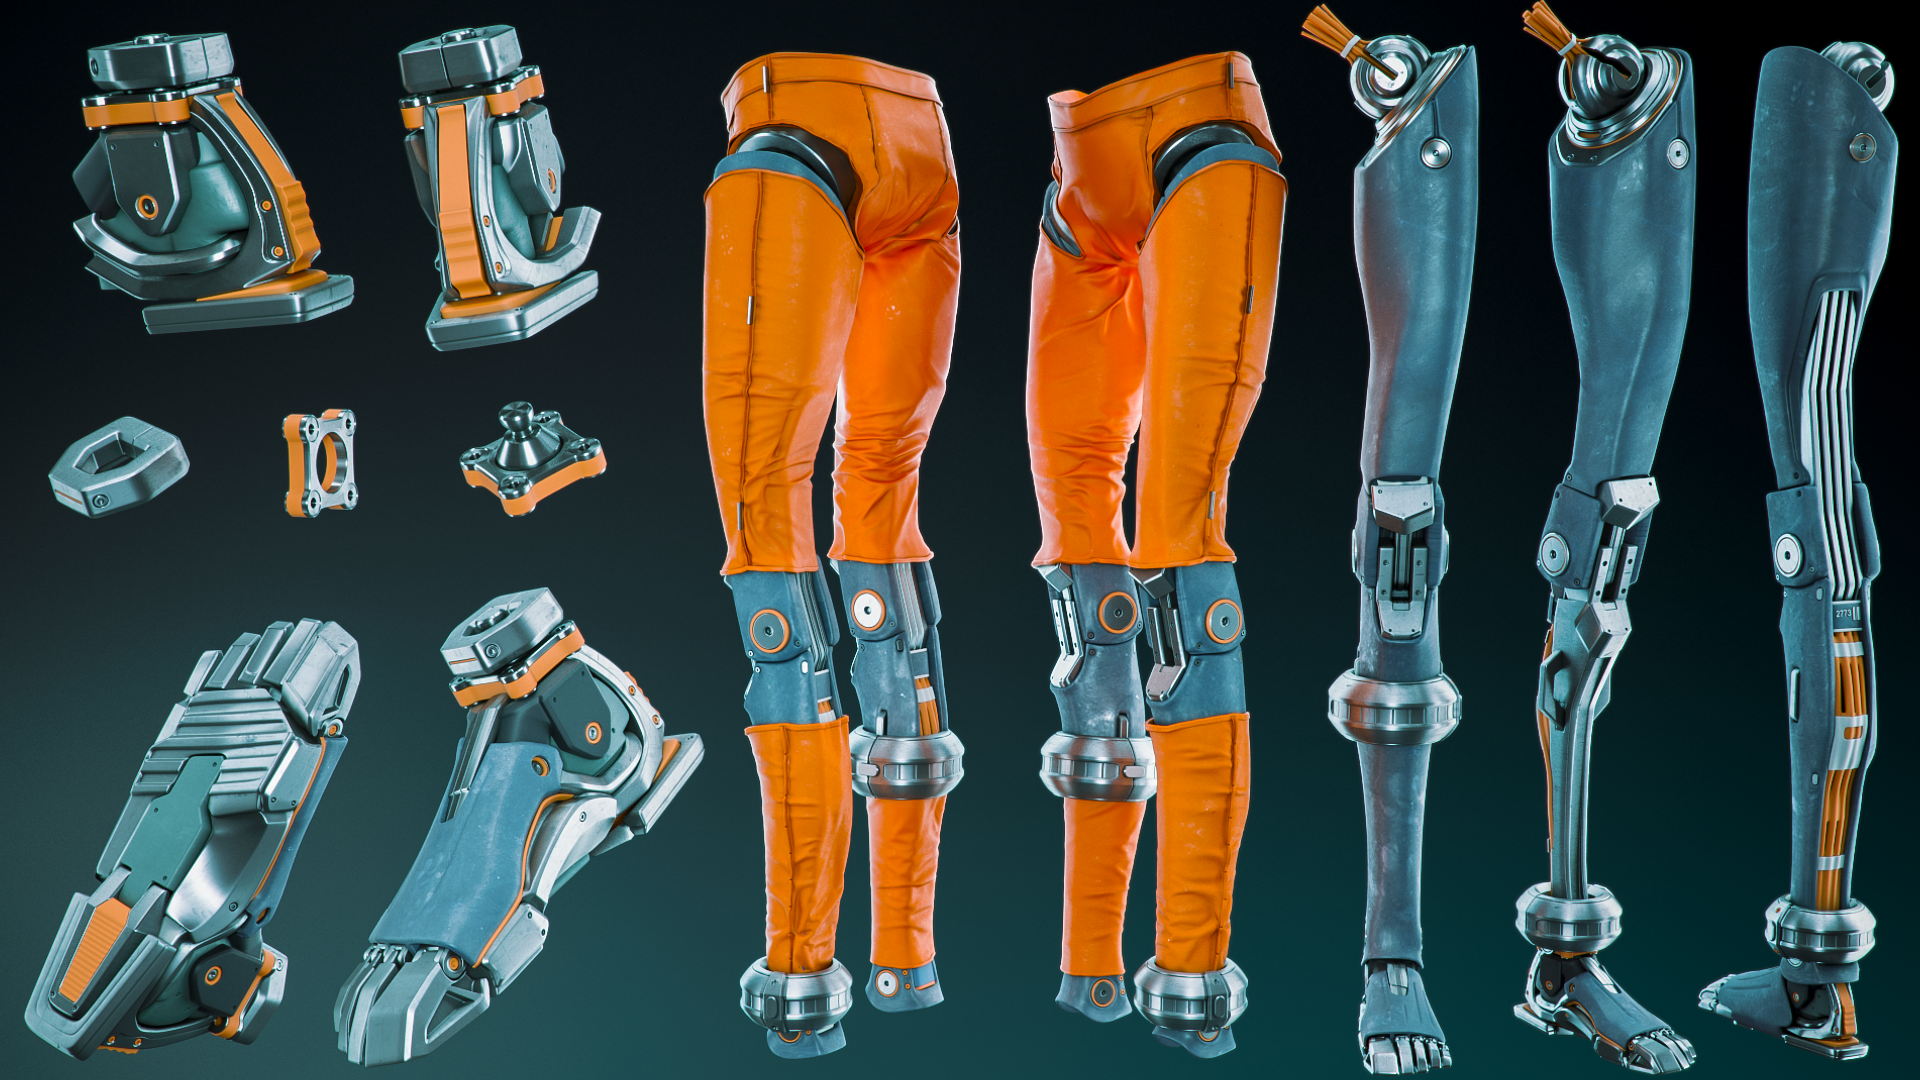
Building Adam was a bit of a challenge, as we had to make him functional, while still preserving the look and mood of the concept. We knew that he had a large range of motions to perform, as well as some pretty extreme closeups in a few of the shots. Adam also had to function as a base for the crowd, and our other two main characters also used parts from Adam where it made sense to do so. I had to keep this in mind during the modeling stage and build Adam almost as a sort of flexible reusable modeling kit. We began with a blockout version of the character, which was updated incrementally. There was a lot of back and forth between our animation director, the production designer, and me: quite a few things had to be tweaked or redone all together as they looked good initially, but had to be reworked to improve the character’s range of motion, or the silhouette.

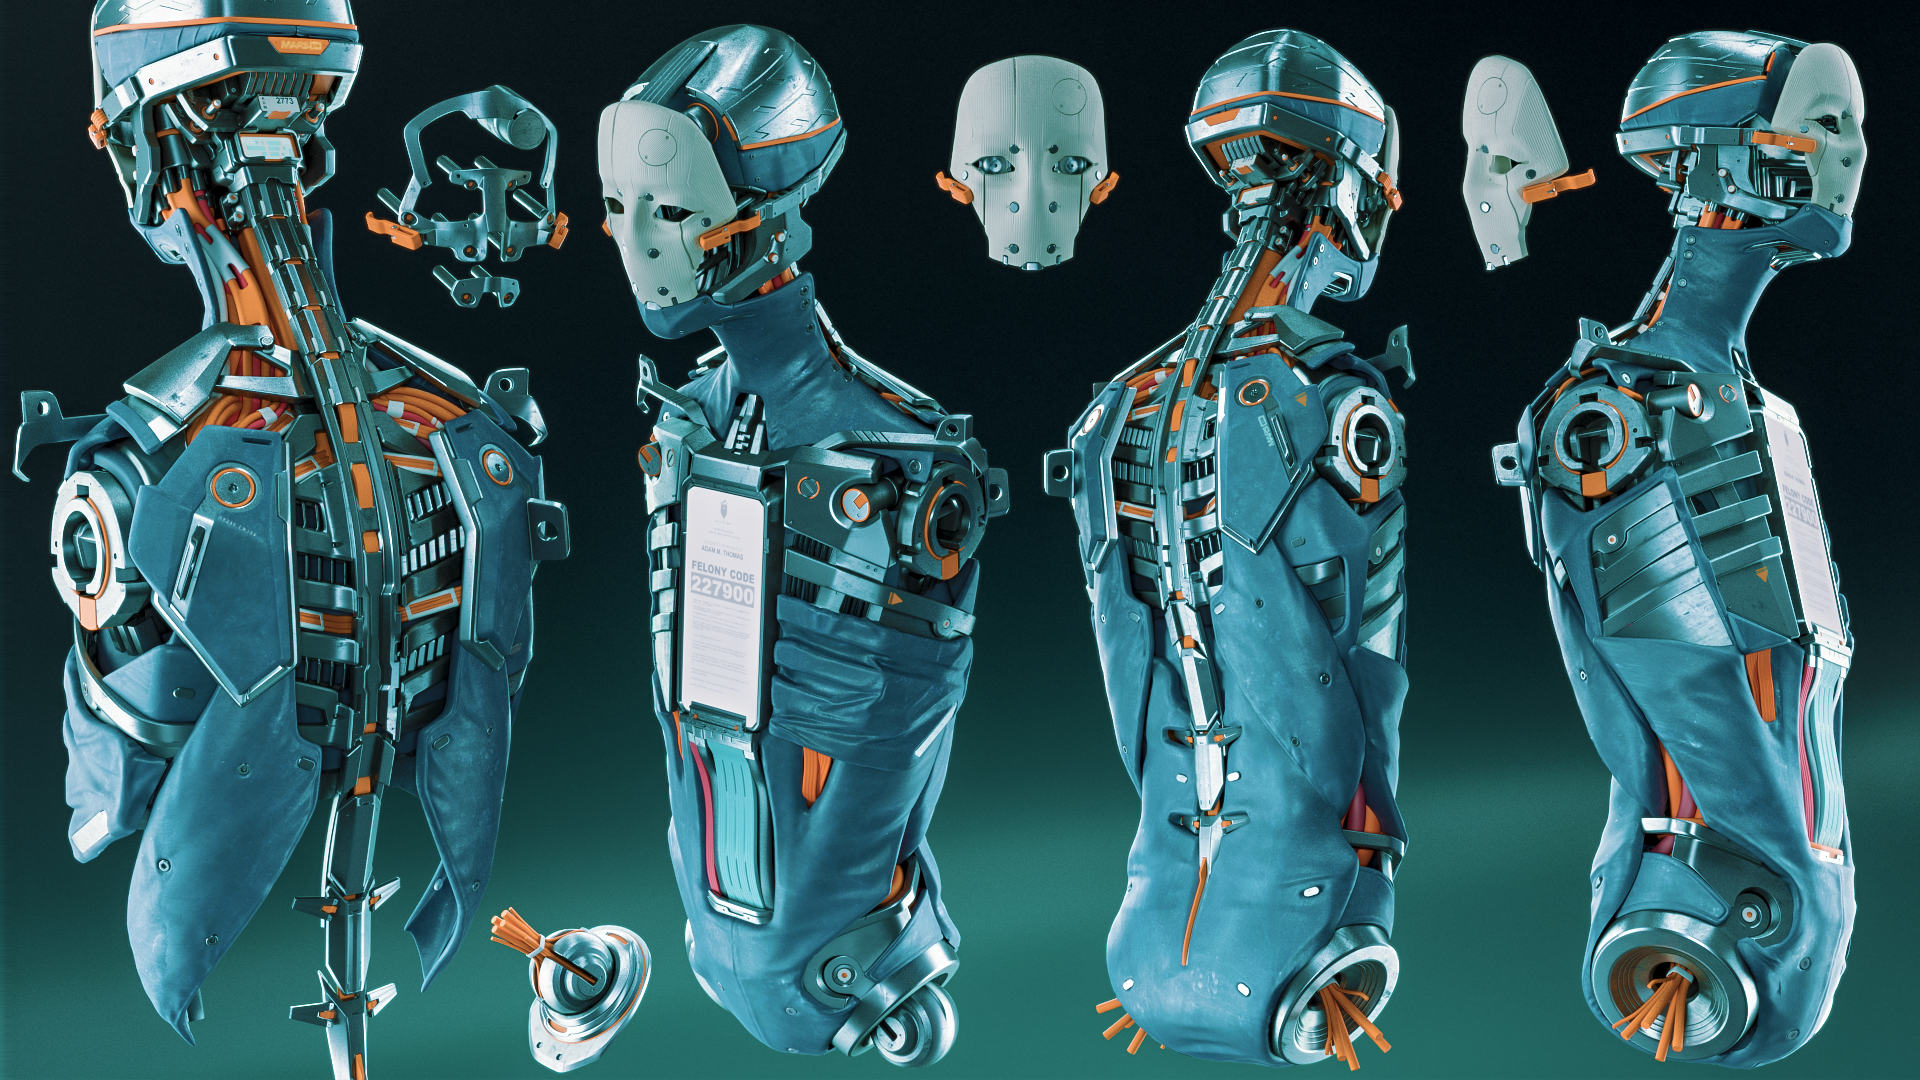


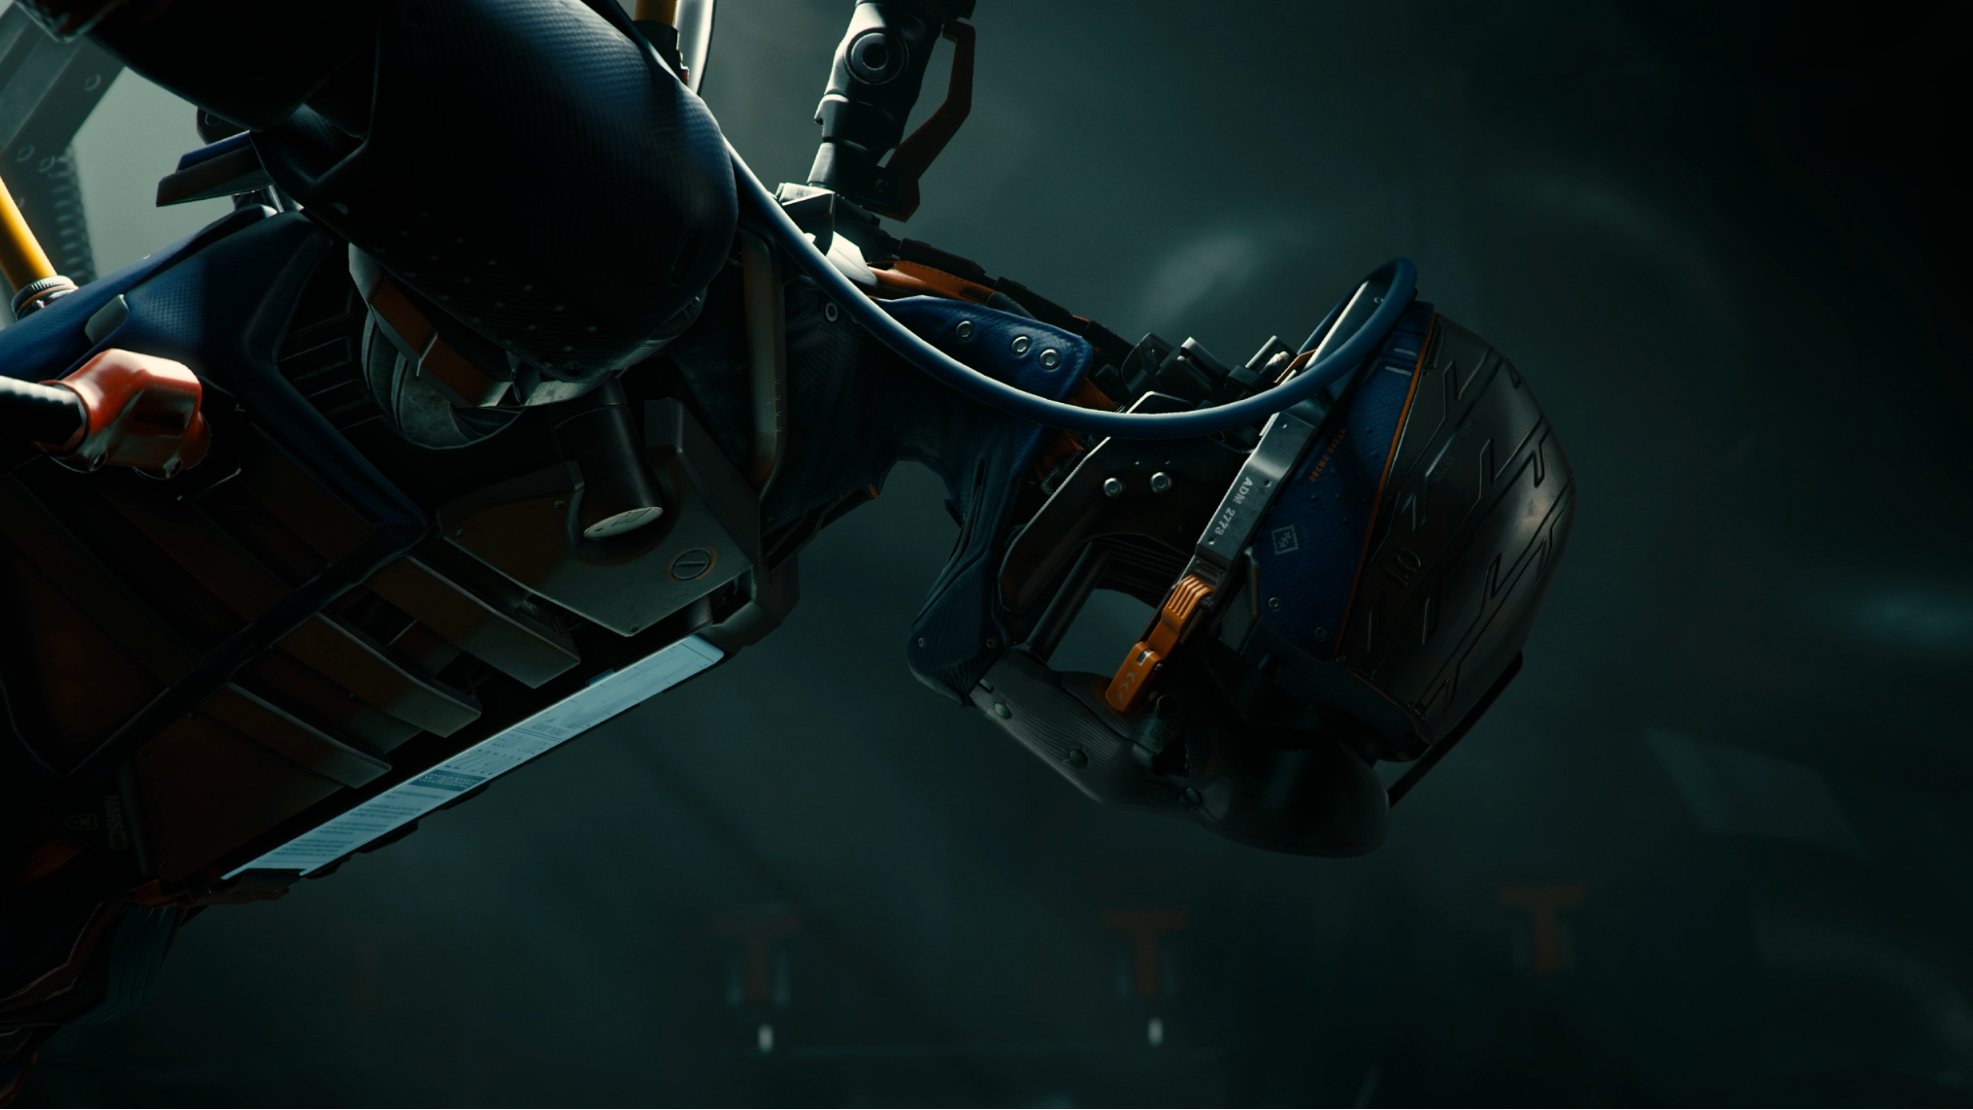
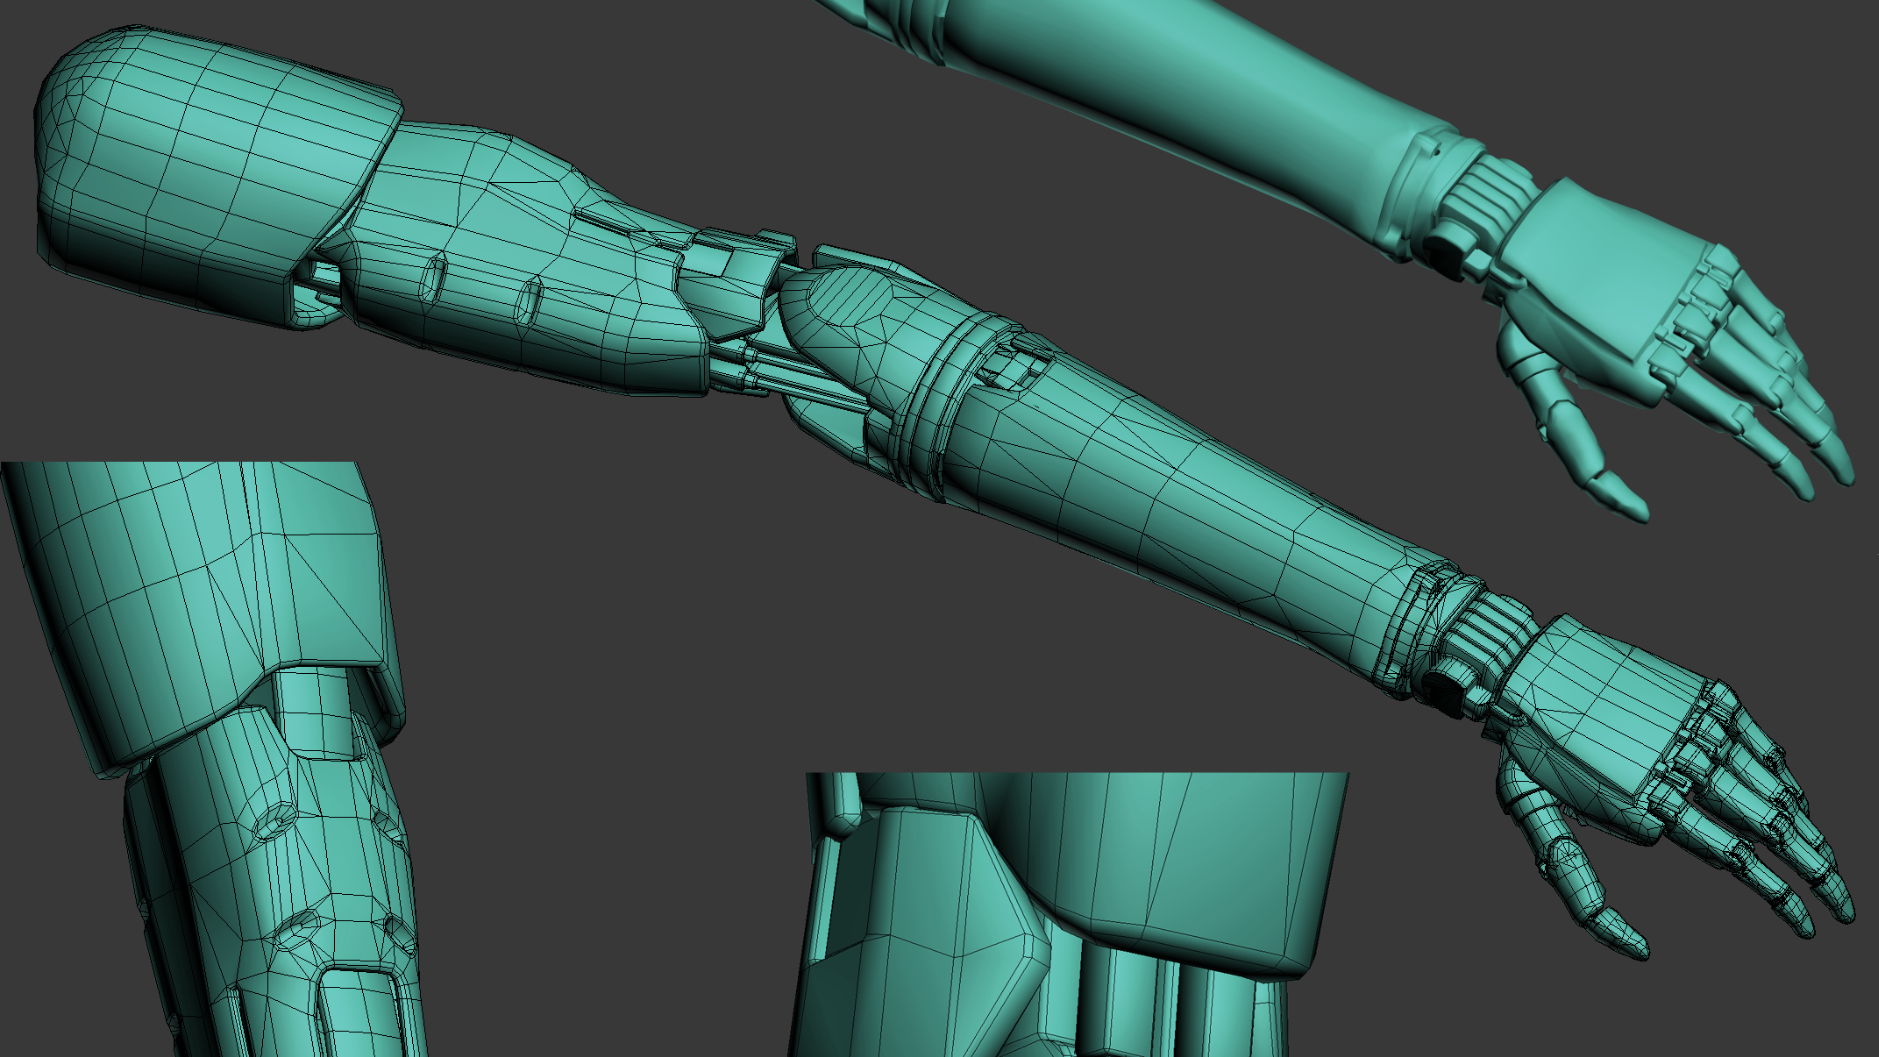
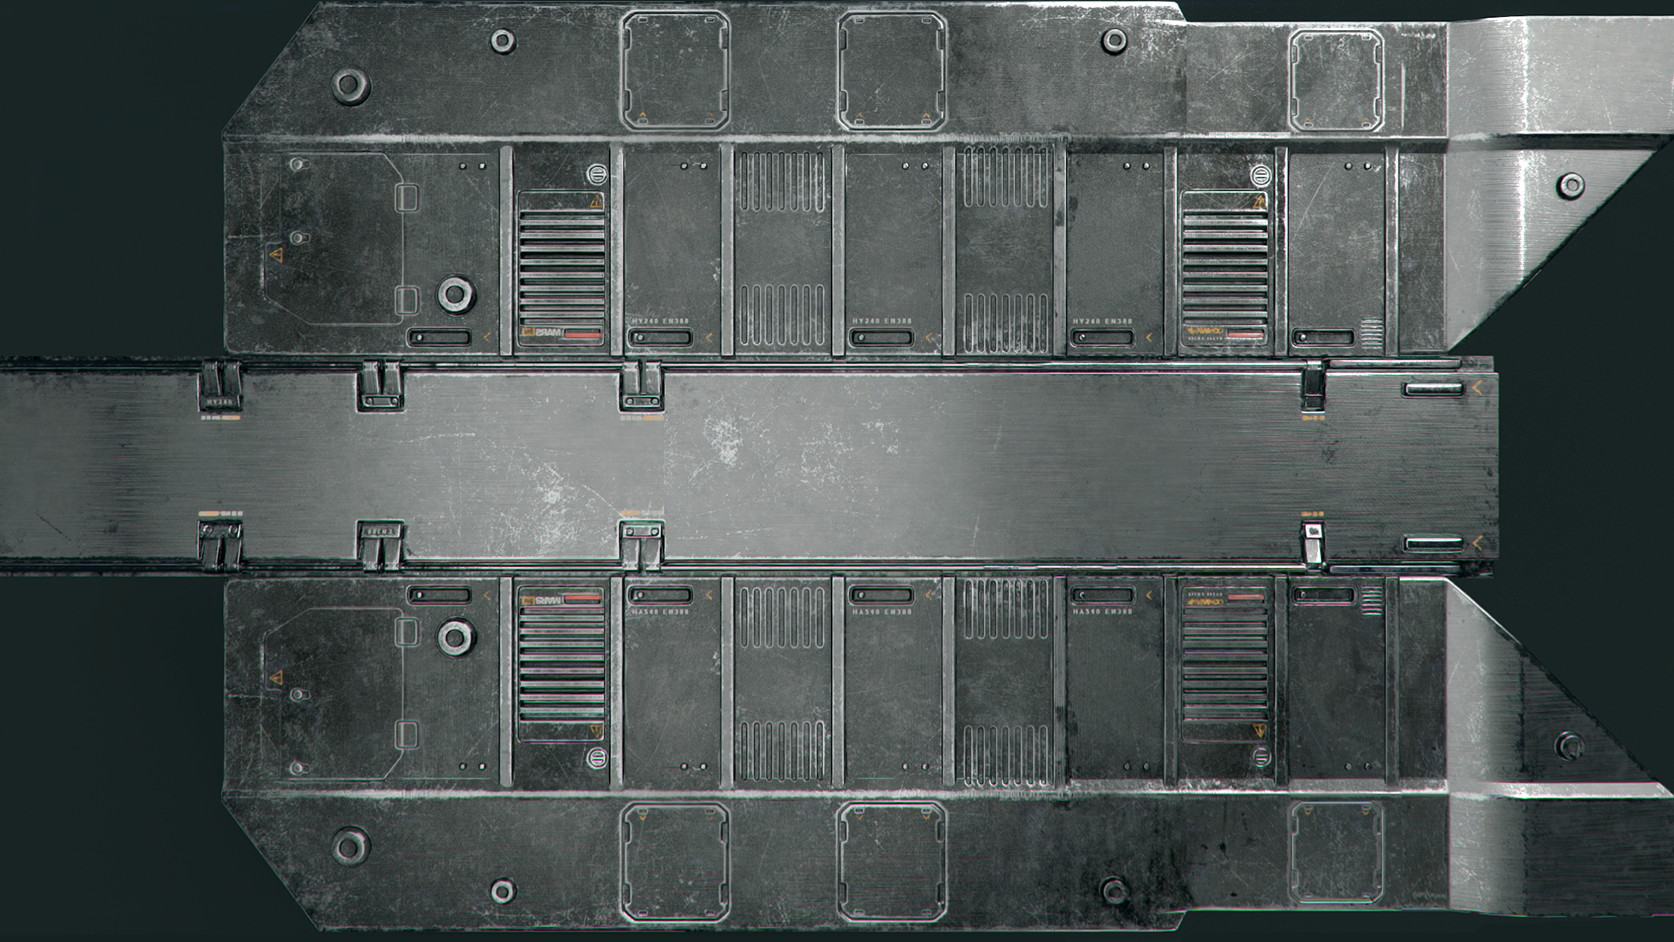
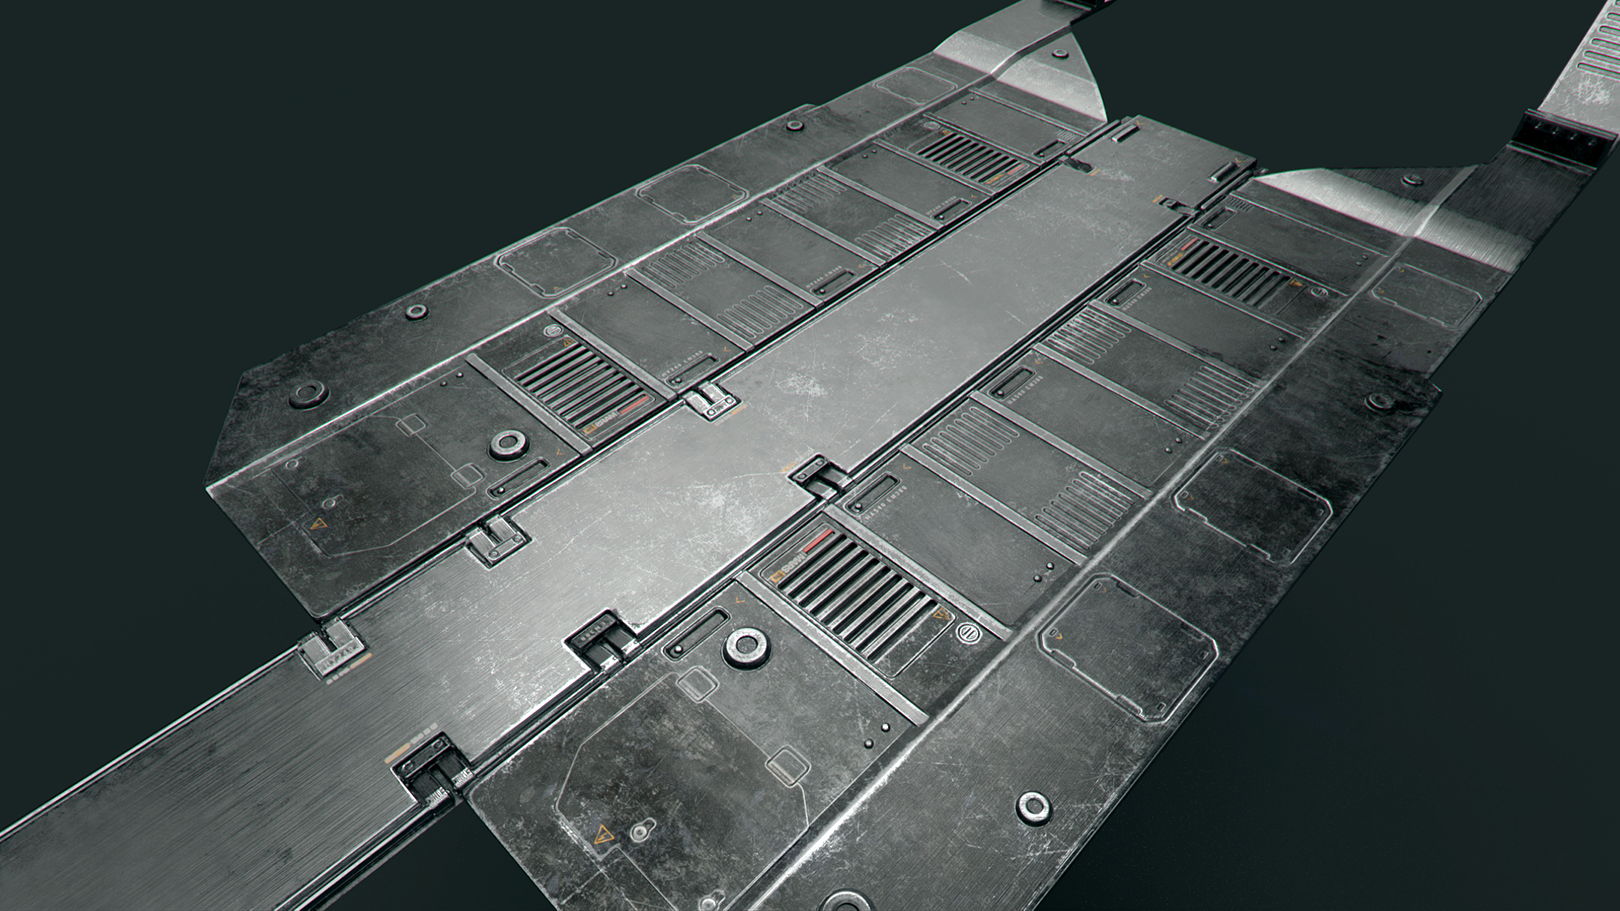
Here are some of the functionality previz renders I did for the parts of Adam that had more complex motions, before moving on to the low poly models. The arms were one of the more complex parts: they had layers of details, most of which had to be able to move and slide properly. Not all of them are visible in the final film, but they did help to get the right proportions and also give us some fresh ideas about details.

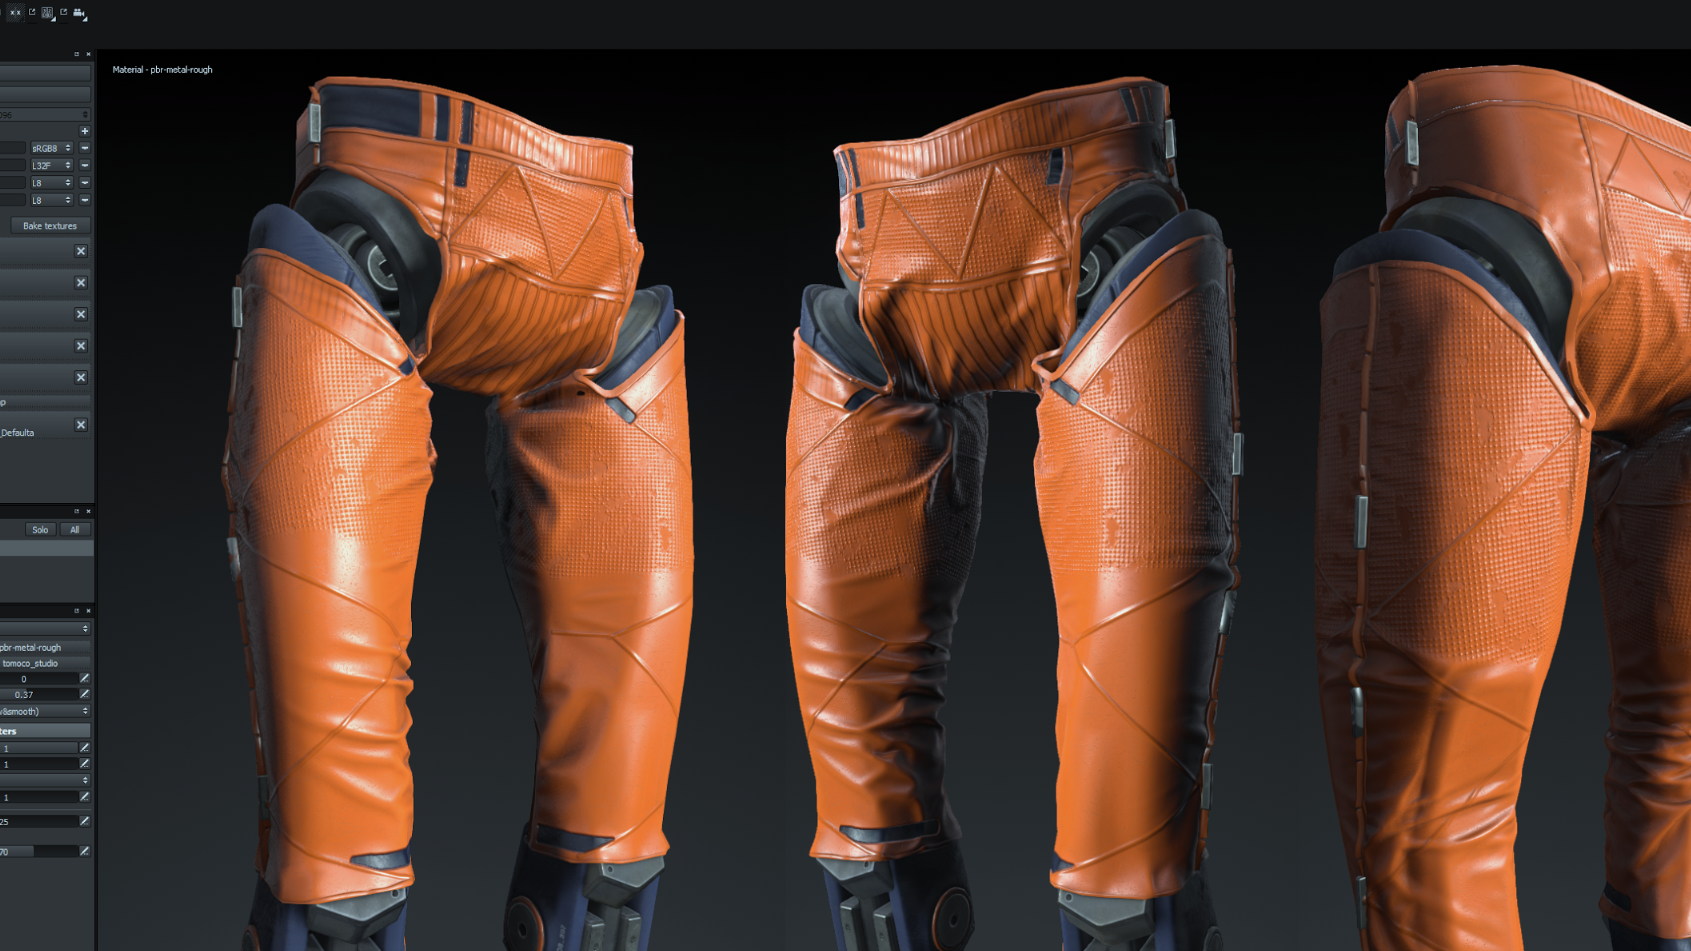
The previz renders also served as a material guide to quickly see the high poly models with the base materials and colors in place, before moving on to the actual low poly models and textures, and gave us time to iterate on those. The setup was fairly straightforward: I used mostly auto uv’s that were relaxed in Zbrush, and then I set up the Vray materials with tiled textures to break up the roughness and albedo a bit.
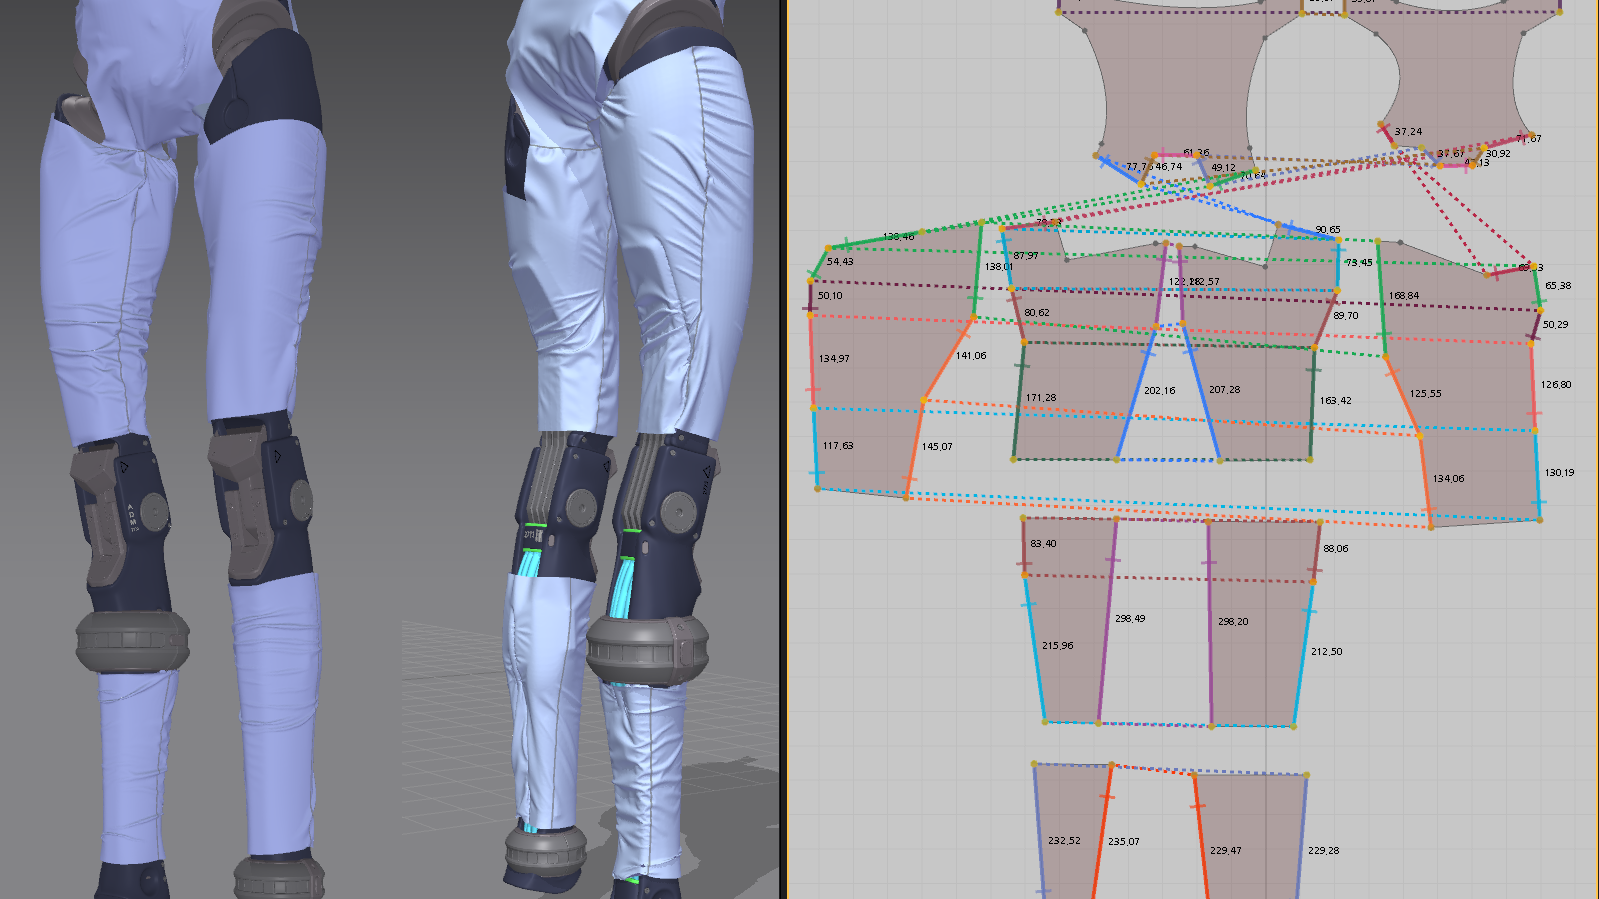
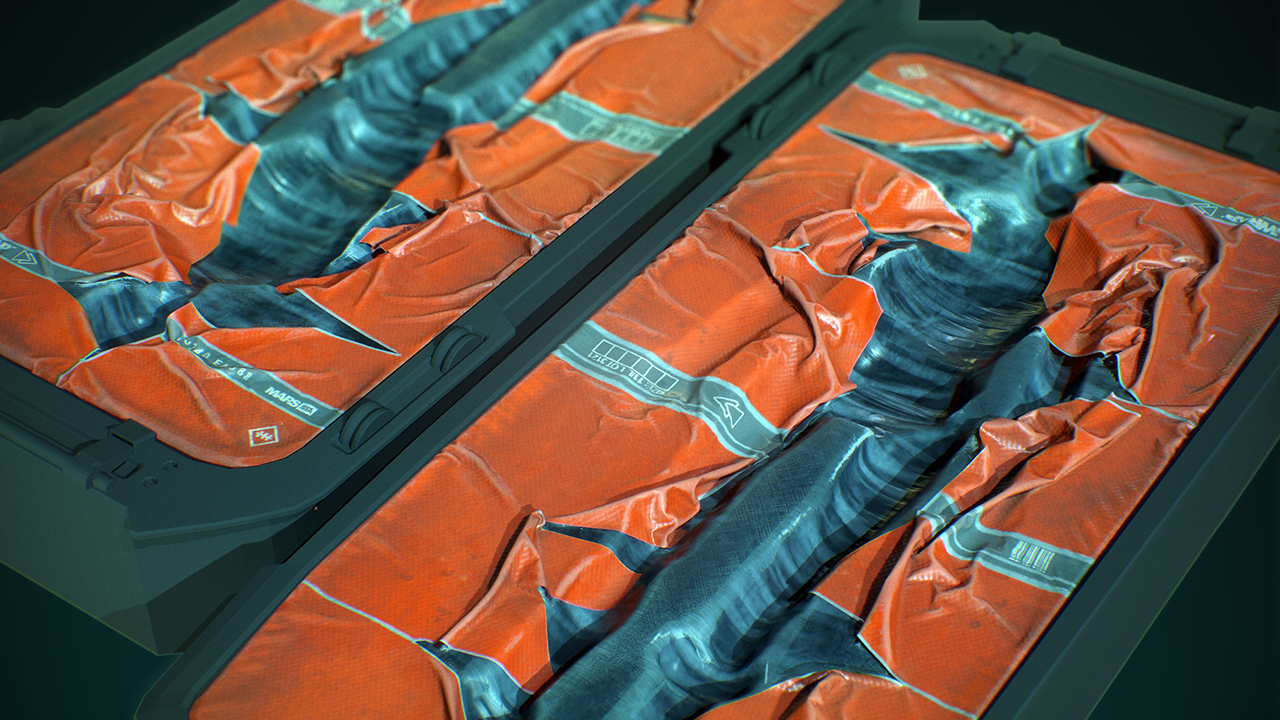
For the wrapped material I used Marvelous Designer as a base. It gave me something that looked good right away, and then it was much easier to continue with detailing and polishing it in Zbrush to get the final result.


Texturing
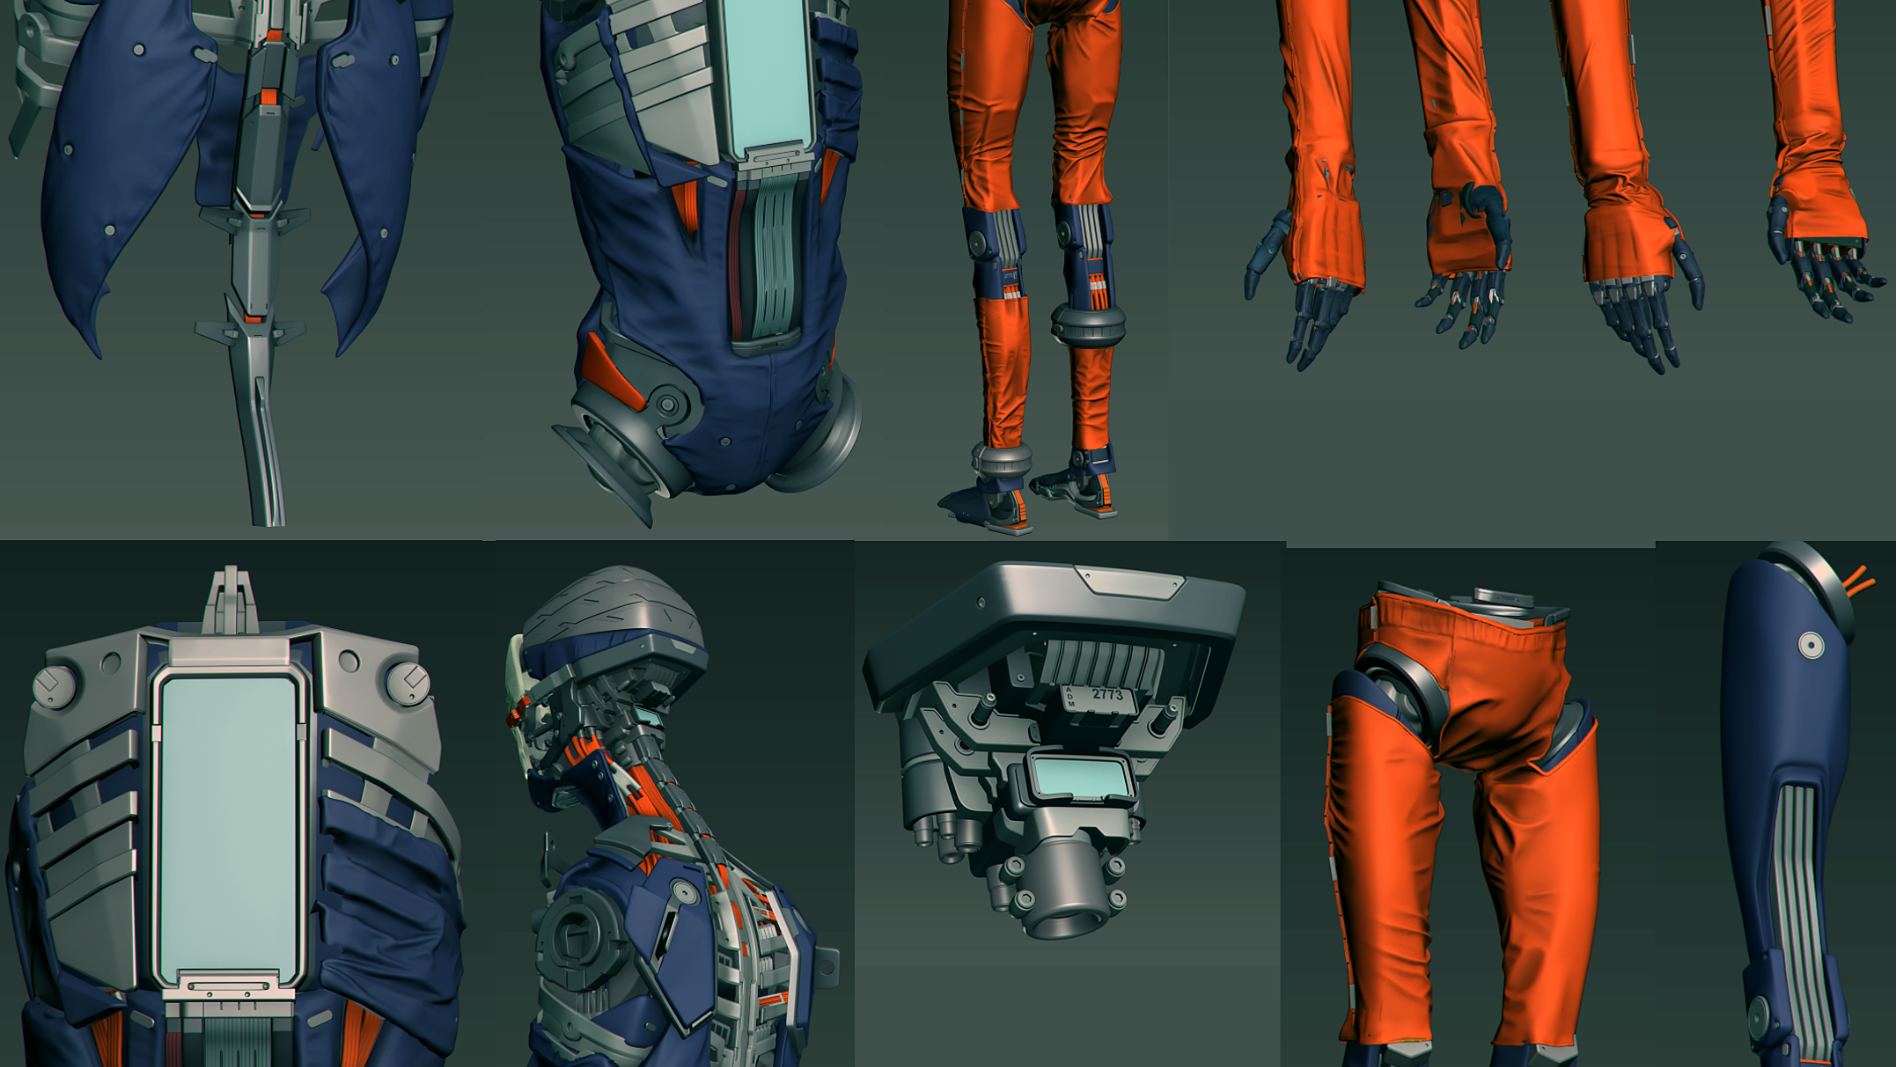
For the texturing of Adam I used Substance Painter 2 with unique texture sets for the head, body and limbs. I also added some secondary details in the normals directly in Painter.

At this stage, I was testing the values and weathering distribution. In this example, the weathering of the metals turned out to be a bit too much and some color values and saturation were a bit off. After solving these issues, I moved on to the finer details and started to add the surface breakup and decals.


Crowd and variation
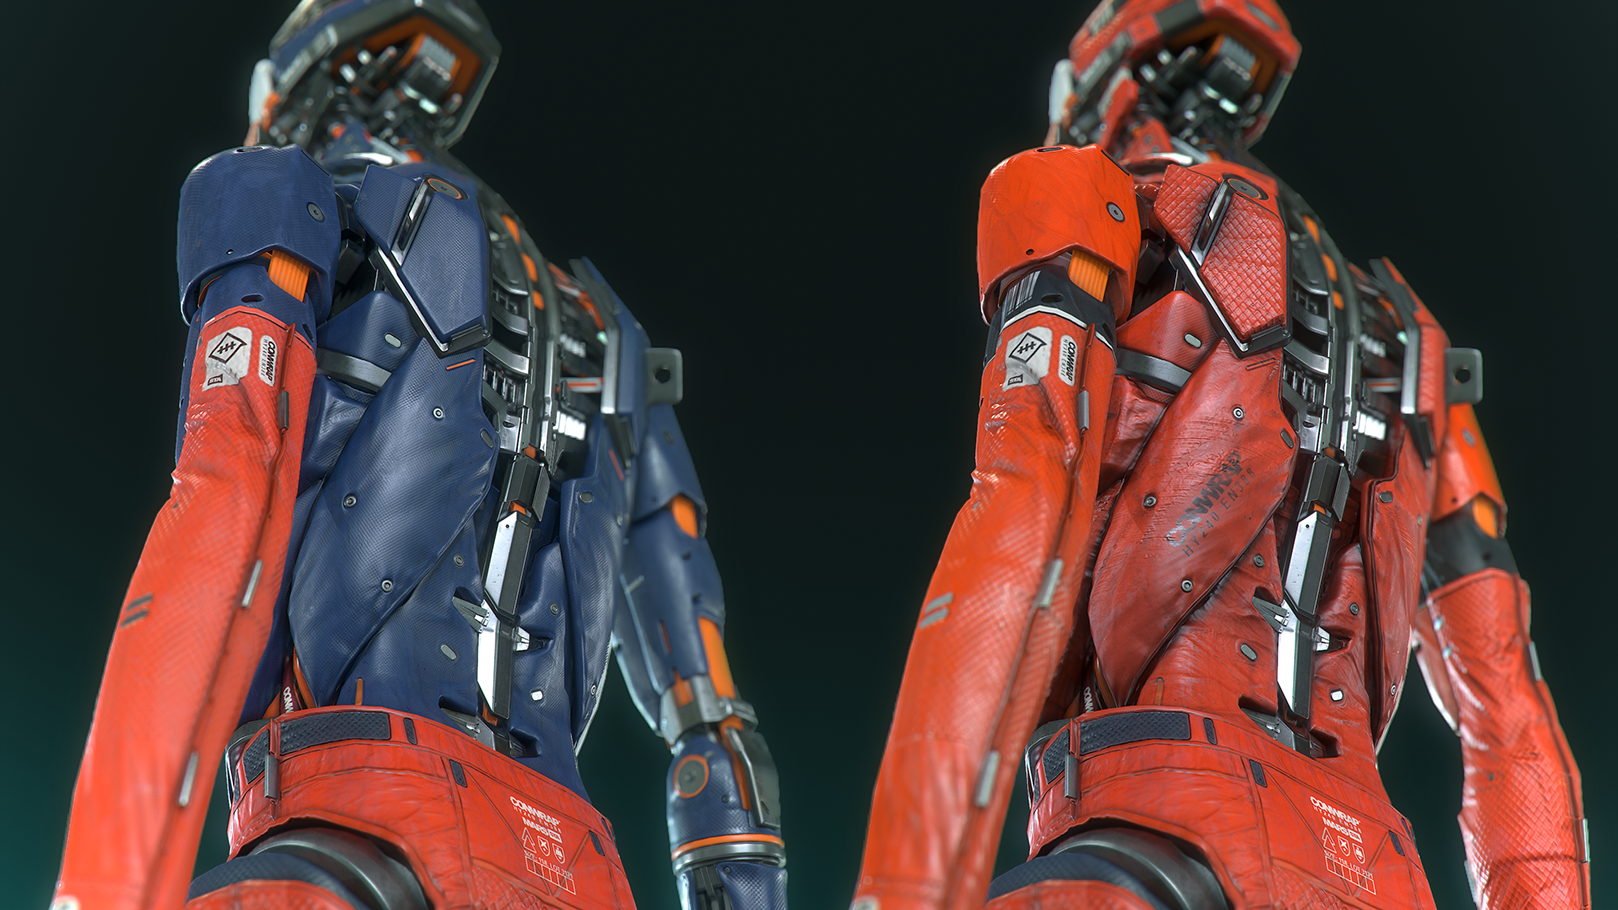
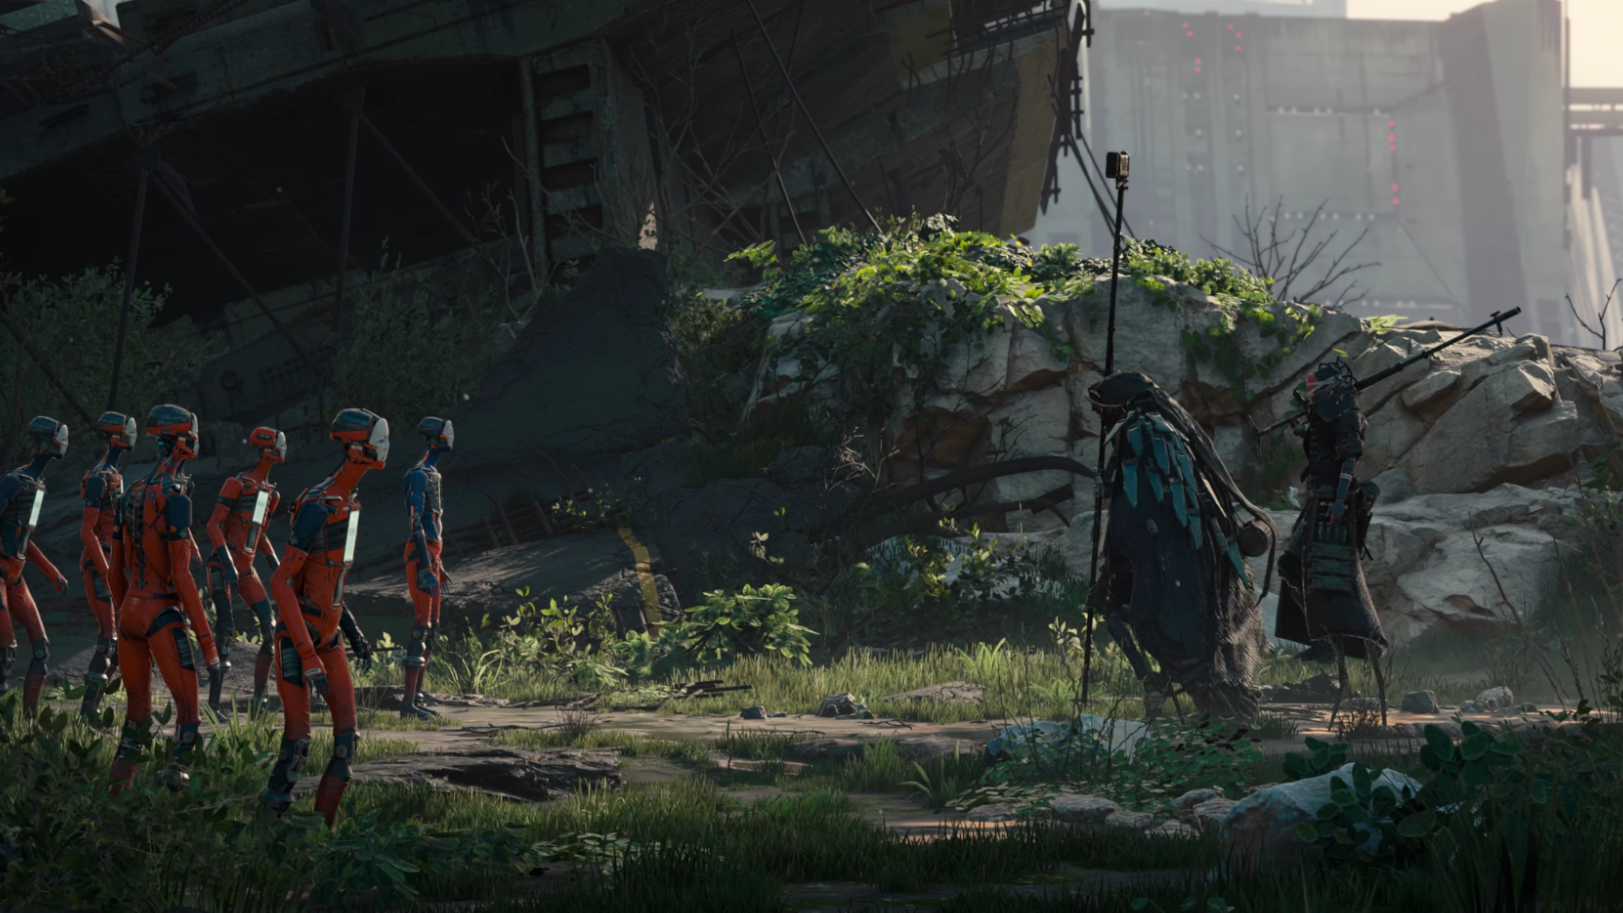
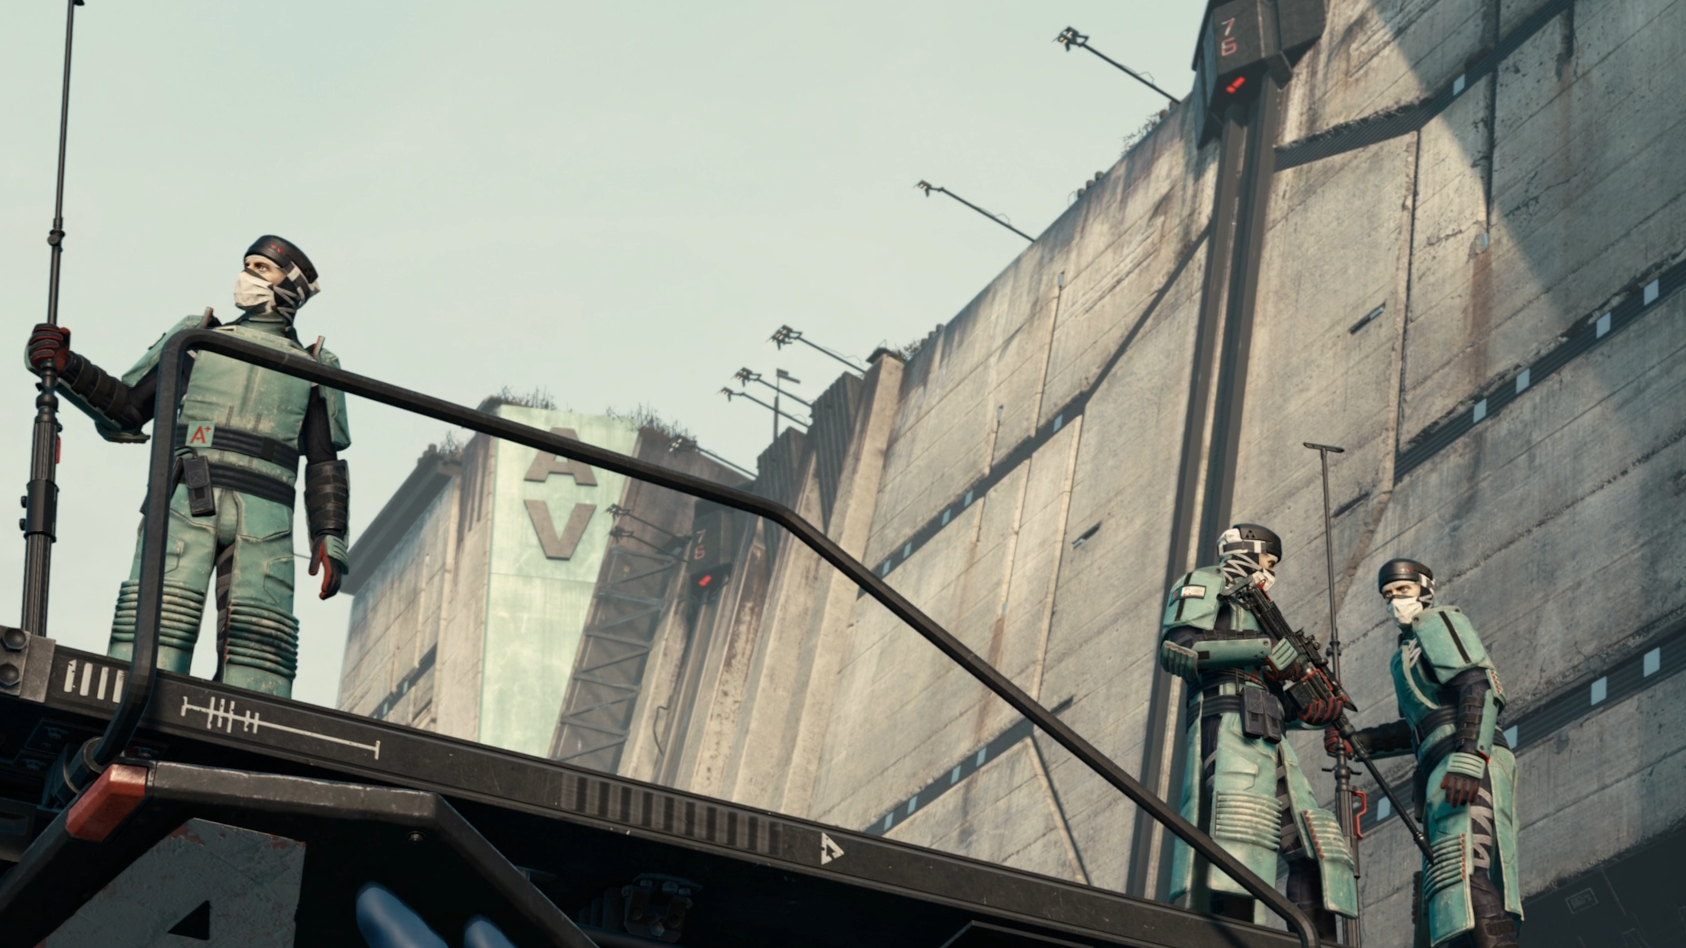
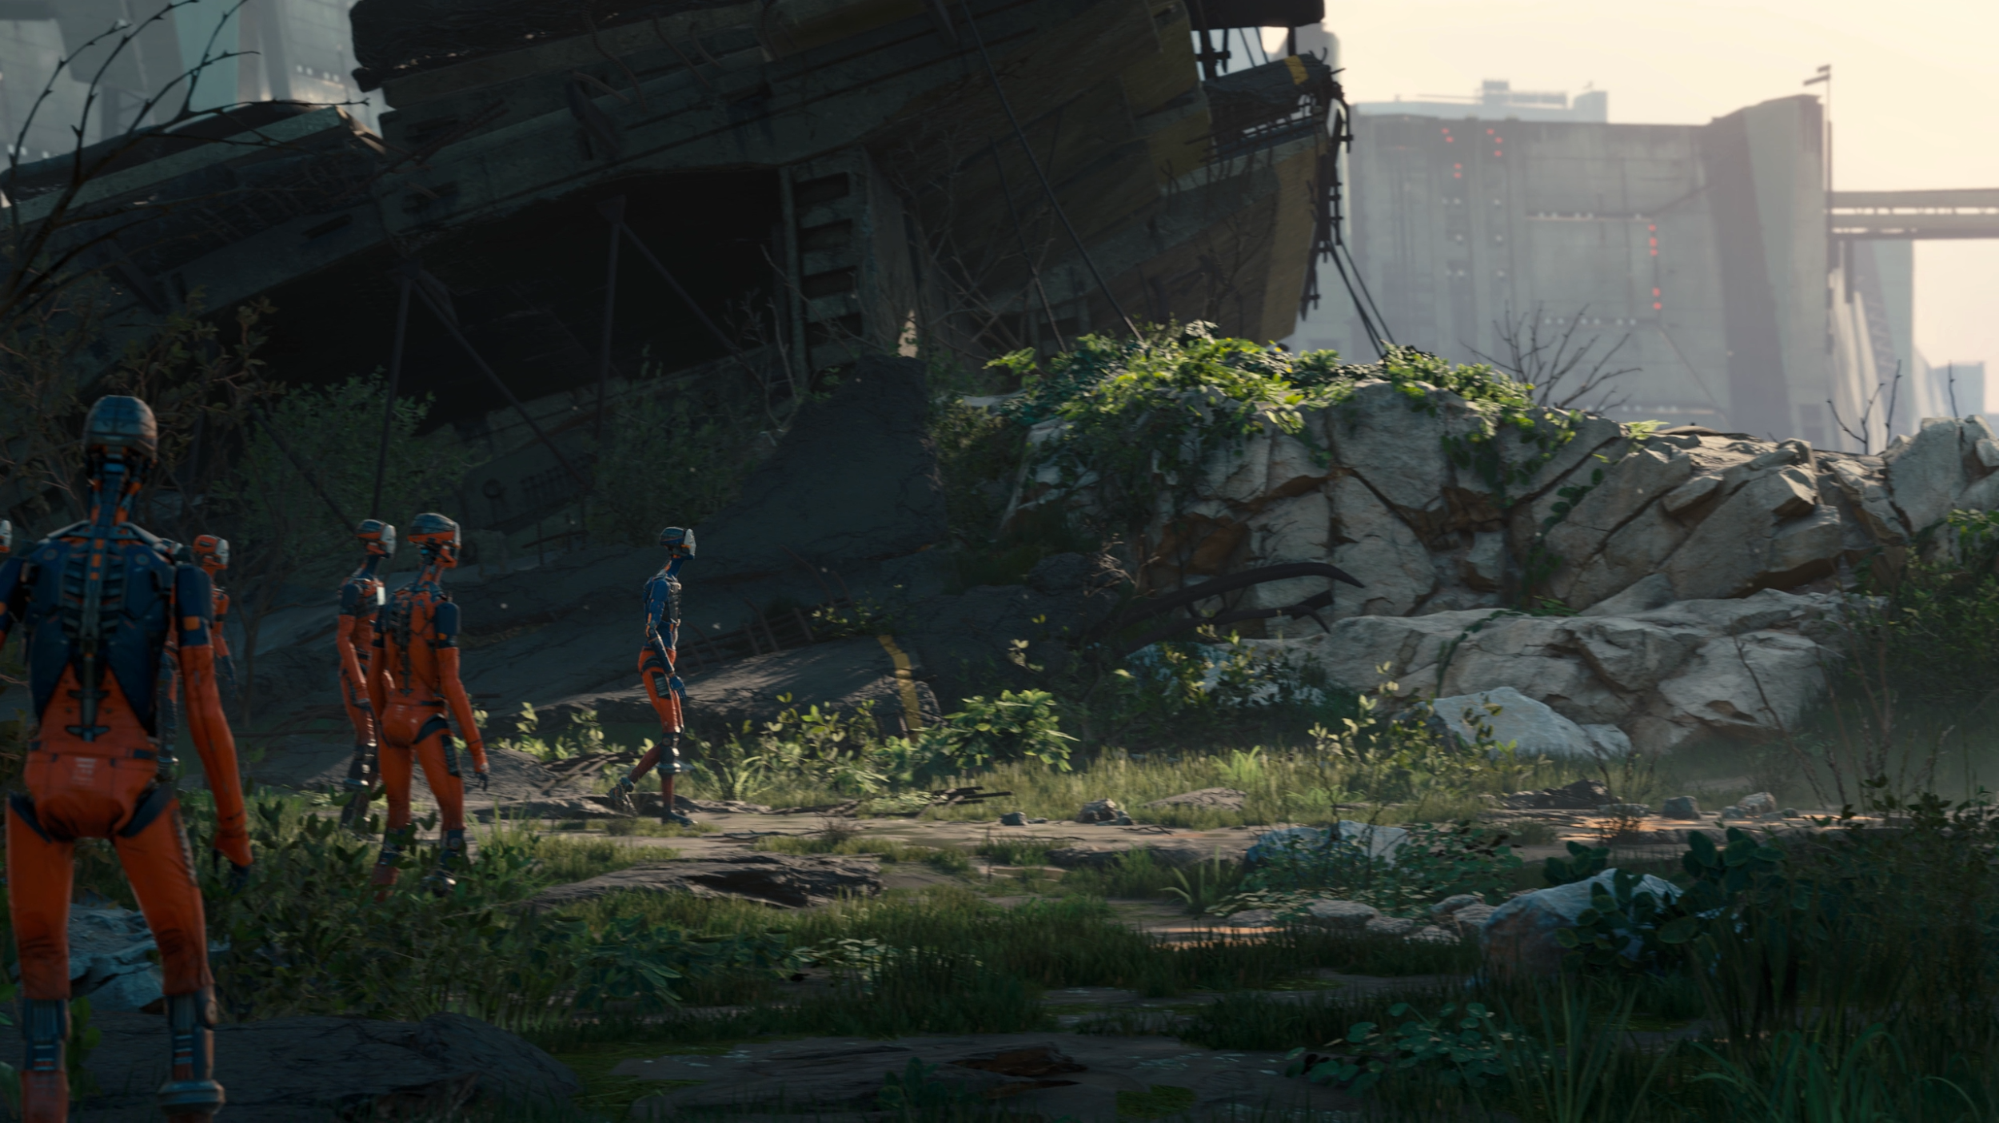
The other challenging aspect of the production is that we had to produce a crowd of convicts in real time, some of whom were very close to the camera - in some shots closer even than Adam. Since we knew we couldn't use the default Adam model for each crowd member, we had to use several LOD models depending on the distance from the camera.

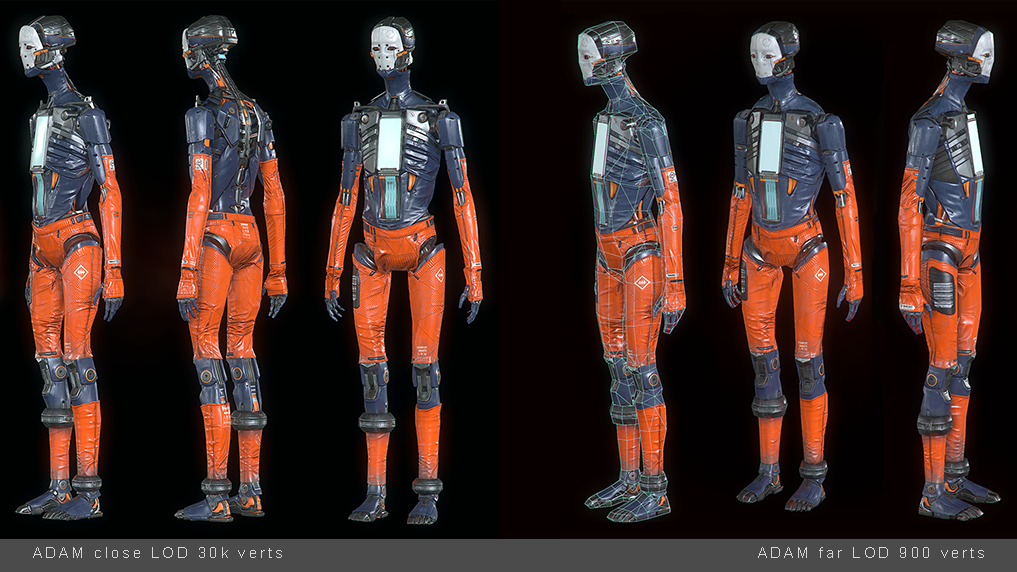
We also wanted to have some crowd variation between the different convicts, so I made a fully wrapped version of Adam to serve as a base, and we used a custom shader with a grayscale mask to add the variation in the wrapping distribution.


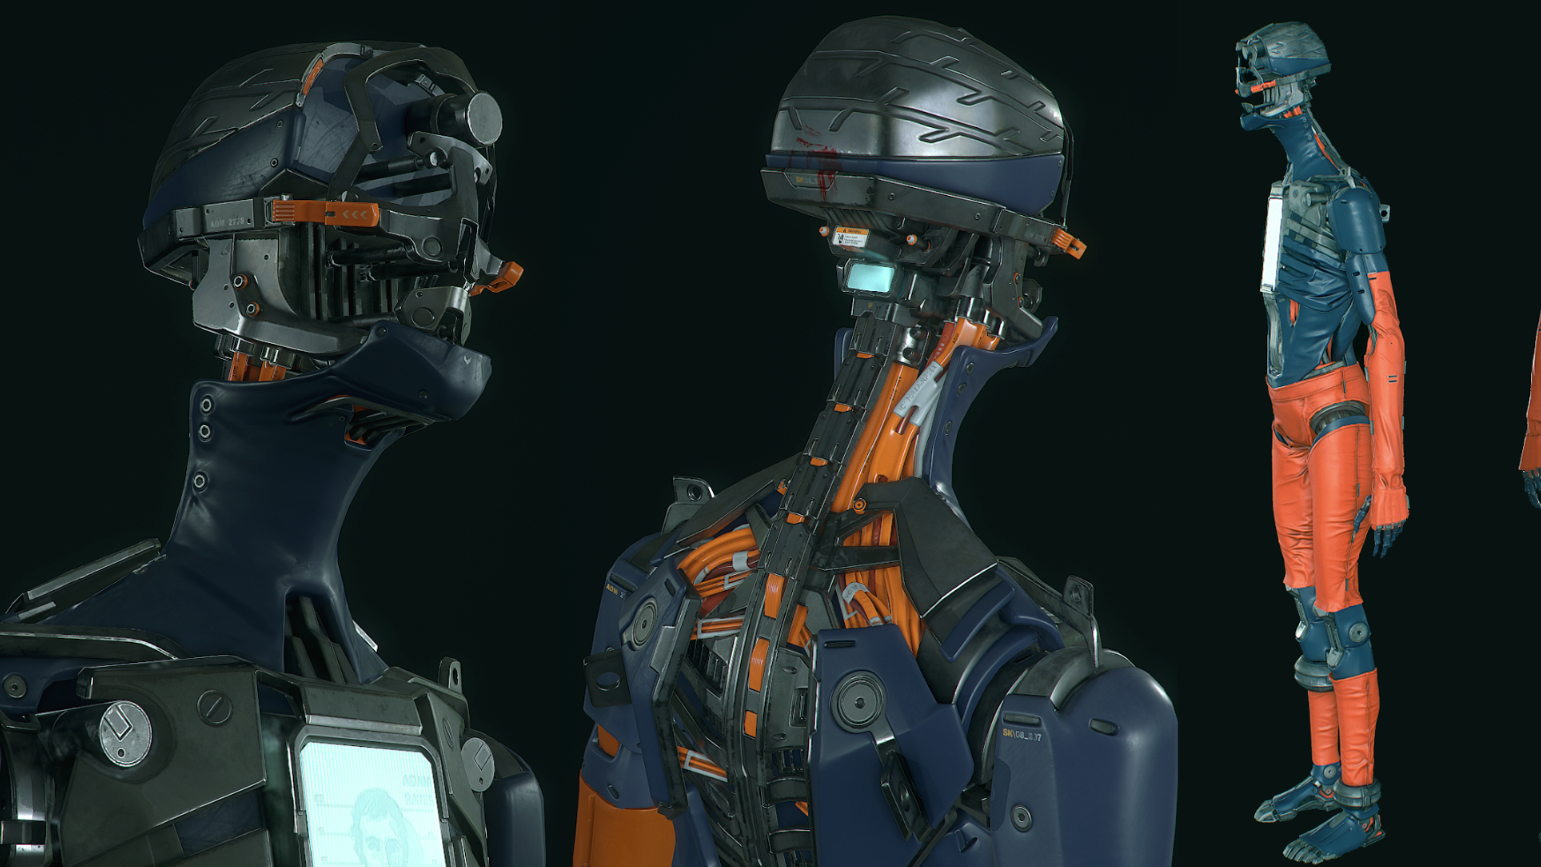
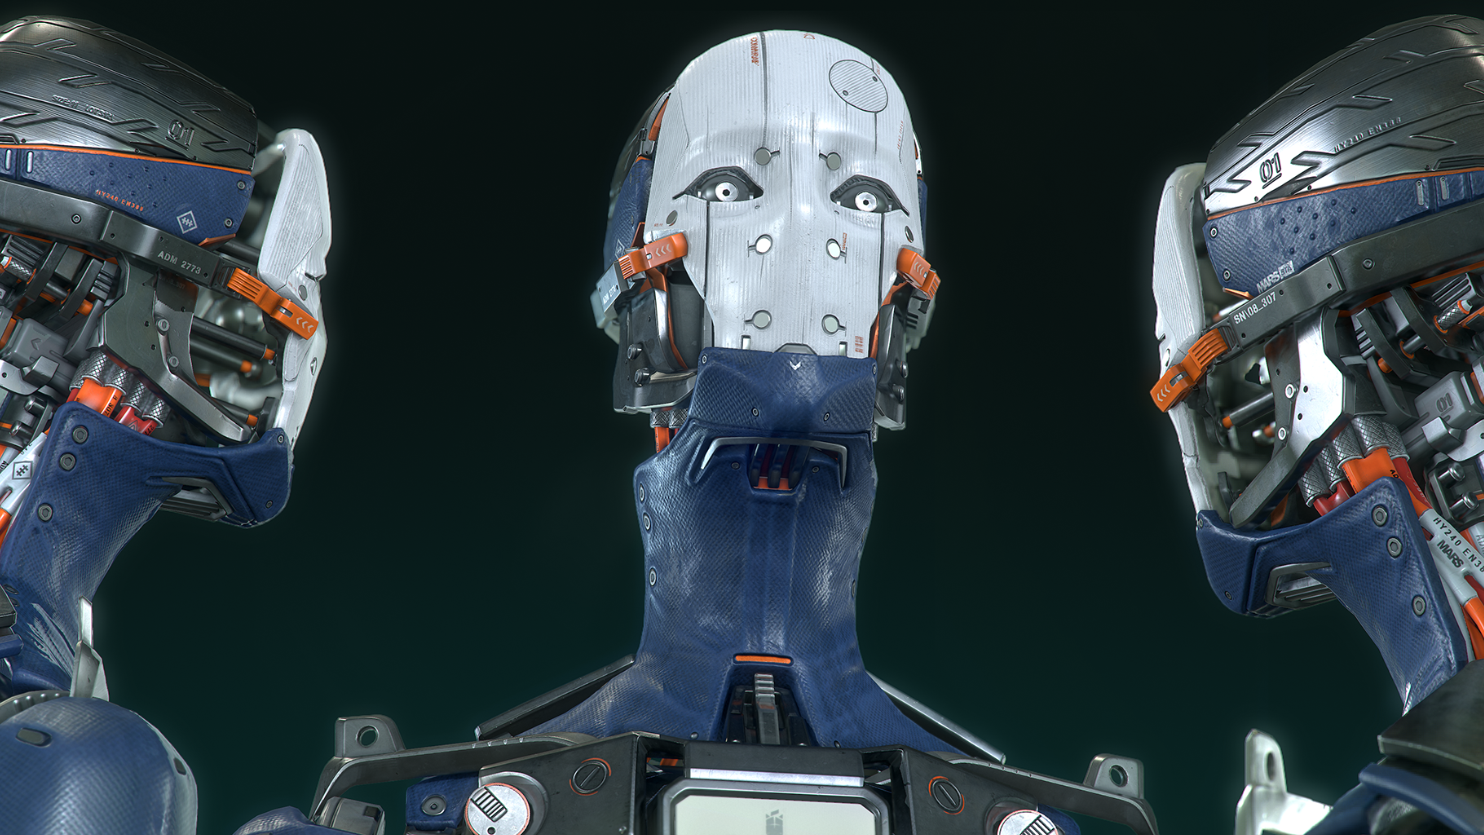
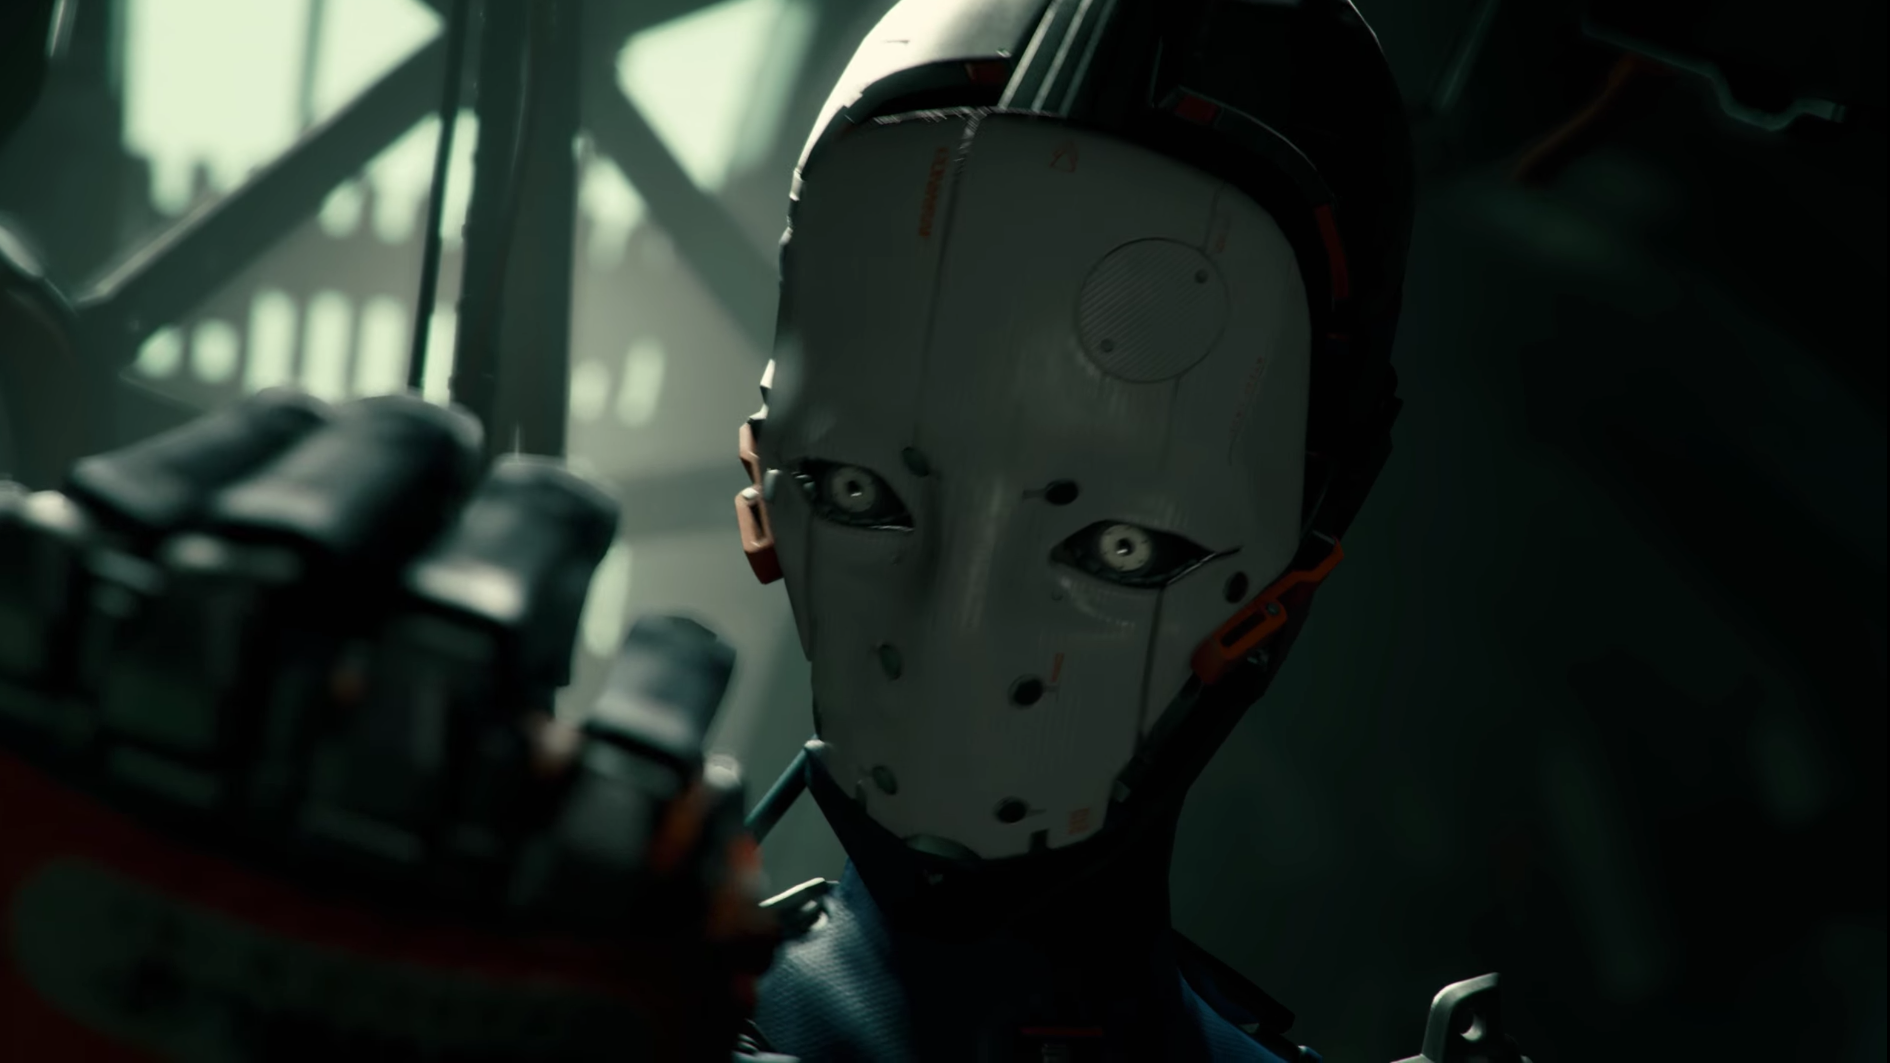
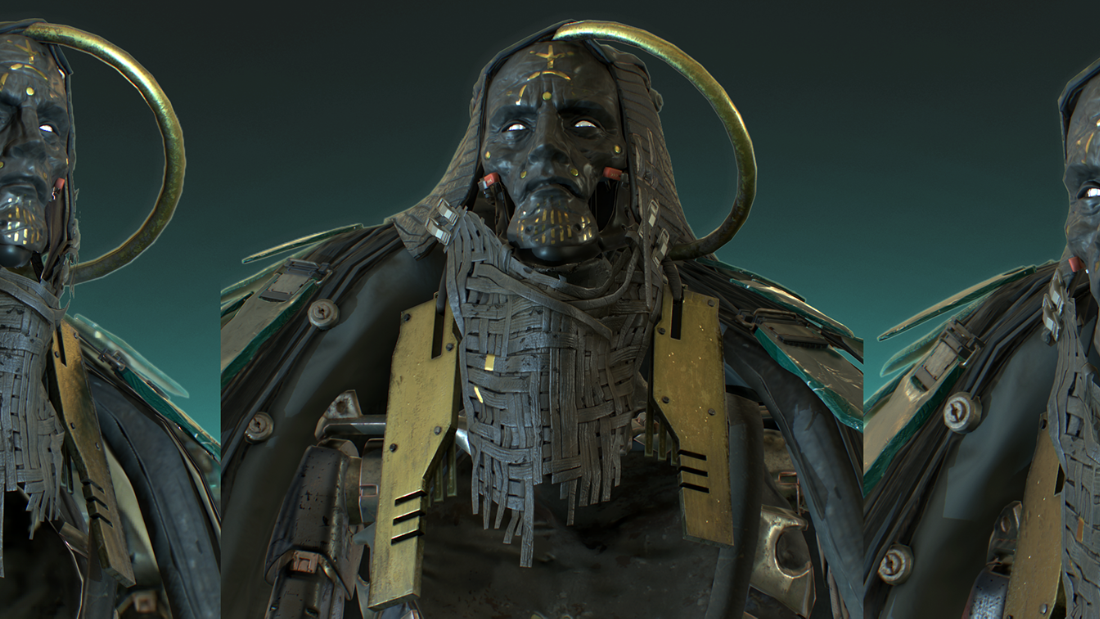
Adam’s mask
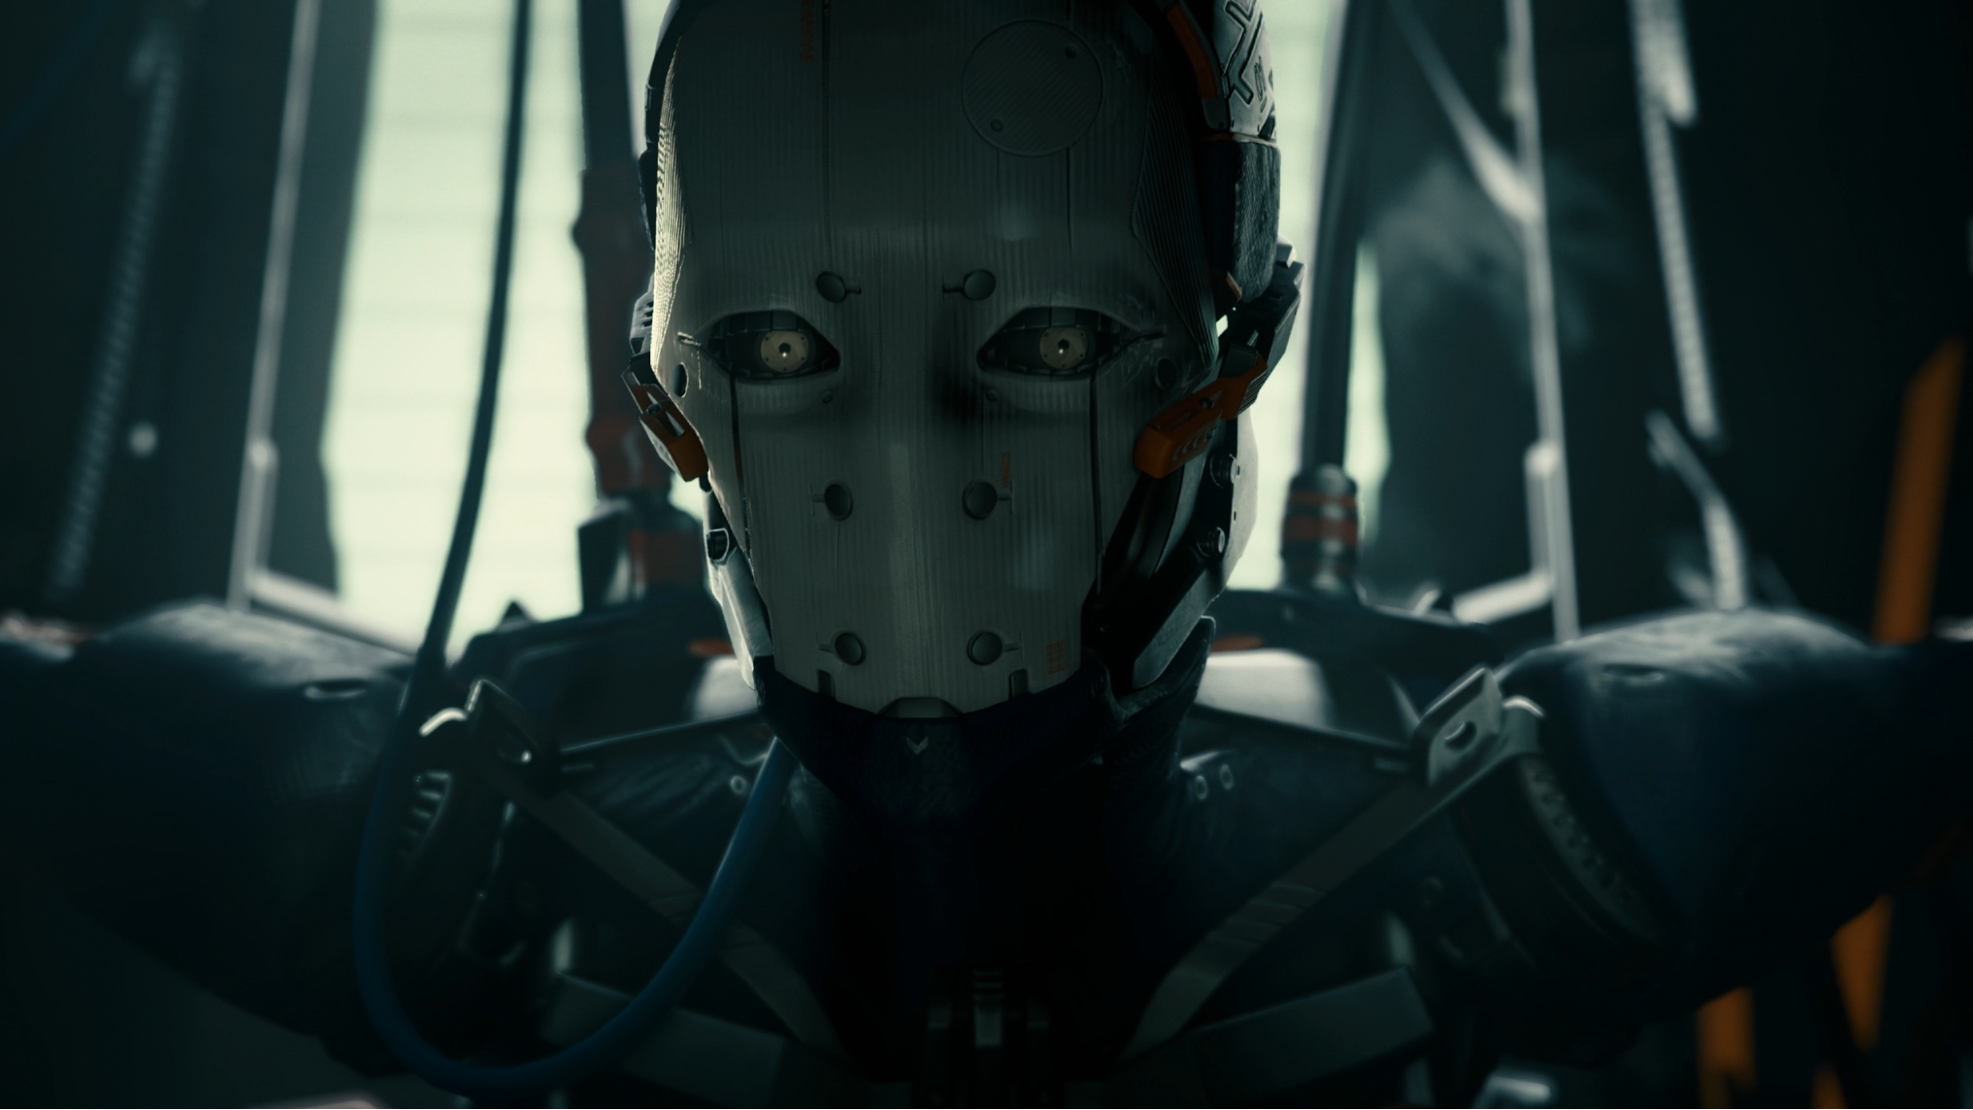
Adam's mask went through a number of iterations as we tried to find the right look that best served the story that we were telling. The material for the mask had to be like a 3D-printed surface with imperfections and some layering, as well as some translucency to the material.

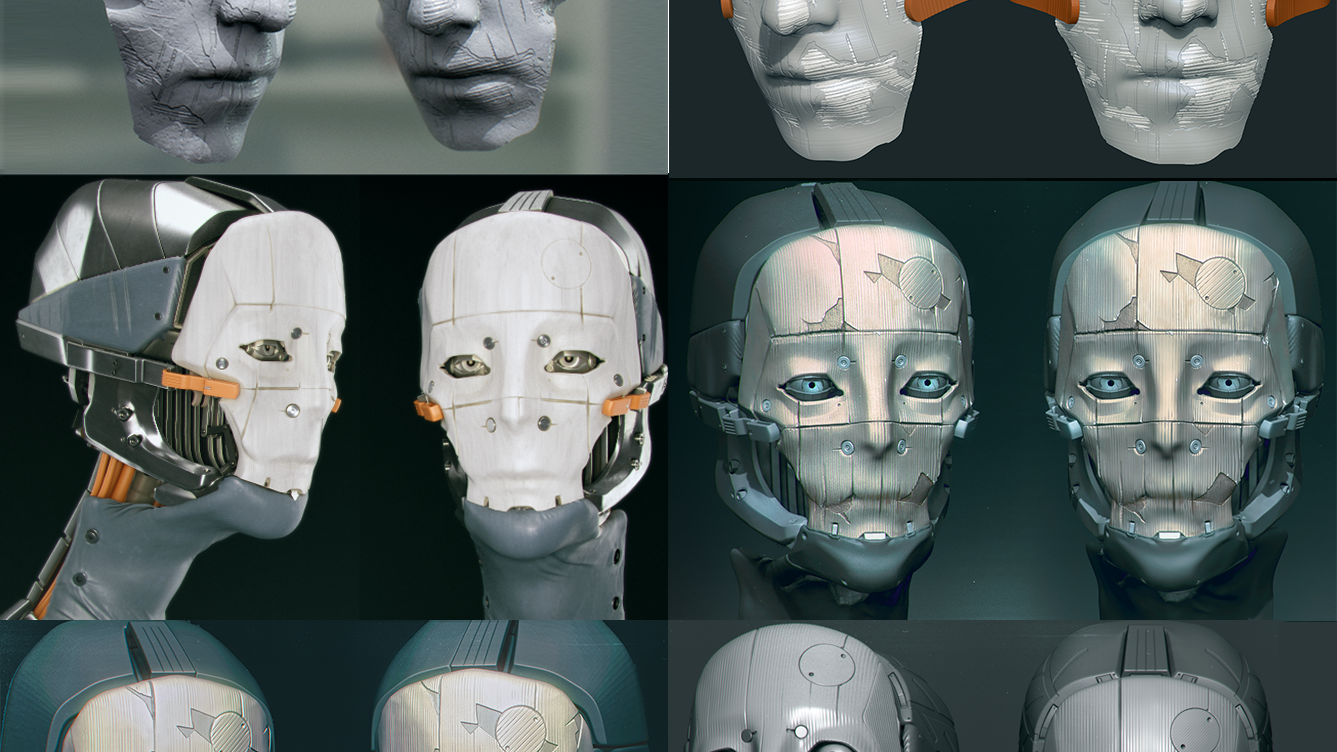
One of the very first previz models was more of a realistic face than what we ended up using, but after some iterations, the director decided that he wanted it to look more like a face behind a mask, instead of an actual face, so we started simplifying it until almost all facial features were gone. For those first stages, I mainly used Zbrush. That helped me to work in a non-destructive way - keeping things in layers, using the noise maker and masking to try different levels of weathering, and blending between them on demand.

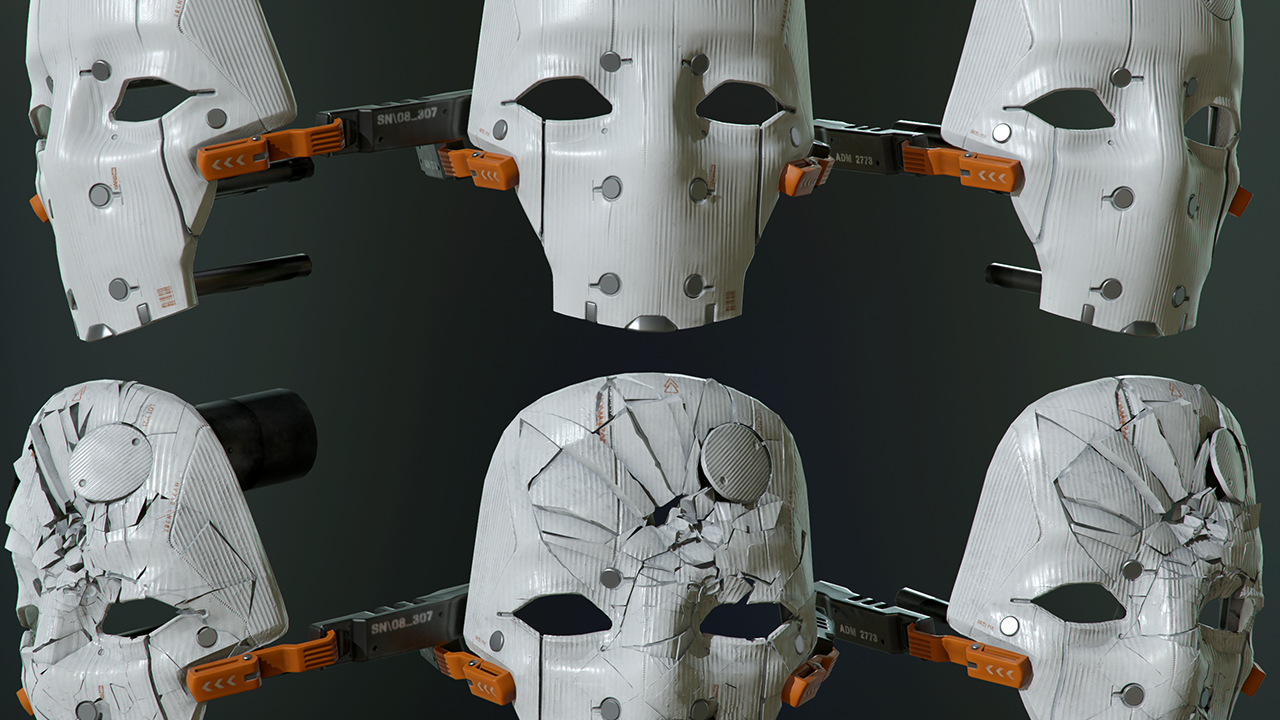
For the broken mask our VFX artist Zdravko Pavlov made some experiments using the intact mask with the final uv's and textures to keep it consistent. With the help of the Bullet physics plugin for 3ds Max he made several destruction passes to choose from for the mask. After we settled on the one we liked, I took it and used it as a base to work from and started to add some additional variety and imperfections. Since it already had the uv’s and textures from the intact mask, I only had to add the uv’s for the additional geometry for which we kept uv space in the original texture, and then brought it to Substance Painter for the final detail pass and materials.


Sebastian, Lu, Guard
For the other characters in the demo, we used the help of character artists Jonas Törnqvist, Vincent Joyau, and Sergey Samuilov.

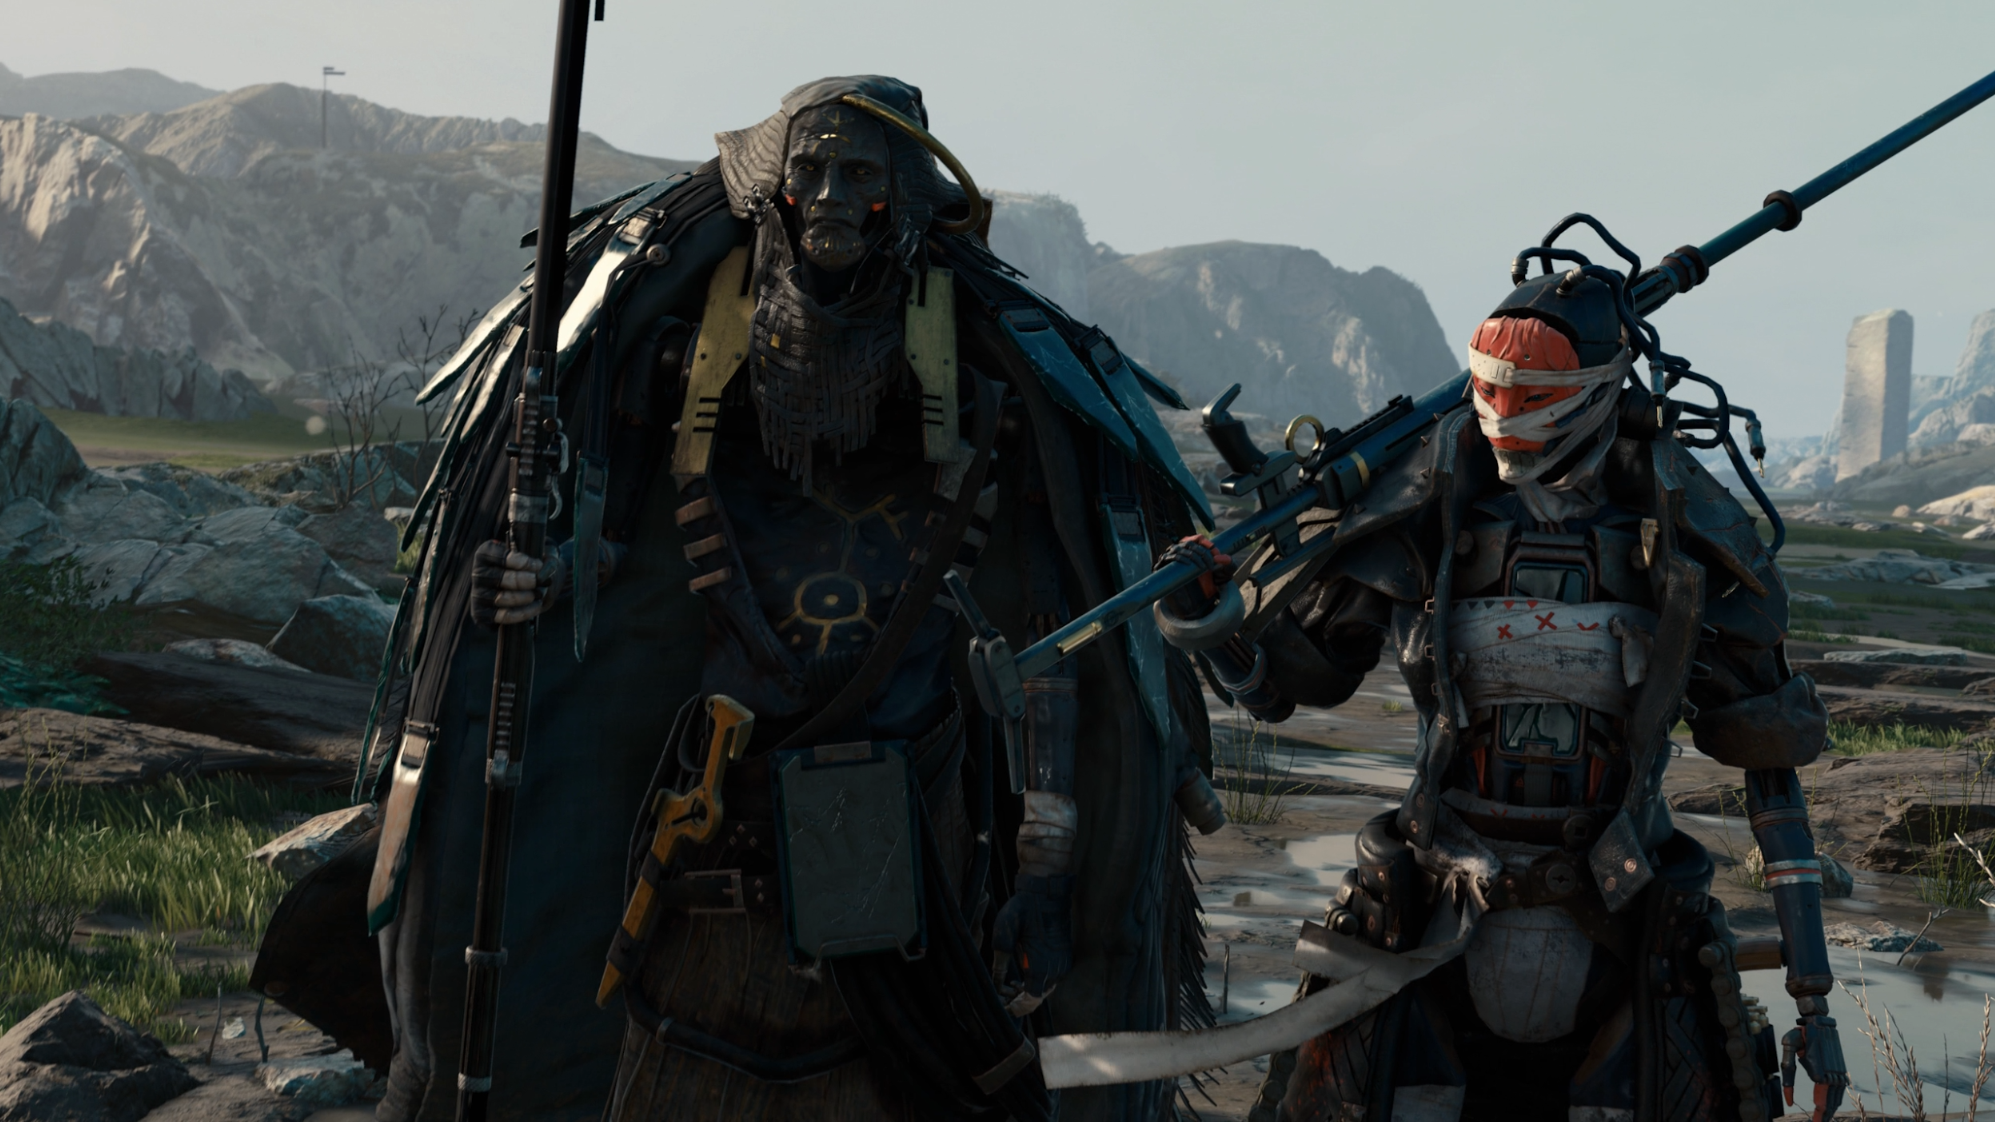


For the models of Sebastian and Lu, it was important to use some of the body parts from the Adam model in order to communicate some of the backstory, as well as maintain consistency.

Environment Art
The interior scene
For the interior scene we created unique objects like the door, pipes, beds etc, and also some assets that rely only on tiled textures and geometry decals.


Props


The idea behind the beds was that they were the storage unit for the convicts’ bodies and had to be made of a similar material to the one that was used for making the convict wrapping. I used Marvelous Designer for the base simulation and then brought them in Zbrush for final polish and detailing. I made two models for them, one with the convict still inside and the other one open. For the final movie, we only used the second one.


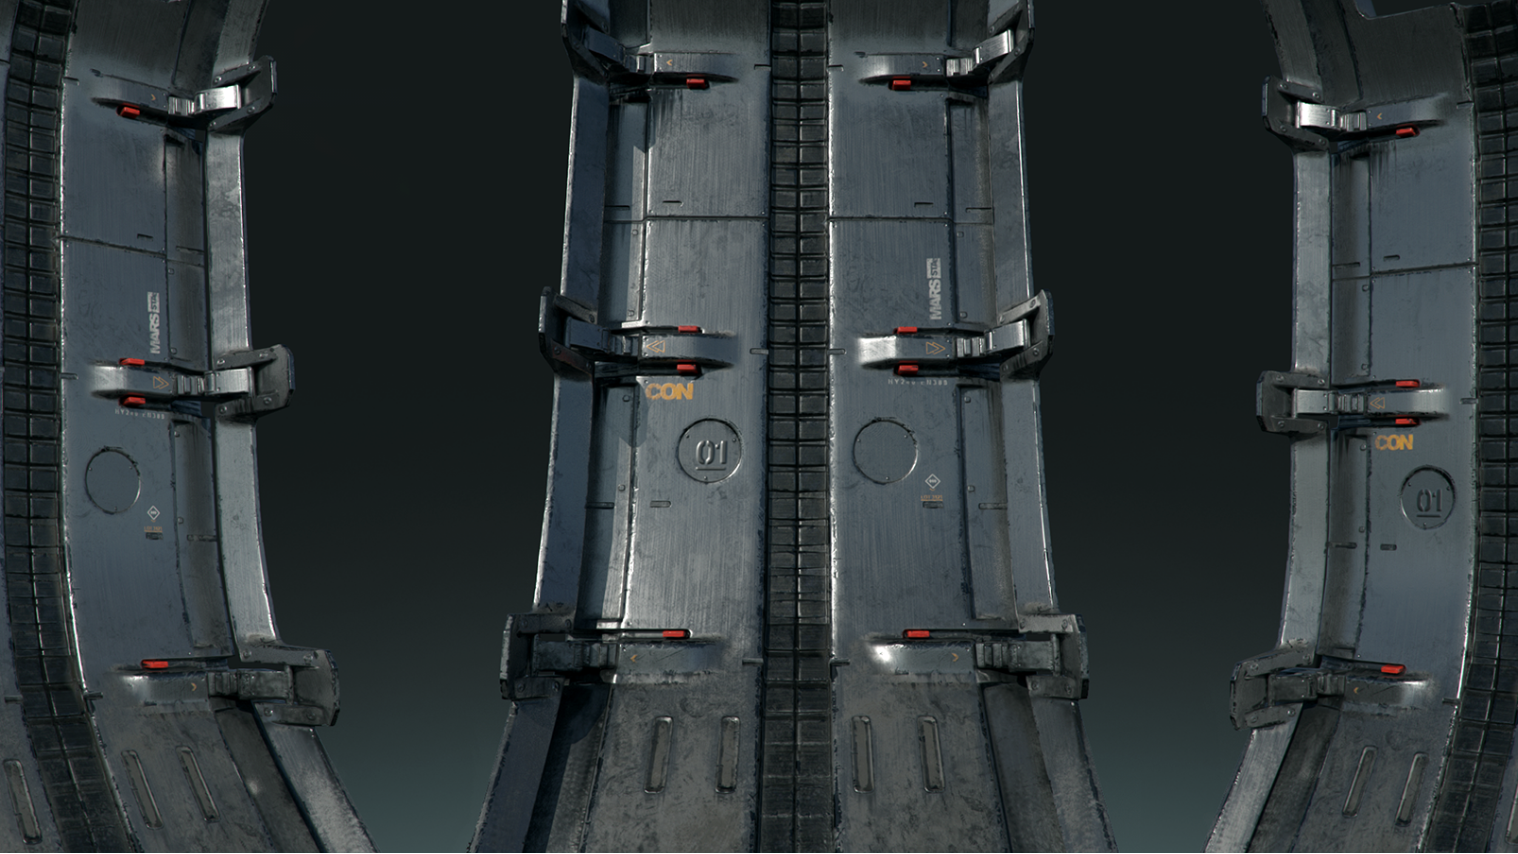
The exterior scene
For the movie’s exterior scene, we knew we would have some very large objects that would be fairly close to the camera. For that reason, we used a lot of tiled textures and decals on top of a base texture, so that the objects acquired the necessary resolution depending on the shots they were in. For the tiled textures we used mainly Quixel Megascans data and custom grayscale masks to mix the different textures and add variety.

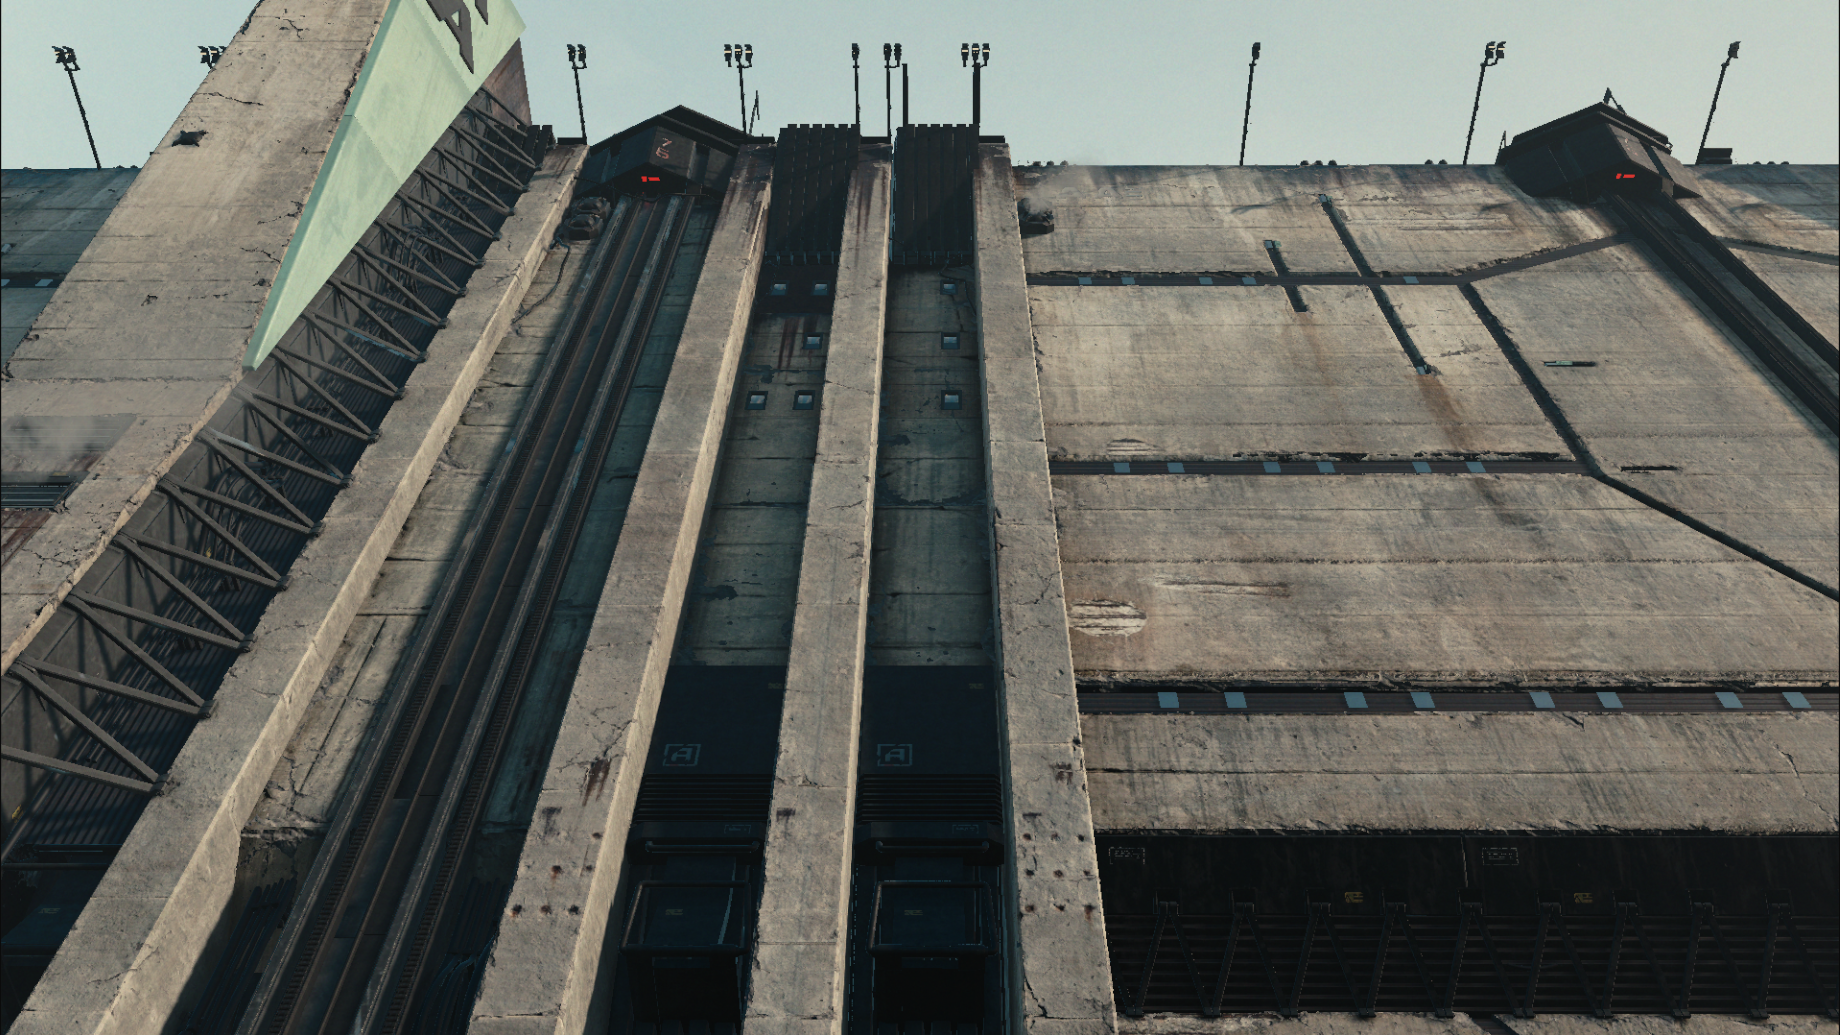
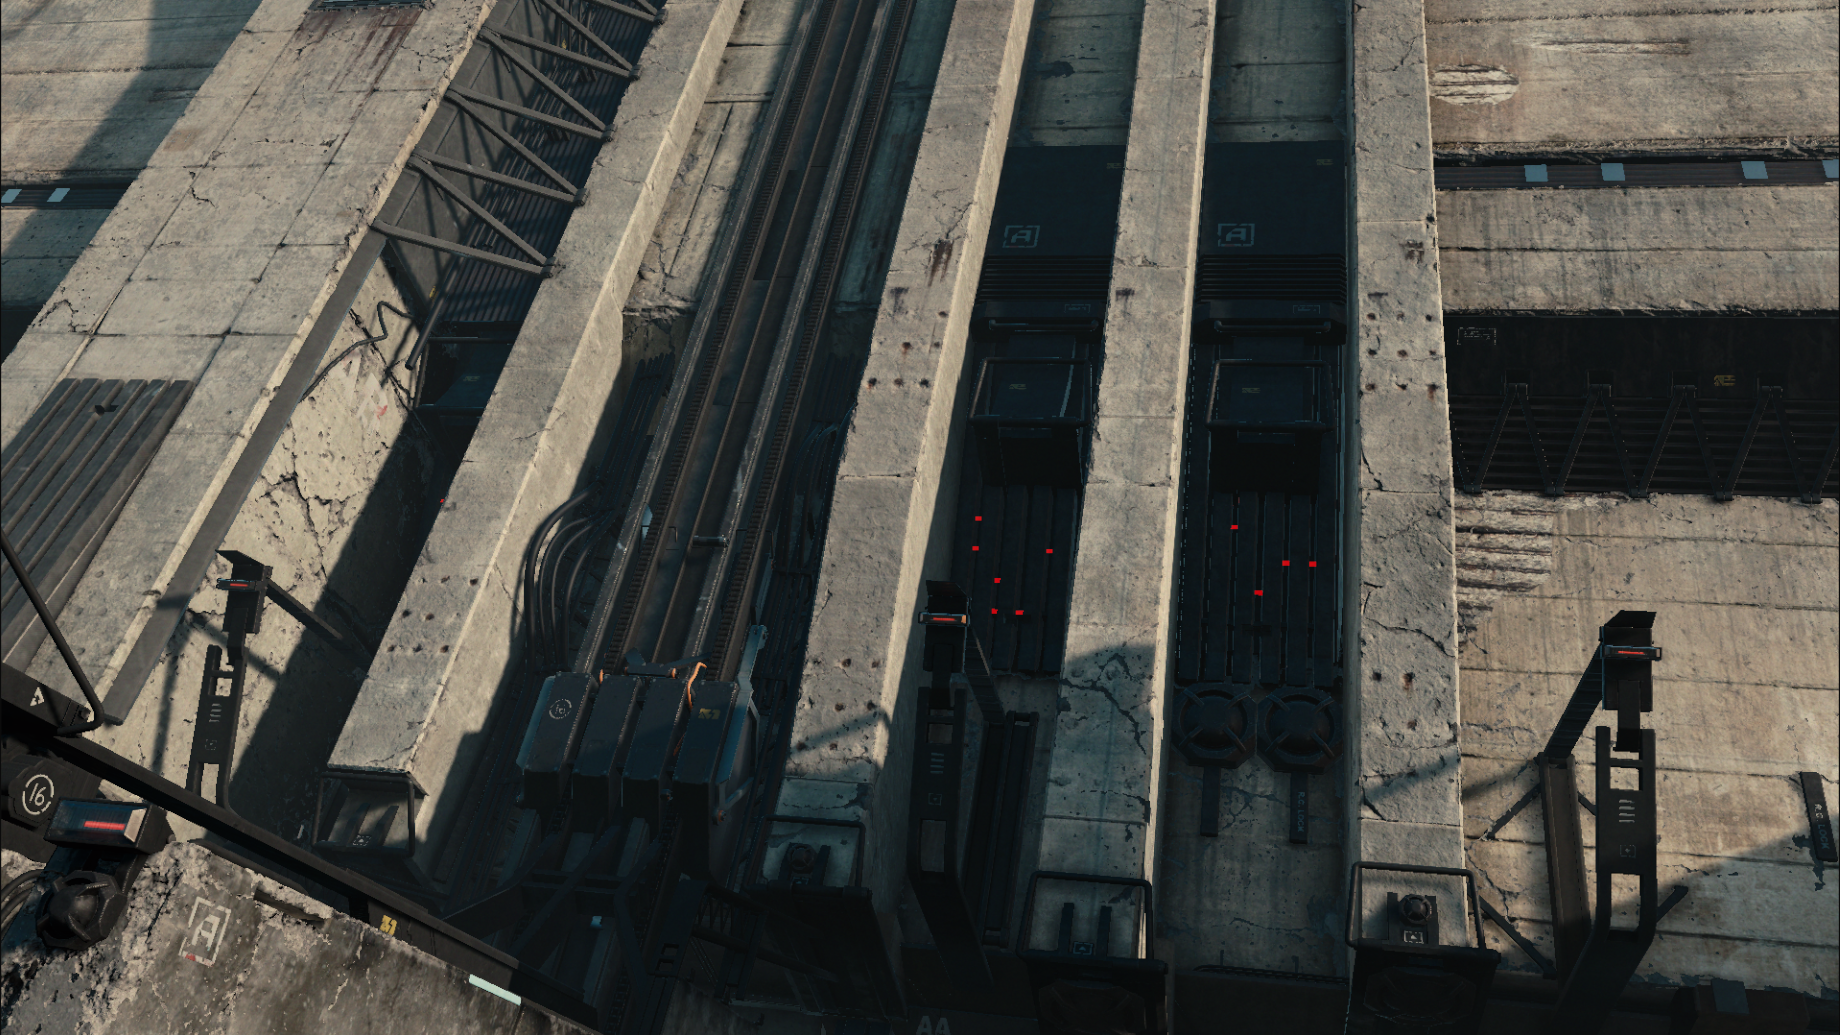
This is an example of the finished city wall with the base materials and masks from Substance Painter, detail texture arrays in Unity, and geometry decals added that give the finished look and resolution that we needed for the bigger assets in the demo.
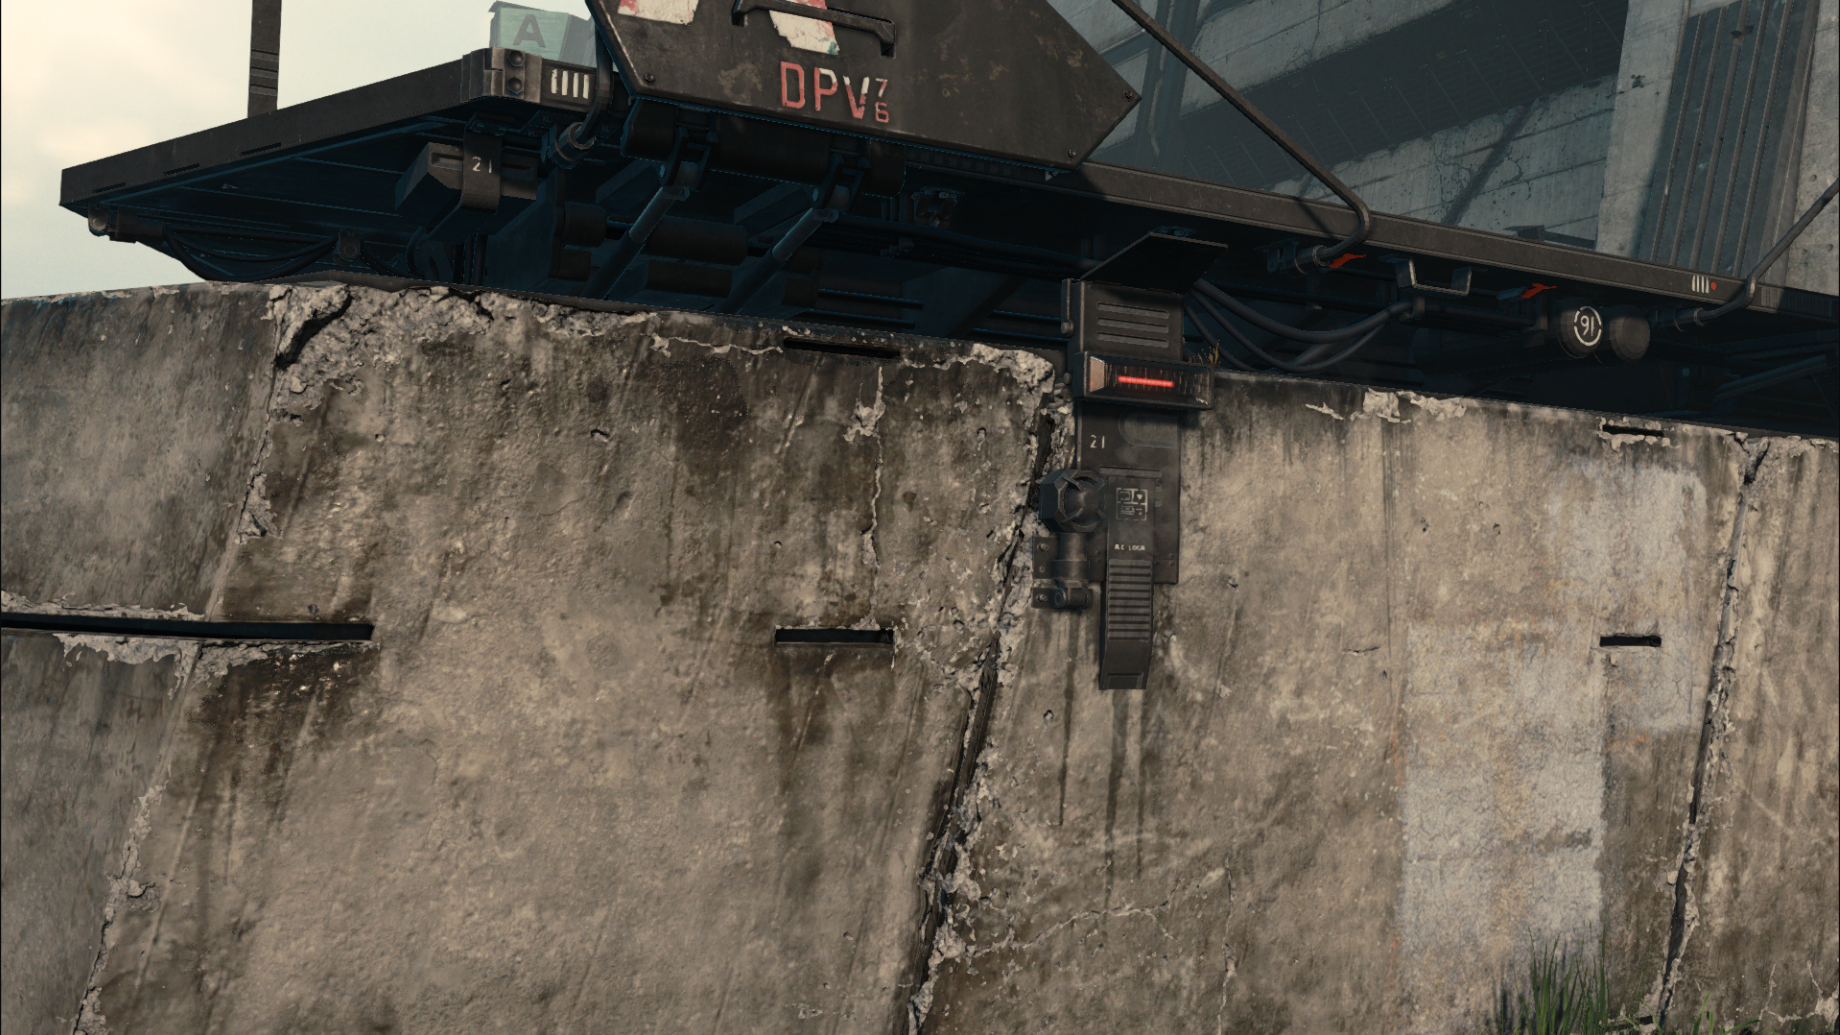
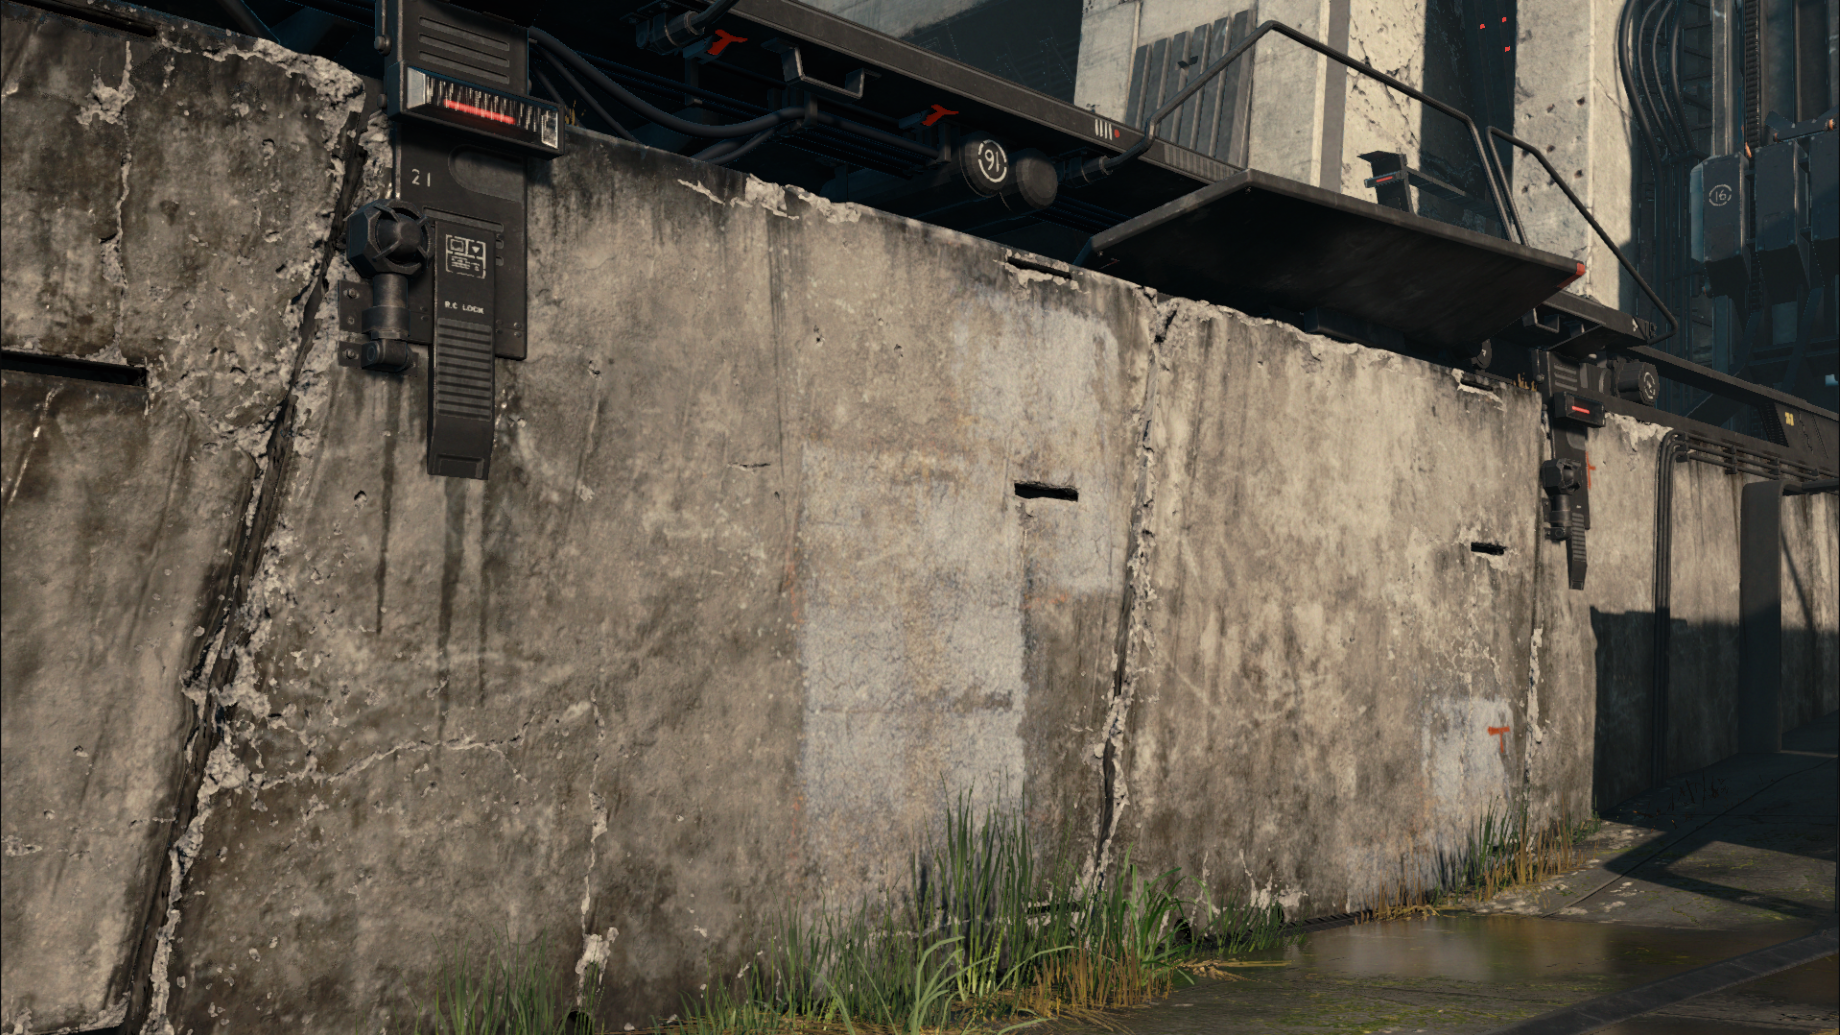
For the platform concrete base, I used a similar approach to the one I used for the wall:
- Base textures for the Albedo
- Quixel Megascans for the extreme closeup details (tiled in the Unity Standard shader)
- A final pass of broken details geometry used as decals for the weathered edges of the concrete.
On Demo team we like to share our work and learnings to the best of our ability, and release as much content as possible. We’ve seen many of you use assets from our previous demos for testing, prototyping, presentation of their own work, tutorials, even research papers – and we’re happy that people find various ways to make use of what we’ve produced.
So we’re currently working on preparing most of the assets from “Adam” for release on the Asset Store. We aim for some time in Autumn. Please bear with us – remember I’m the only 3D artist on the team.
Is this article helpful for you?
Thank you for your feedback!
- Unity Labs
- Copyright © 2024 Unity Technologies